Owning an RV means there is always something that needs a little attention.
Last week, it was the windshield seal on our motorhome. The week before that, we discovered we were missing a hubcap. This time, it was something much smaller: our faded and cracked RVIA certification decal.
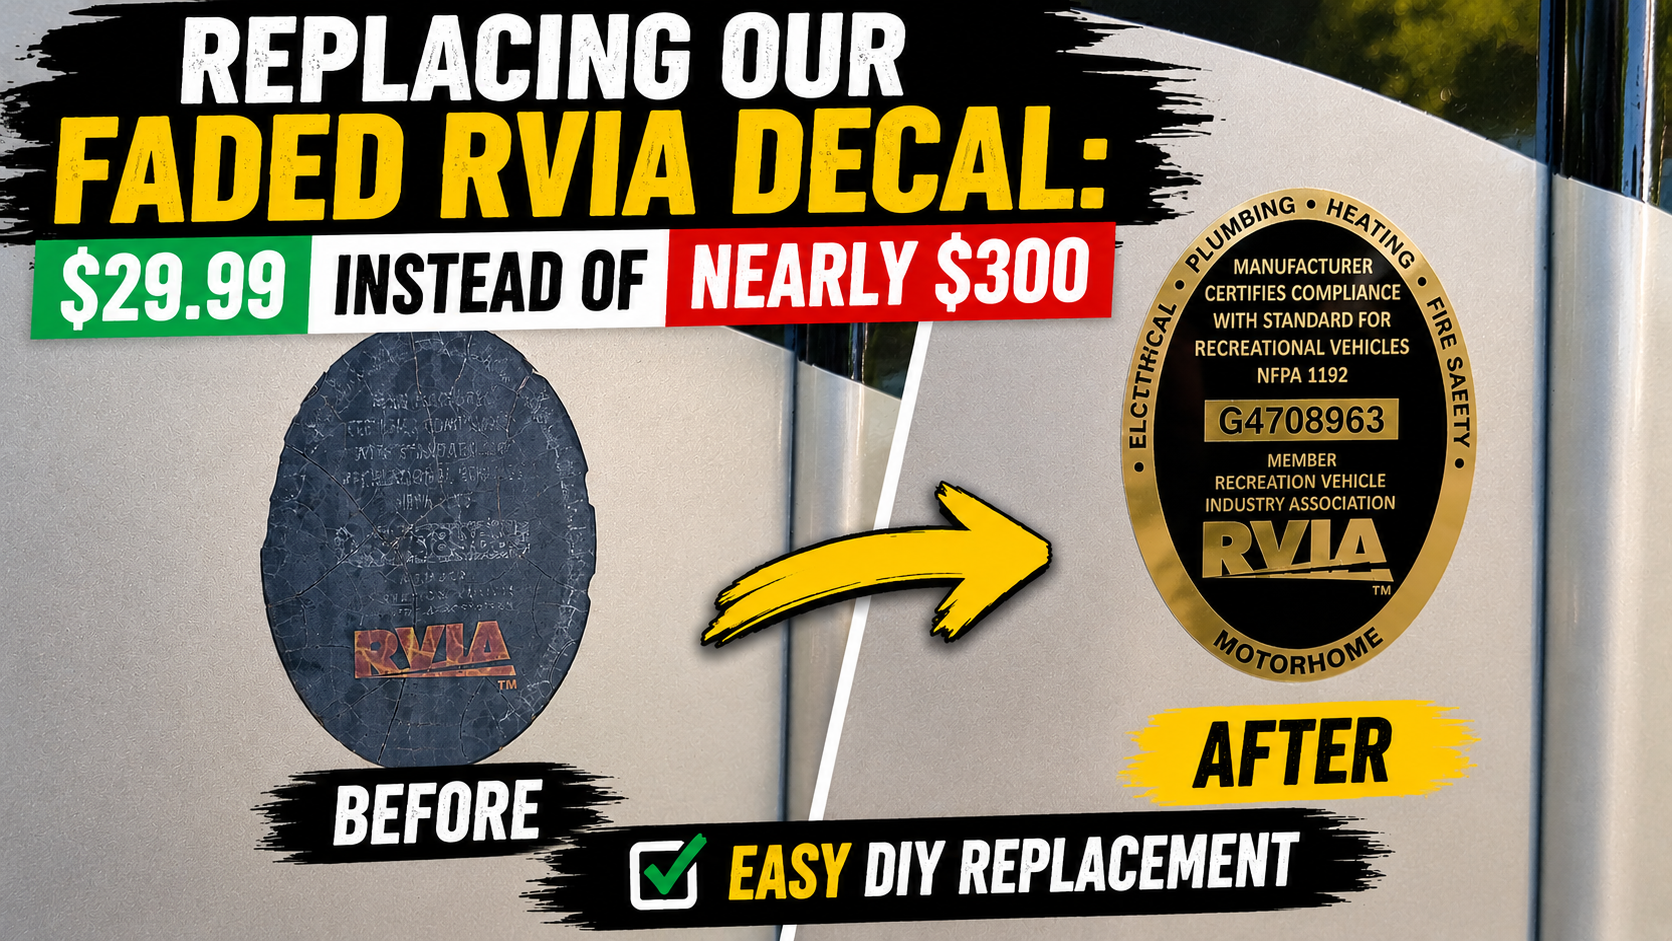
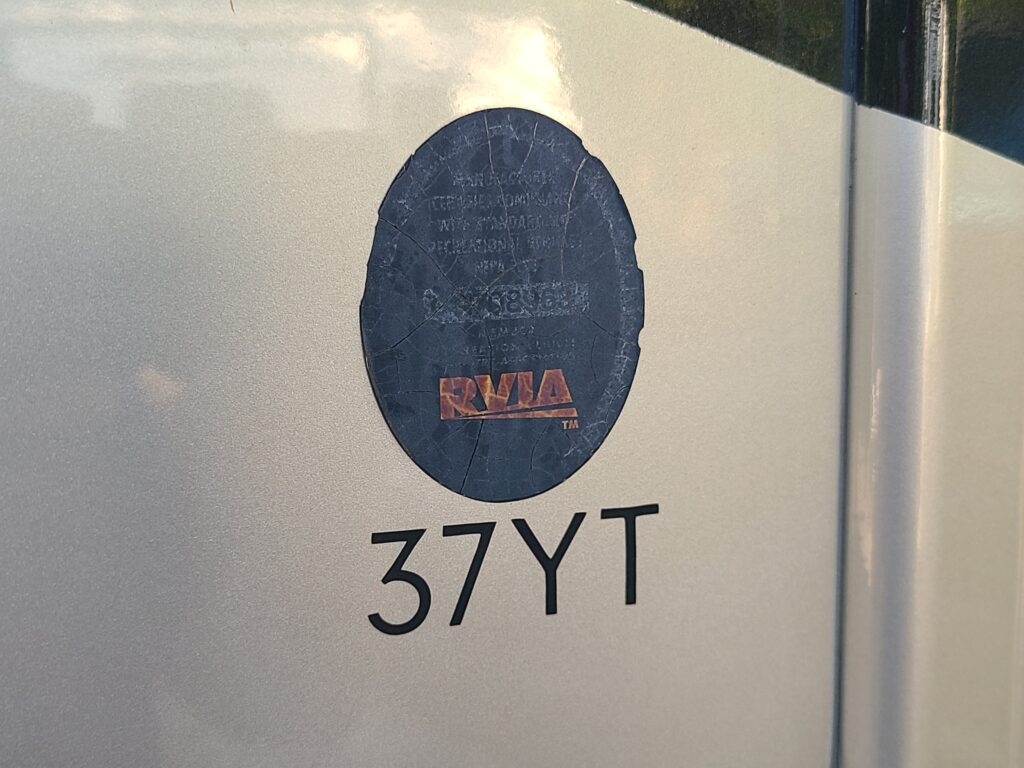
The original RVIA decal on our 2019 Thor Challenger had spent years exposed to the sun and weather. It had gotten to the point where it was badly faded, cracked, and difficult to read.
It was definitely time to replace it.
I figured getting a replacement sticker from Thor would be the easiest solution.
Then I found out what they wanted for it.
Nearly $300 for one little sticker.
Yeah…that wasn’t happening.
Fortunately, a little searching led me to ReplacementDecals.com, where I was able to order a replacement RVIA decal with our correct certification number for $29.99 plus shipping.
Here’s how we found the replacement, what we received, and how I removed the old RVIA decal and installed the new one.
- Our Original RVIA Decal Had Seen Better Days
- Thor Wanted Nearly $300 for a Replacement
- I Almost Made My Own RVIA Decal
- Finding an RVIA Replacement at ReplacementDecals.com
- The Replacement Decal Arrives
- What We Used to Replace Our RVIA Decal
- How We Removed the Old RVIA Decal and Installed the New One
- The Finished RVIA Decal
- Before and After
- $29.99 vs. Nearly $300
- Was the ReplacementDecals.com RVIA Decal Worth It?
- Tips Before Replacing Your Own RVIA Decal
- Frequently Asked Questions About RVIA Decals
- Another Small RV Project Checked Off the List
- More RV Maintenance & Repairs
This post contains affiliate links. As a participant in Amazon Associates and various affiliate programs, we are compensated when qualifying purchases are made through our referral links at no additional cost to you. Full Disclosure
Our RV: 2019 Thor Challenger 37YT
Thor Replacement Cost: Nearly $300
Our Cost: $29.99
Where We Found It: ReplacementDecals.com
Difficulty: Easy DIY project
Would We Do It Again? Absolutely
Our Original RVIA Decal Had Seen Better Days
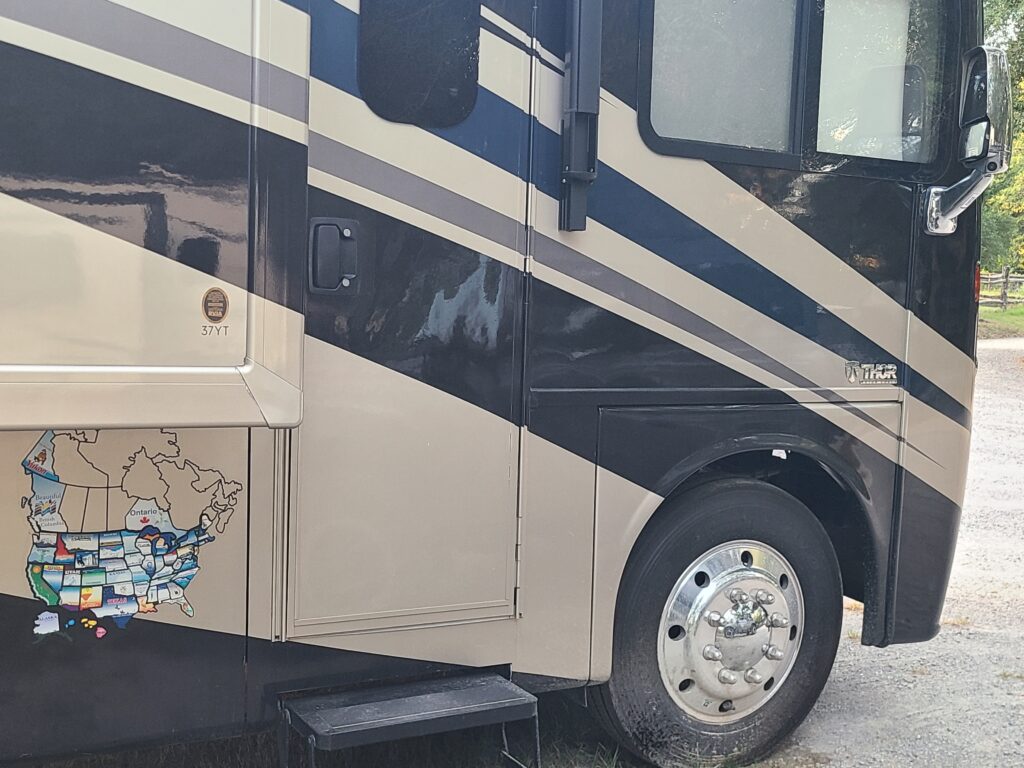
Our Thor Challenger is a 2019 model, and after years of traveling and living full-time in it, the exterior has obviously seen its share of sunshine and weather.
The RVIA decal didn’t hold up particularly well.
The colors had faded significantly, the surface was badly cracked, and portions of the decal were becoming difficult to read.
It wasn’t exactly the biggest maintenance issue we’ve ever dealt with, but that’s RV ownership. Along with the big repairs, there are always little things that eventually need attention.
Thor Wanted Nearly $300 for a Replacement
My first thought was to simply order another decal through Thor.
After all, it’s a small sticker. How expensive could it possibly be?
Apparently, pretty expensive.
I contacted Thor about getting a replacement and was quoted nearly $300.
For a sticker.
I understand that replacement OEM parts aren’t always cheap, but I couldn’t justify spending that much to replace a small decal.
So I started looking for another option.
I Almost Made My Own RVIA Decal
At one point, I was seriously considering recreating the decal myself in Canva.
The design isn’t particularly complicated, and I figured I could reproduce the basic appearance and then have it printed.
Before going down that road, though, I did a little more searching.
That’s when I stumbled across ReplacementDecals.com.
As it turned out, there was no reason for me to try making one myself.
Finding an RVIA Replacement at ReplacementDecals.com
ReplacementDecals.com already offered the type of RVIA decal we needed.
Even better, when ordering the decal, their website allows you to enter the number from your existing RVIA seal so the replacement can be reproduced with the correct number.
That was exactly what I was looking for.
The price?
$29.99 plus shipping.
Compared with the nearly $300 I had been quoted, ordering the replacement was an easy decision.
For the record, we purchased the decal ourselves. ReplacementDecals.com did not provide it to us, and this article is based entirely on our own experience ordering and installing it.
The Replacement Decal Arrives
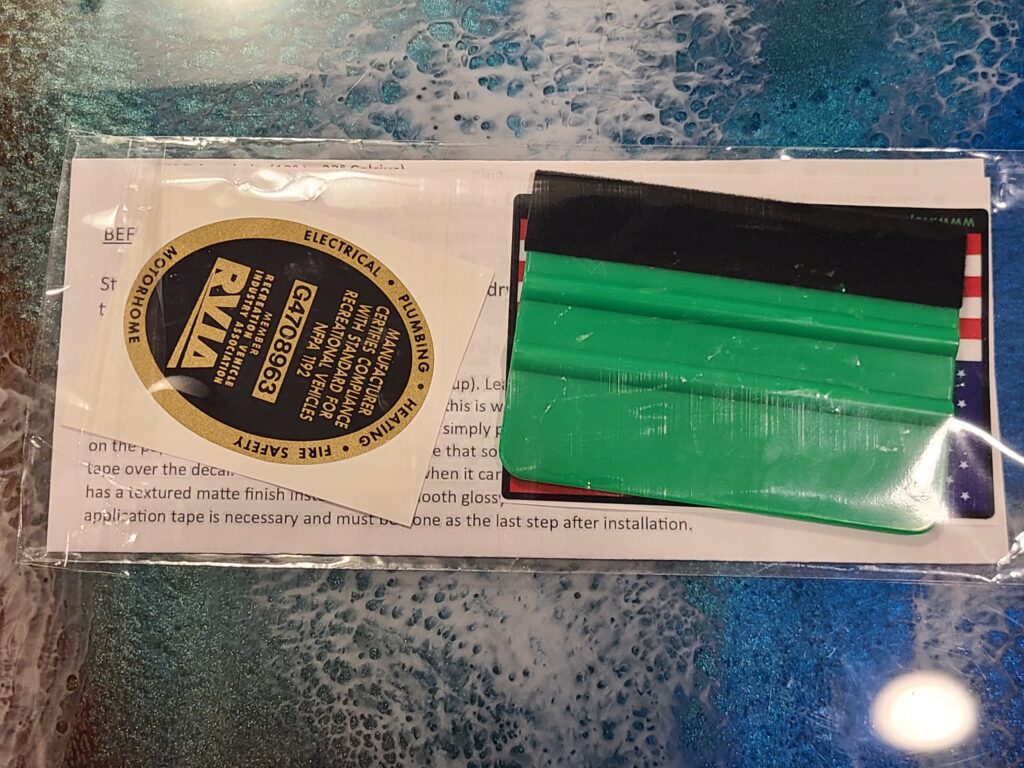
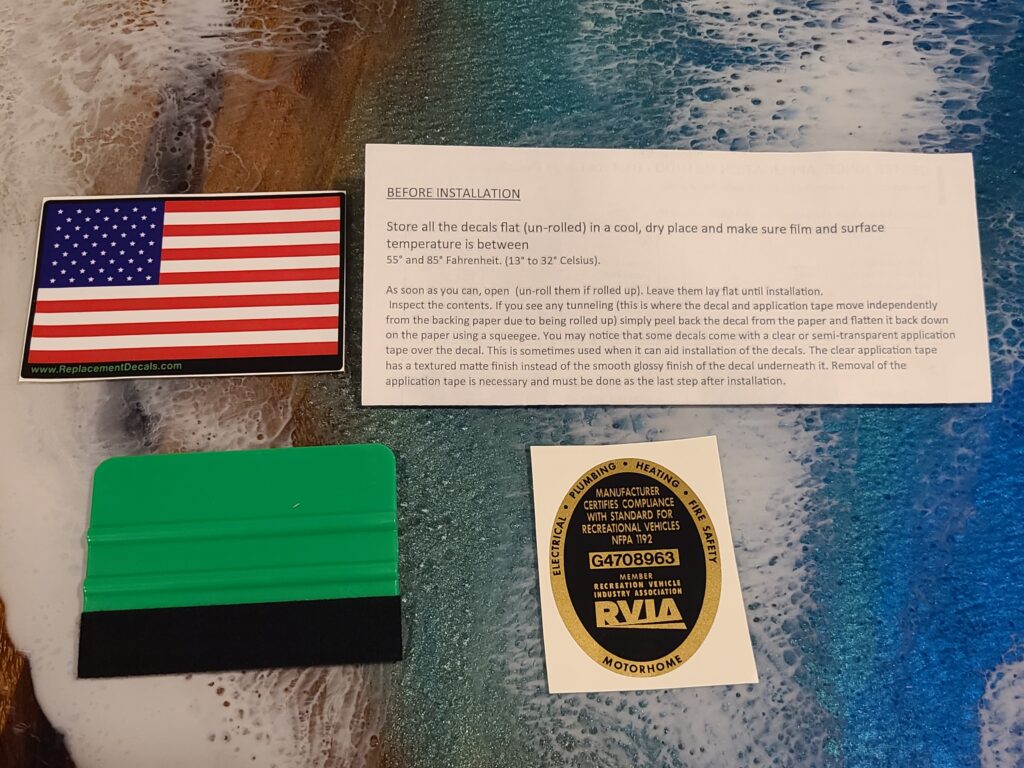
When the replacement arrived, I was impressed with the quality.
The printing was sharp, the colors looked great, and most importantly, our certification number had been reproduced correctly.
Considering the price difference, I was very happy with what we received.
Now I just had to get what remained of the old decal off the motorhome.
What We Used to Replace Our RVIA Decal
This was a pretty simple DIY project and didn’t require a long list of special tools or supplies. Most of what I used was already around the motorhome.
- Replacement RVIA decal from ReplacementDecals.com — $29.99 plus shipping
- Scraper
- Goo Gone Spray Gel
- 91% isopropyl alcohol
- Microfiber towels
- Replacement Decals applicator/squeegee (comes with the decal)
- Wash Wax ALL
One important note before getting started: RV exterior finishes vary. Be careful when using scrapers, adhesive removers, alcohol, or other products on your RV. What worked on our motorhome may not be appropriate for every exterior surface, paint, graphic, or clear coat. Test products in an inconspicuous area first if you’re unsure.
How We Removed the Old RVIA Decal and Installed the New One
With the replacement decal in hand, it was time to get the old one off.
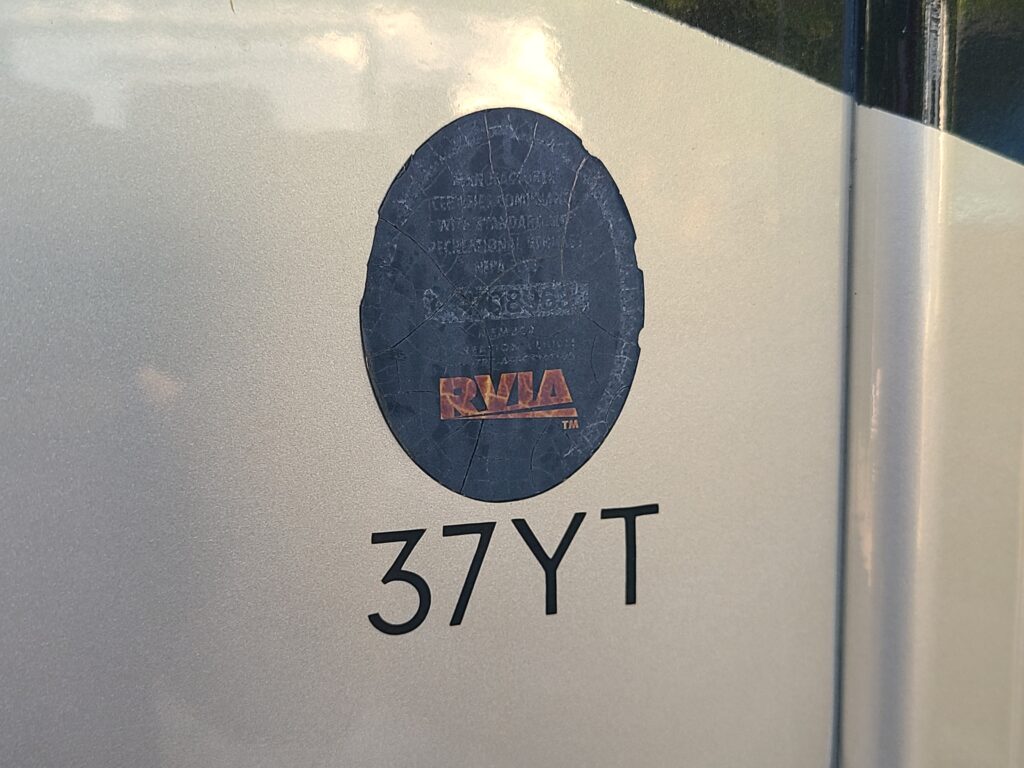
Looking at our original RVIA decal, you can see just how far gone it was. The surface was badly faded and cracked, and most of the original gold lettering had disappeared.
After years of sun and weather, this wasn’t going to be a simple matter of grabbing a corner and peeling the whole sticker off.
Step 1: Document the Original RVIA Decal
Before removing anything, take a few good pictures of the original decal.
This is especially important because the RVIA seal has an identifying number printed on it. Ours had deteriorated considerably, but fortunately, we could still make out the number.
I also recommend writing the number down somewhere instead of relying only on your photos.
Once that old decal is gone, you don’t want to discover that you can’t read the number you need for the replacement.
Step 2: Remove the Old RVIA Decal
I started by carefully scraping the old decal from the side of the motorhome.
Because ours was so deteriorated, it didn’t come off cleanly in one piece. The material had become brittle, so I had to work it off a little at a time.
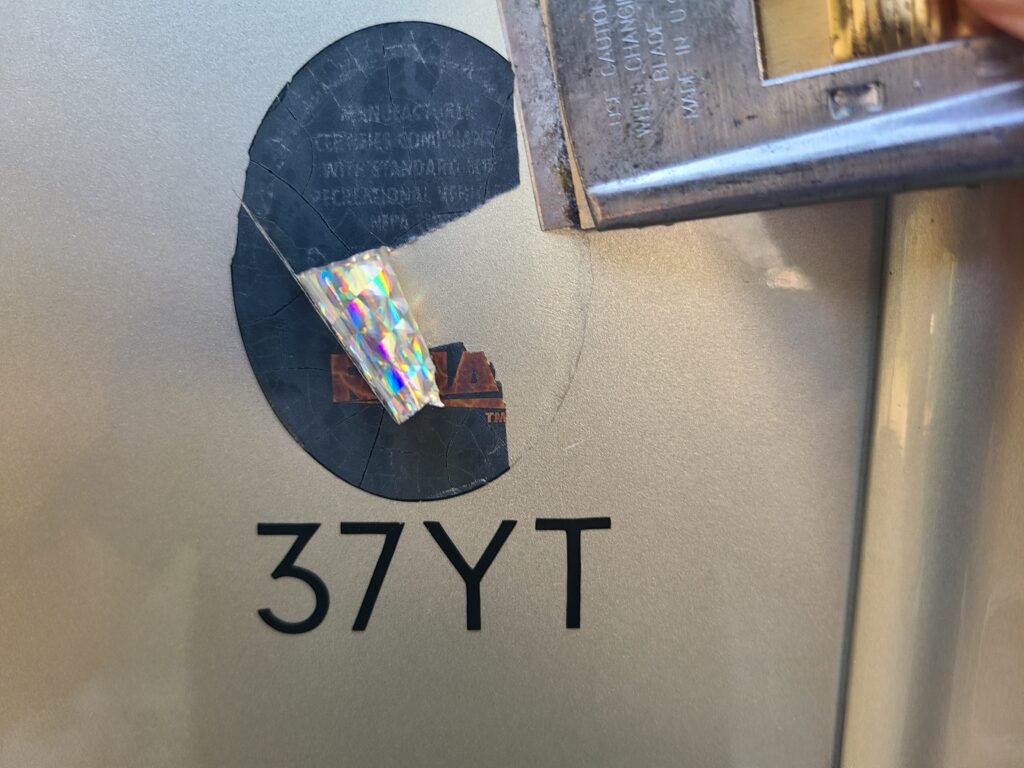
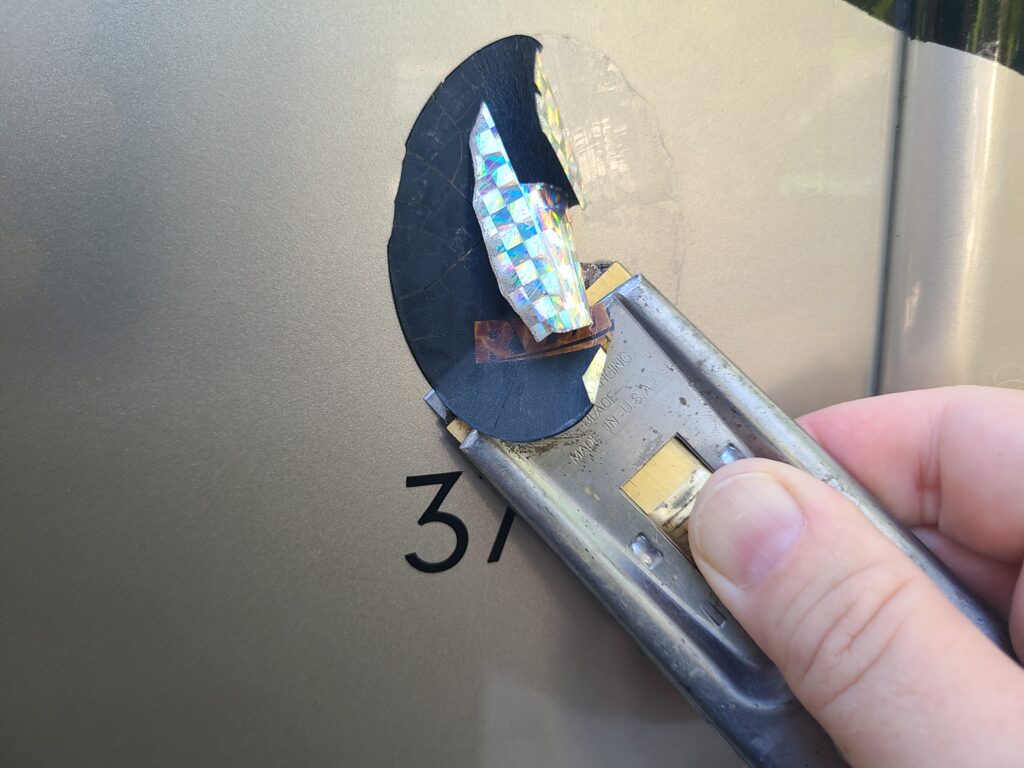
This is one of those jobs where patience is more important than speed.
You don’t want a simple decal replacement turning into damage to the paint or finish.
If you’re doing this yourself, be especially careful when using any type of scraper or blade against your RV’s exterior. What worked on our motorhome may not be appropriate for every type of RV finish.
Step 3: Remove the Leftover Adhesive
Once the actual decal was gone, you could still clearly see where it had been.
There was quite a bit of adhesive residue left behind, including a nearly perfect outline of the old oval decal.
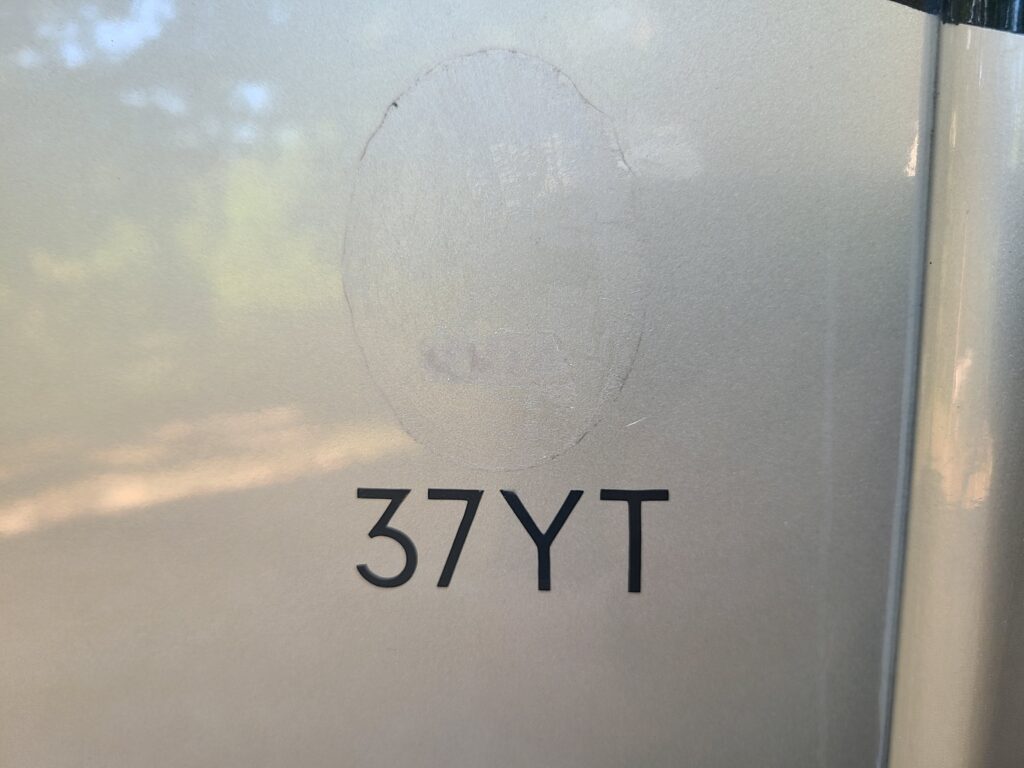
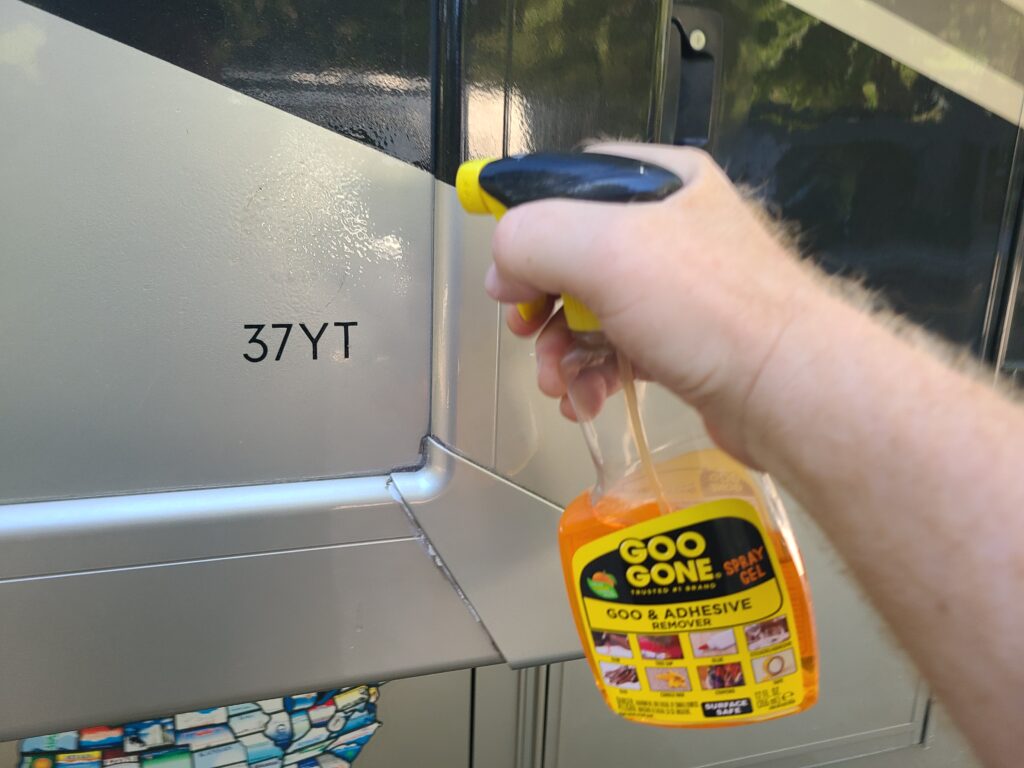
To tackle the remaining adhesive, I used Goo Gone Spray Gel.
I worked on the residue until the old adhesive was removed and the surface felt smooth again.
Again, I’d make sure whatever adhesive remover you use is appropriate for the particular surface of your RV before applying it.
Step 4: Clean the Surface With Isopropyl Alcohol
Removing the adhesive wasn’t the end of the surface preparation.
Before installing the new decal, I wanted the area completely clean and free of anything that might interfere with the new adhesive.
For the final cleaning, I used 91% isopropyl alcohol.
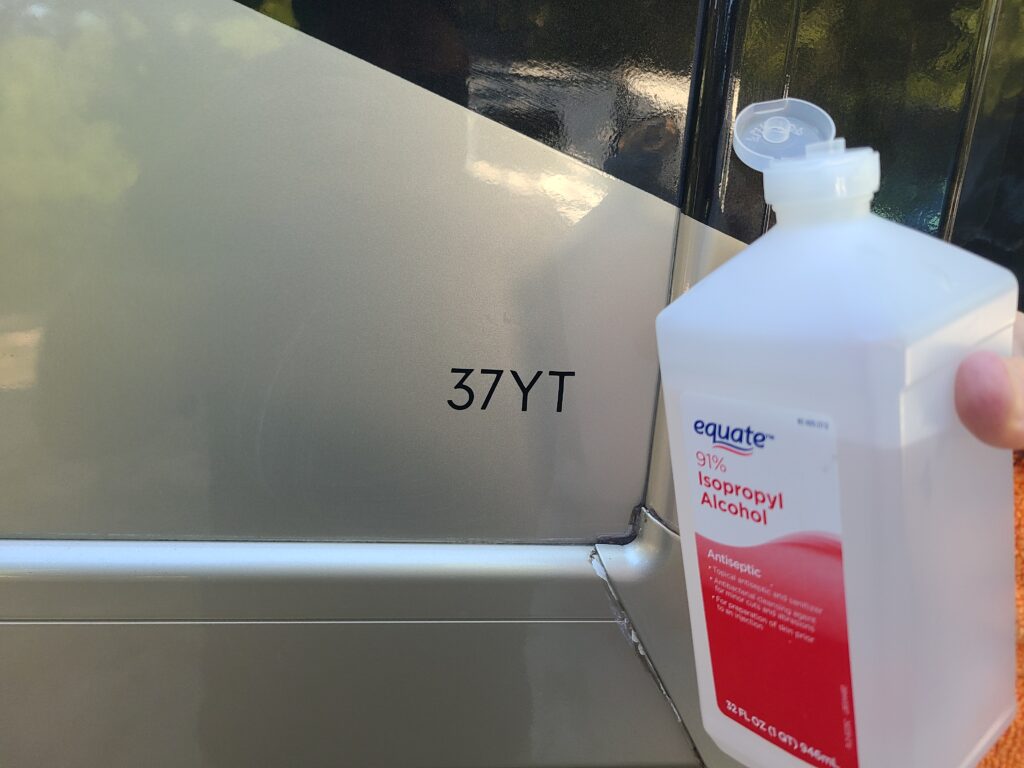
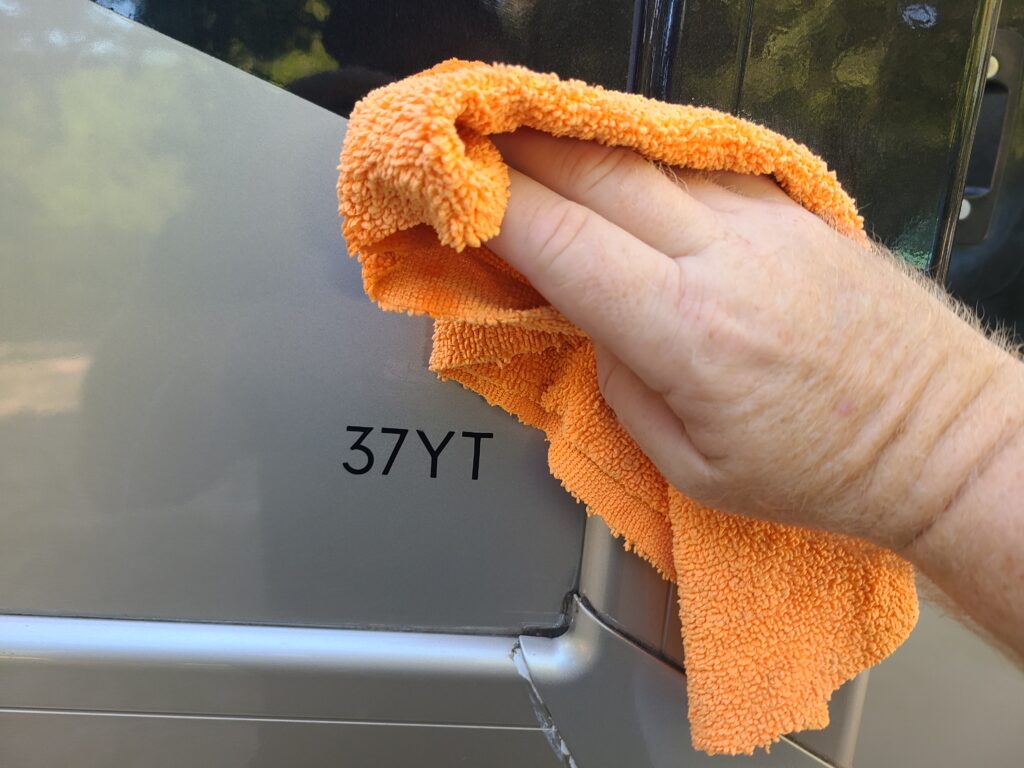
I wiped the area down thoroughly with a clean microfiber towel.
Once everything was clean and dry, I had a smooth surface ready for the new decal.
Seeing the motorhome without the RVIA decal there at all looked a little strange!
Step 5: Double-Check the Replacement Decal
Before sticking anything to the motorhome, I gave the replacement another look.
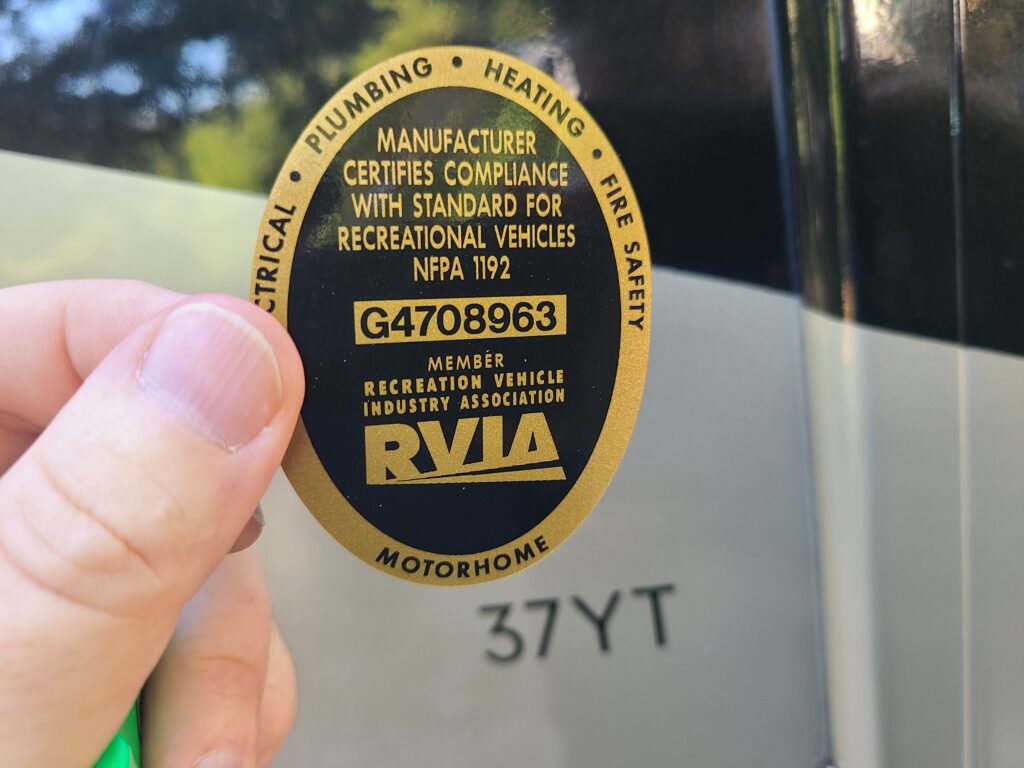
ReplacementDecals.com reproduced our decal with the same RVIA certification number as our original.
That’s one of the things I really liked about ordering the replacement from them. Instead of receiving a generic RVIA sticker, I was able to enter the number from our original decal when ordering.
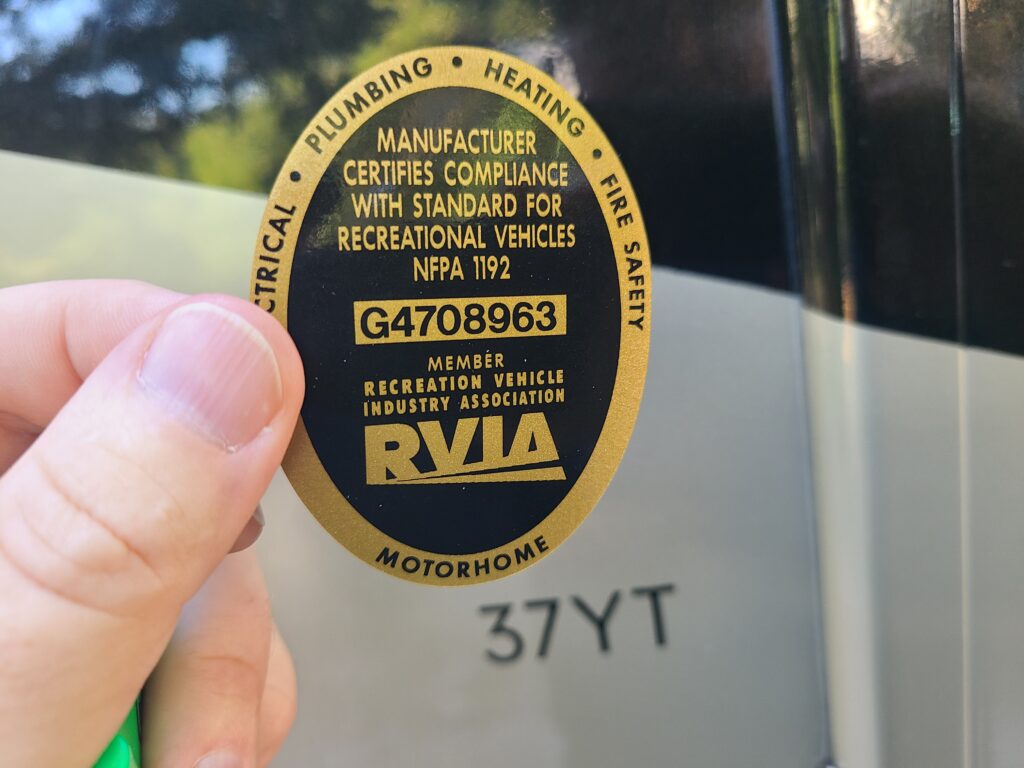
This is another reason I strongly recommend photographing your original decal and writing down the number before removing it, especially if yours is already badly faded.
Step 6: Position and Apply the New RVIA Decal
Next came the part where I really didn’t want to mess up.
I positioned the new decal where the original had been installed, using the existing 37YT model designation below it as a reference.
Once I was satisfied with the placement, I began applying the new decal.
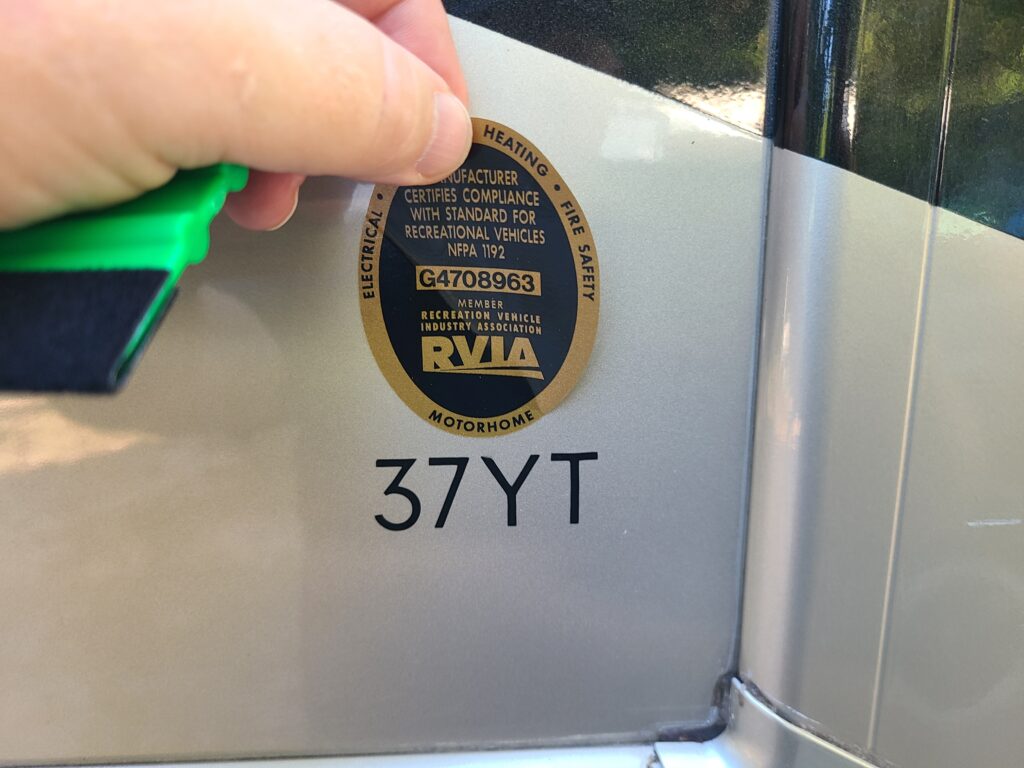
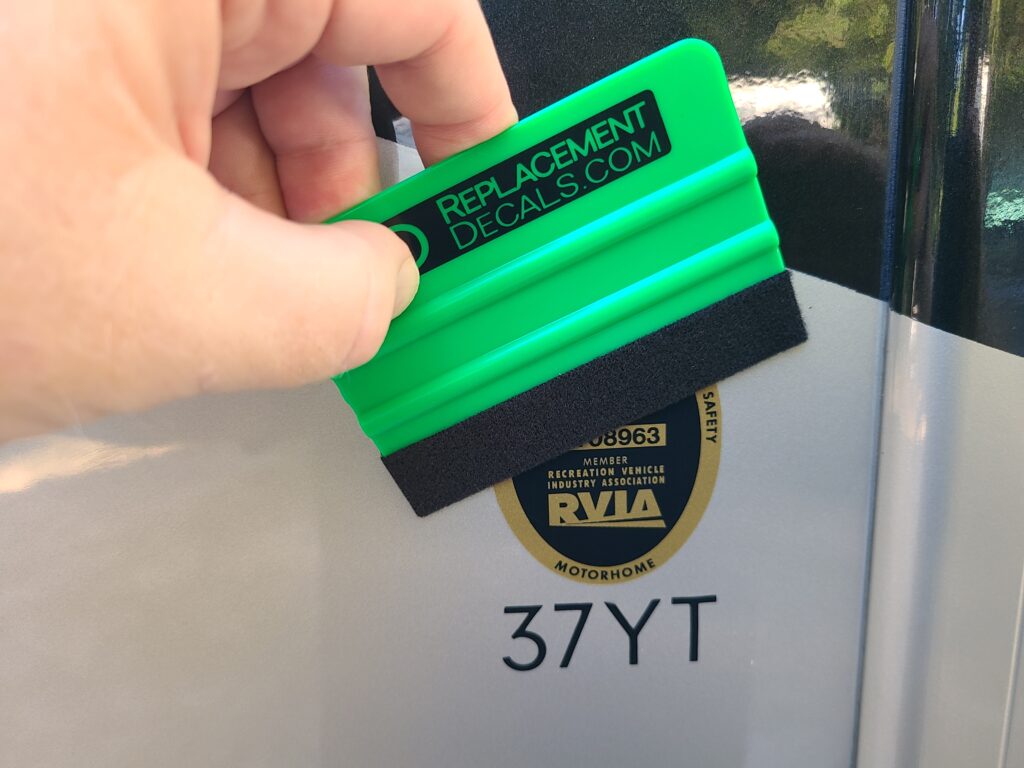
Replacement Decals included an applicator/squeegee, which I used to press the decal firmly against the surface.
I worked across the decal carefully to make sure it was firmly adhered and smooth.
Step 7: Give the Area a Final Cleaning
Once the new decal was installed, I gave the area a final cleaning with Wash Wax ALL, which is what we normally use to clean and protect the exterior of our motorhome. If you’re interested in why we use it, check out our Wash Wax ALL Review.
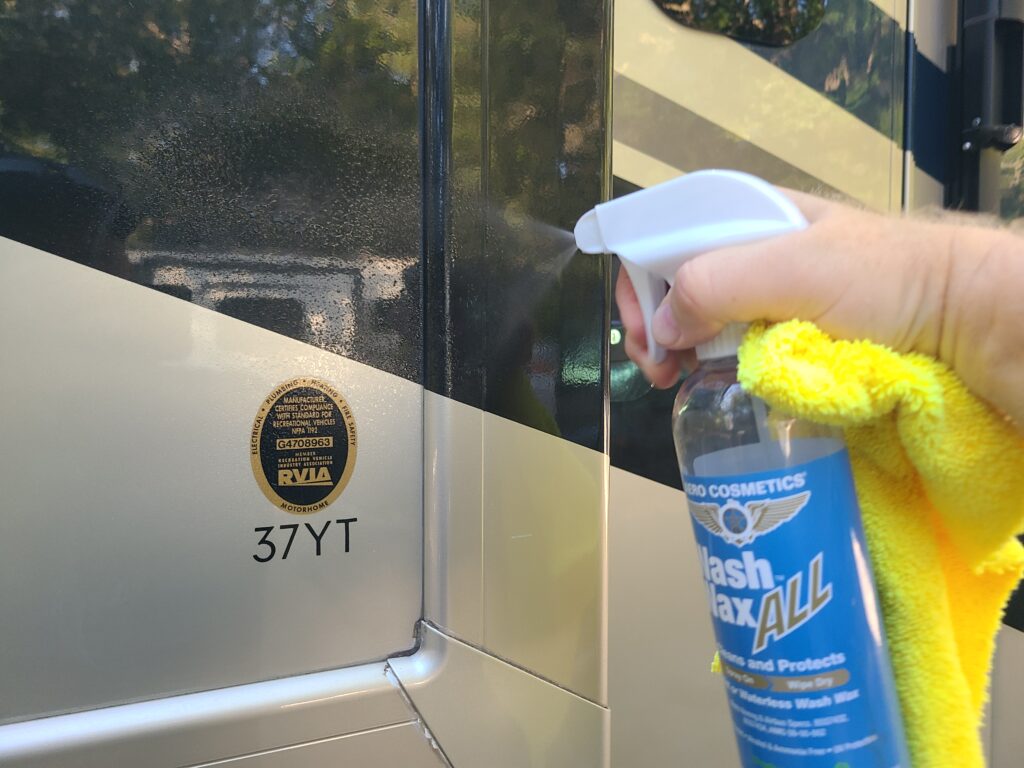
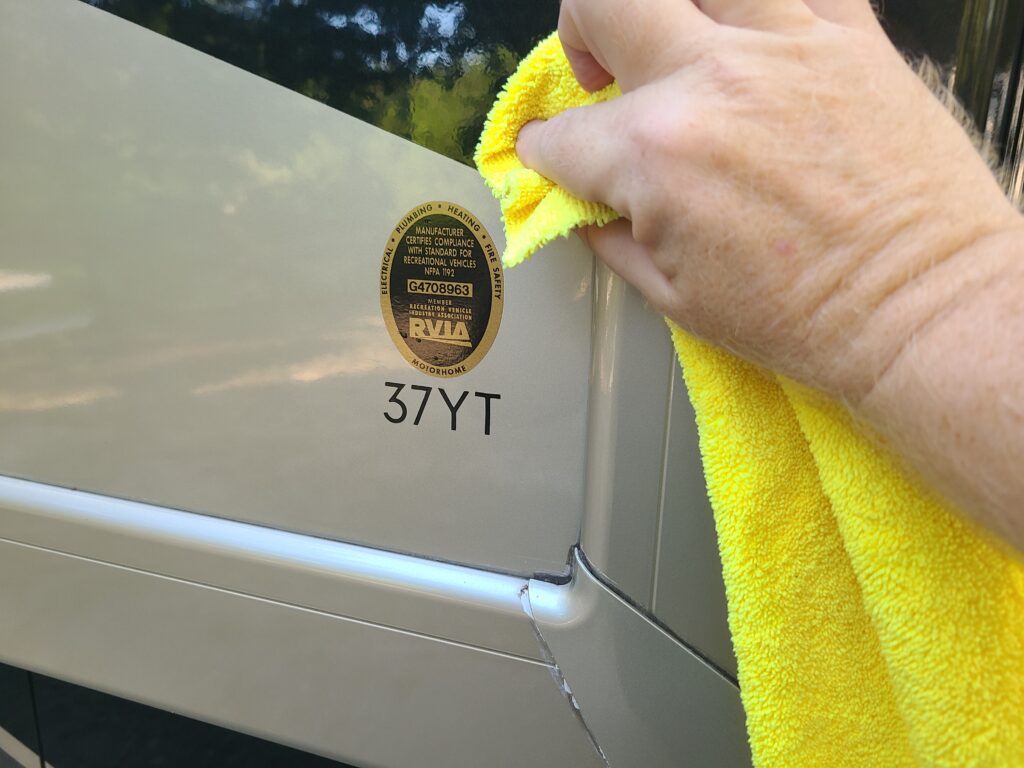
And with that, the job was finished.
The Finished RVIA Decal
What a difference.
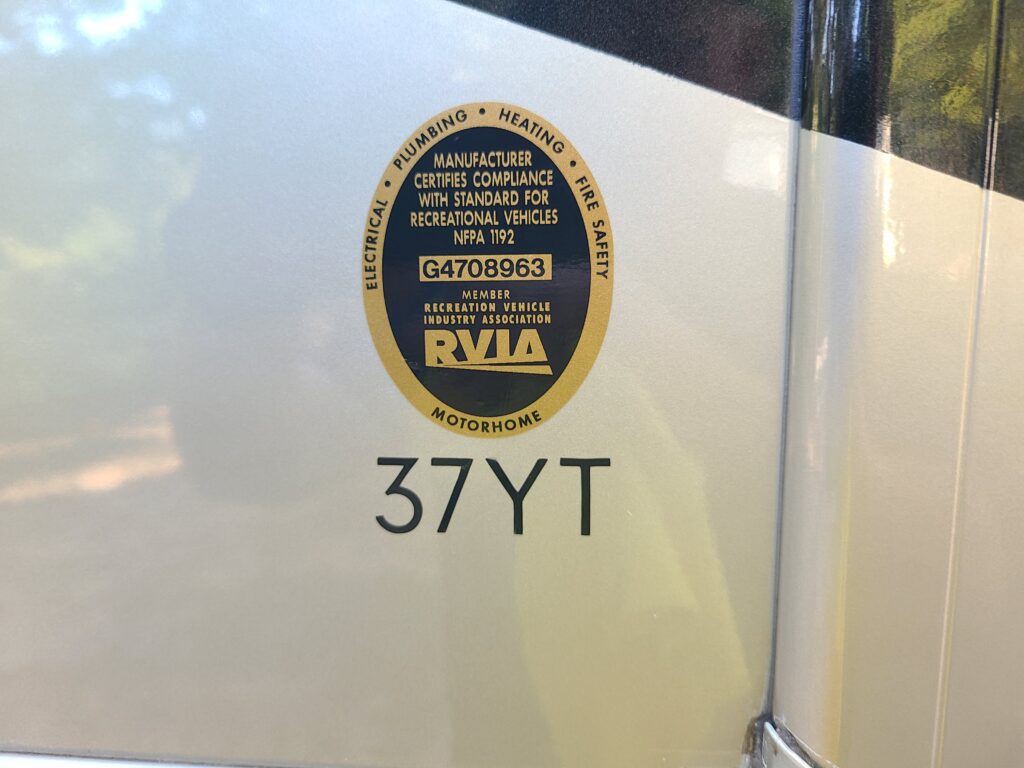
Compared with the faded and cracked original, the replacement looks fantastic. The gold and black are sharp again, everything is readable, and the certification number is right where it belongs.
From a few feet away, it looks right at home on the motorhome.
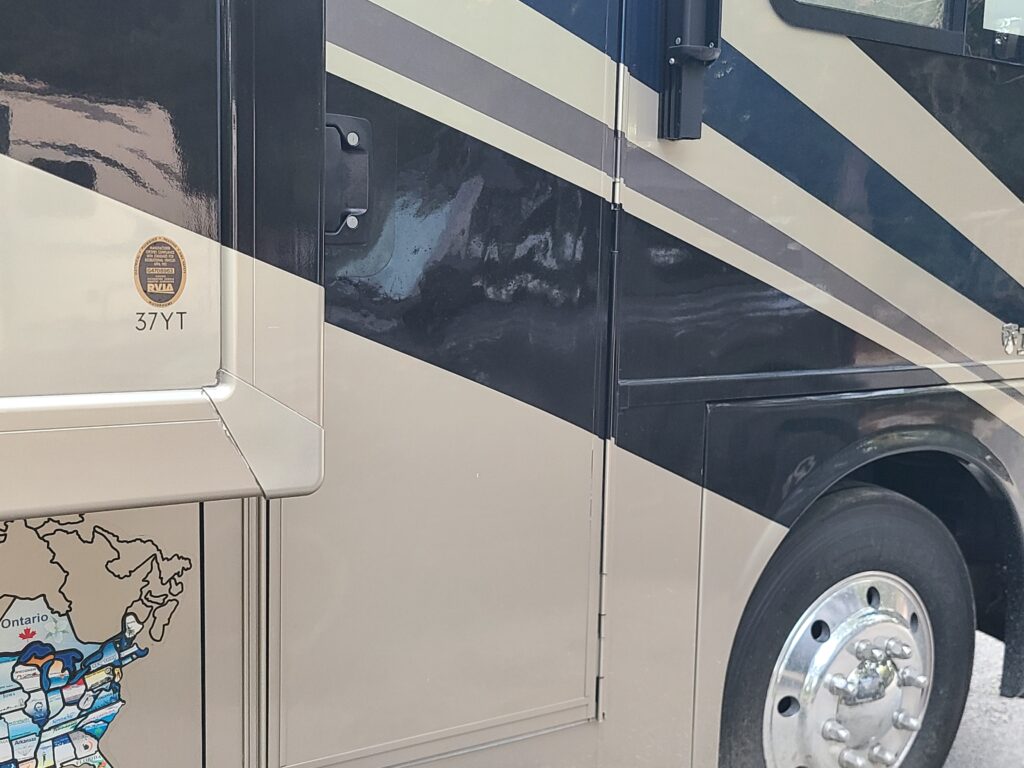
For $29.99 plus shipping, I’m very happy with the result—especially considering Thor wanted nearly $300 for a replacement.
Before and After
Sometimes a before-and-after photo tells the story better than anything else.
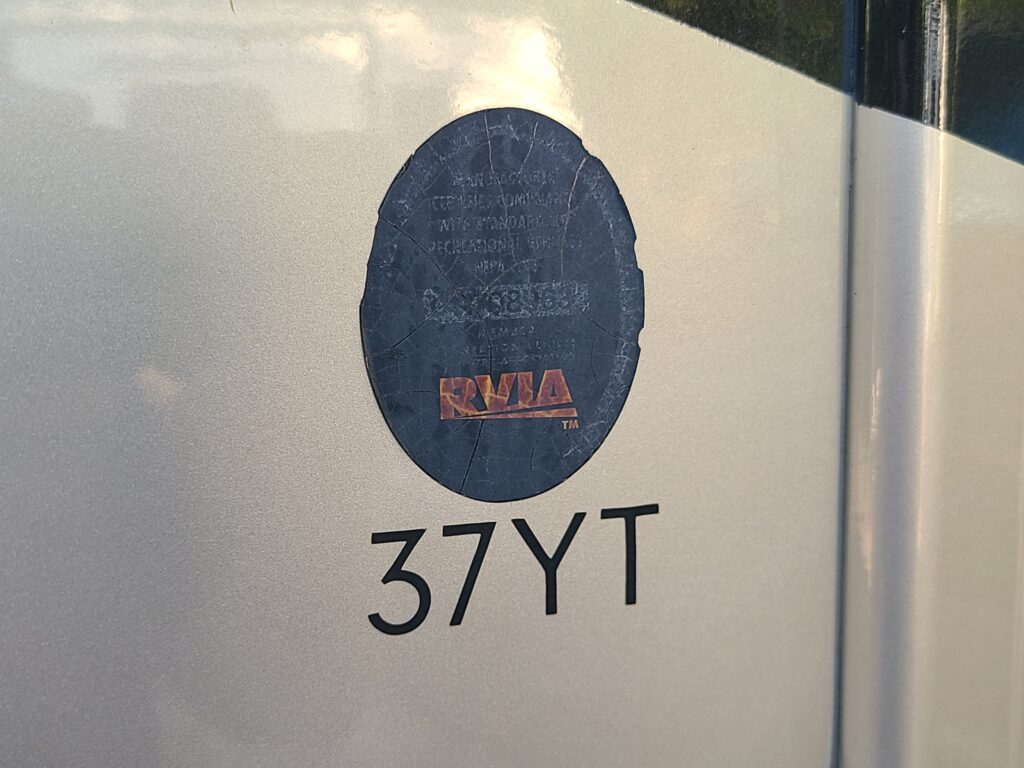
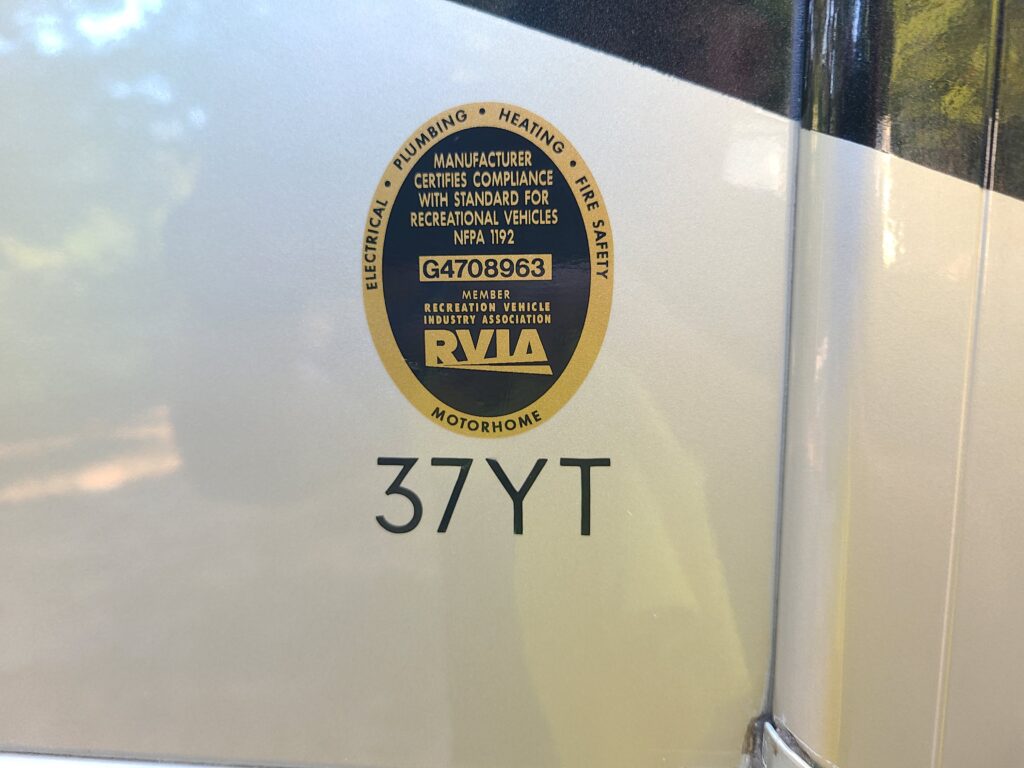
Our original decal was so faded that most of the gold had disappeared. It was cracked throughout and becoming increasingly difficult to read.
The replacement looks like an RVIA decal again.
For something physically so small, it made a surprisingly noticeable improvement.
$29.99 vs. Nearly $300
This is the part of the project that still gets me.
Thor’s quoted replacement cost:
Nearly $300
What we paid through ReplacementDecals.com:
$29.99 plus shipping
That’s roughly a $270 difference before accounting for shipping.
I don’t mind spending money maintaining our motorhome when something needs to be repaired or replaced. That’s part of RV ownership.
But I’m also not interested in spending hundreds of dollars when a good alternative is available for a fraction of the price.
This was one of those times when doing a little research paid off.
Was the ReplacementDecals.com RVIA Decal Worth It?
Based on our experience, absolutely.
We paid for the decal ourselves, so no free product or sponsorship was influencing our opinion.
The ordering process was simple; we were able to have the certification number from our original decal reproduced on the replacement. The decal looked great when it arrived, and we were impressed with the finished result.
At $29.99 plus shipping, I consider it money well spent.
I’d much rather pay that than nearly $300.
Tips Before Replacing Your Own RVIA Decal
A few things I’d recommend based on our experience:
- Photograph the original decal before removing it. Make sure the identifying number is clearly readable.
- Write the number down separately. Don’t rely solely on being able to read an old, deteriorating sticker later.
- Take a wider photo showing the original location. That gives you a reference when positioning the replacement.
- Don’t rush the removal process. You don’t want to damage the RV’s exterior trying to remove a sticker.
- Be careful with scrapers and chemicals. RV exterior materials and finishes vary.
- Remove all of the old adhesive. The new decal needs a clean, smooth surface.
- Clean the surface before installation. We used 91% isopropyl alcohol for our final preparation.
- Check the replacement before installing it. Make sure the number is correct.
- Take your time positioning it. Check the alignment before committing to the final placement.
Frequently Asked Questions About RVIA Decals
Another Small RV Project Checked Off the List
That’s life with an RV.
There’s always something.
One week we’re dealing with a windshield seal. Another week we’re replacing a missing hubcap. Then suddenly I’m spending part of an afternoon replacing a faded certification sticker.
None of those things by themselves are huge repairs, but keeping up with the little things is part of keeping an RV looking good and working the way it should.
Fortunately, this one turned into a pretty inexpensive project.
Our old RVIA decal was faded, cracked, and barely readable. The replacement looks great, has the correct certification number, and cost us $29.99 plus shipping instead of the nearly $300 we were quoted by Thor.
I’d call that a win.
Now we can move on to whatever little project the motorhome decides to give us next.
More RV Maintenance & Repairs
Owning an RV means there’s almost always something that needs a little attention. Sometimes it’s a major repair, but more often it’s little projects like replacing a faded decal, fixing a crank-out window, or servicing an AC unit. Taking care of those small things as they come up helps keep our motorhome looking good and ready for whatever comes next.
Looking for more projects like this? Check out our other Maintenance category for more real-world repairs, maintenance projects, and upgrades we’ve tackled while living and traveling full-time in our RV.