
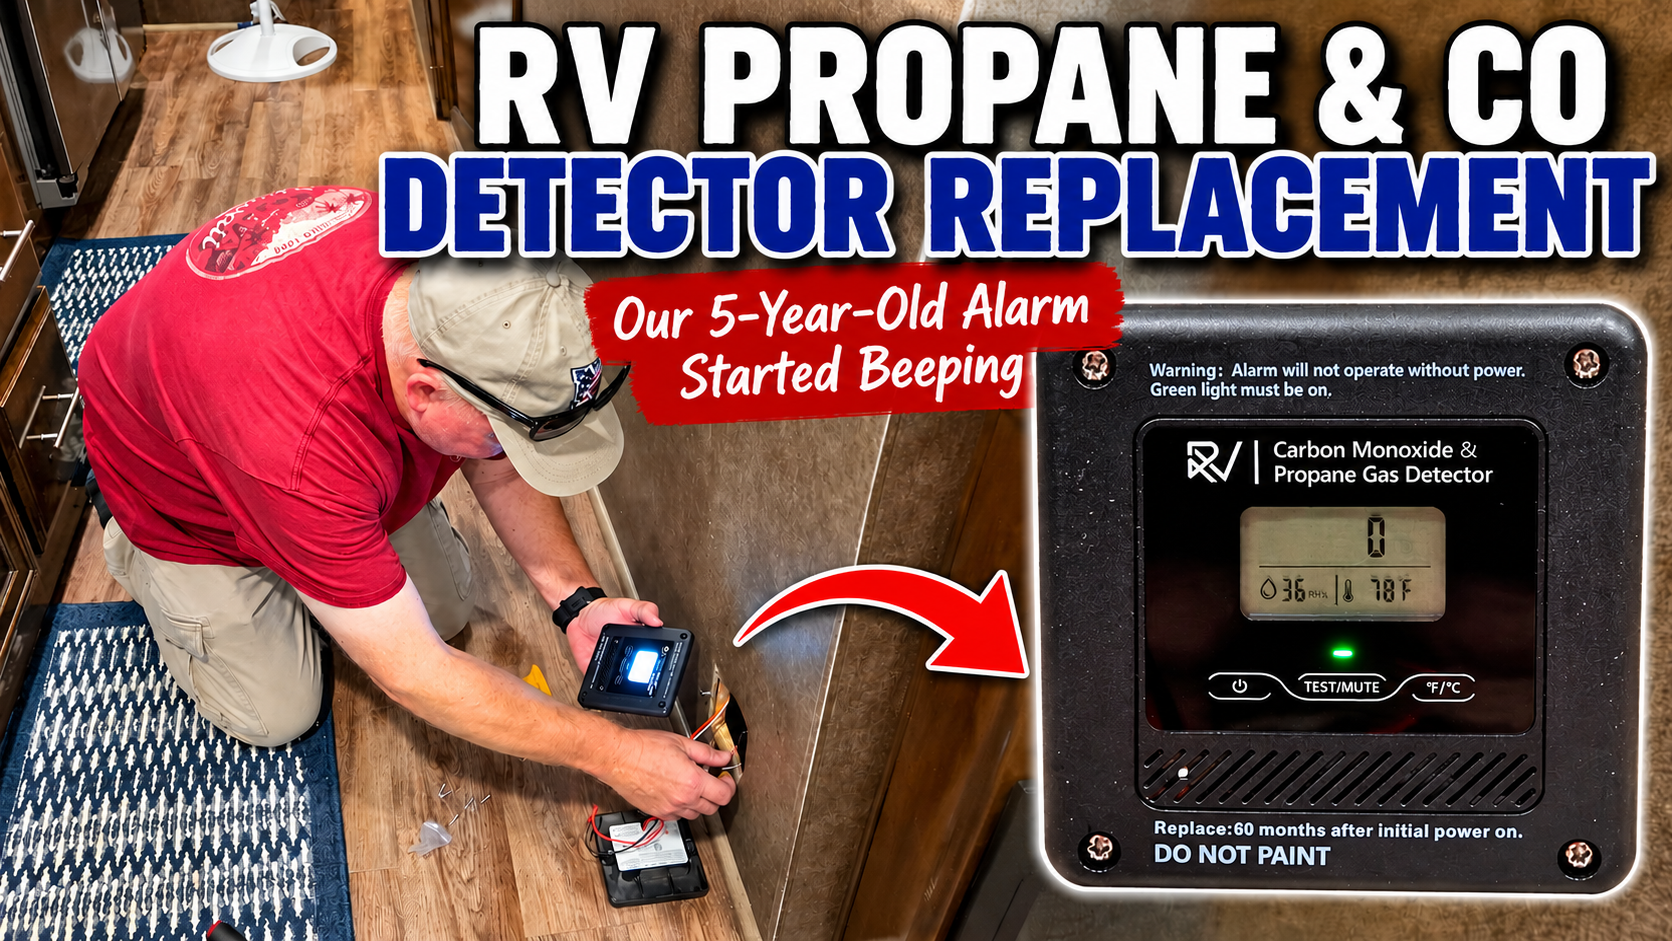
Smoke detectors and carbon monoxide detectors always seem to fail in the middle of the night.
So how do you avoid being woken up by that annoying beeping?
Work the overnight shift! LOL
We came home from work one morning to our RV’s carbon monoxide and propane detector beeping away.
We didn’t think we had a propane or carbon monoxide problem. The only things in our motorhome that run on propane are our on-demand water heater and furnace, and neither was running. We didn’t have anything going on that made us suspect carbon monoxide either.
Plus, we’d been down this road before.
This is actually the second propane and carbon monoxide detector we’ve had to replace in our motorhome. Like a lot of original equipment in an RV, the factory-installed detector didn’t last very long. It went bad after only a couple of years, and we replaced it.
So when this one started beeping, checking the detector itself was high on the list.
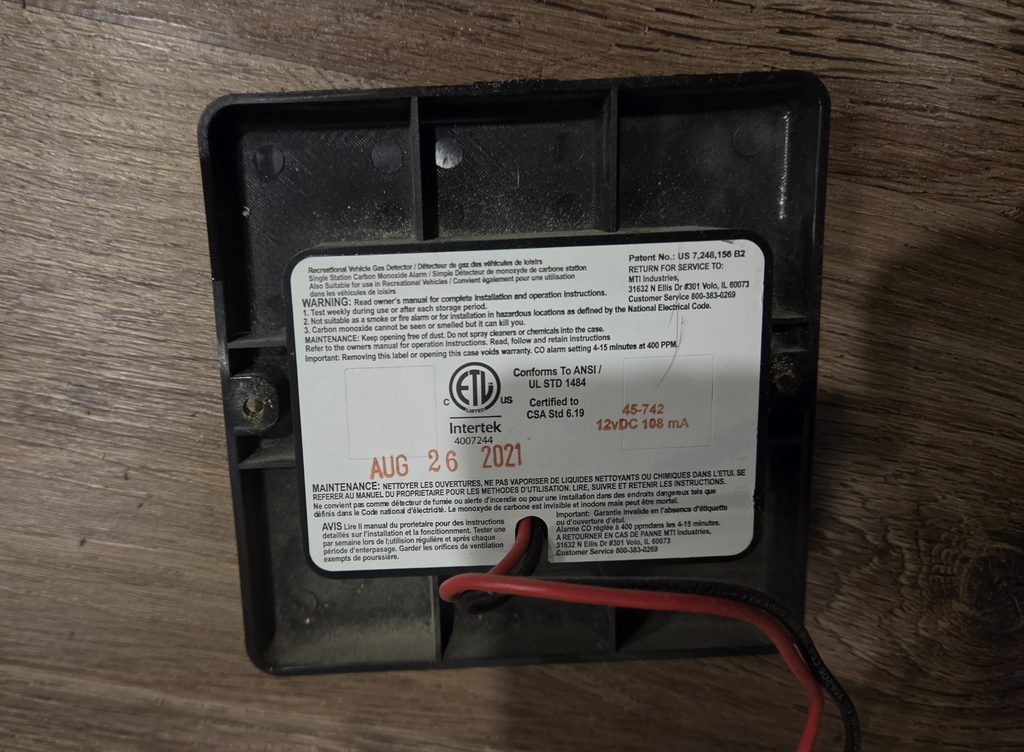
I pulled it off the wall and found the date stamped on the back:
AUG 26 2021
Then I looked at the front:
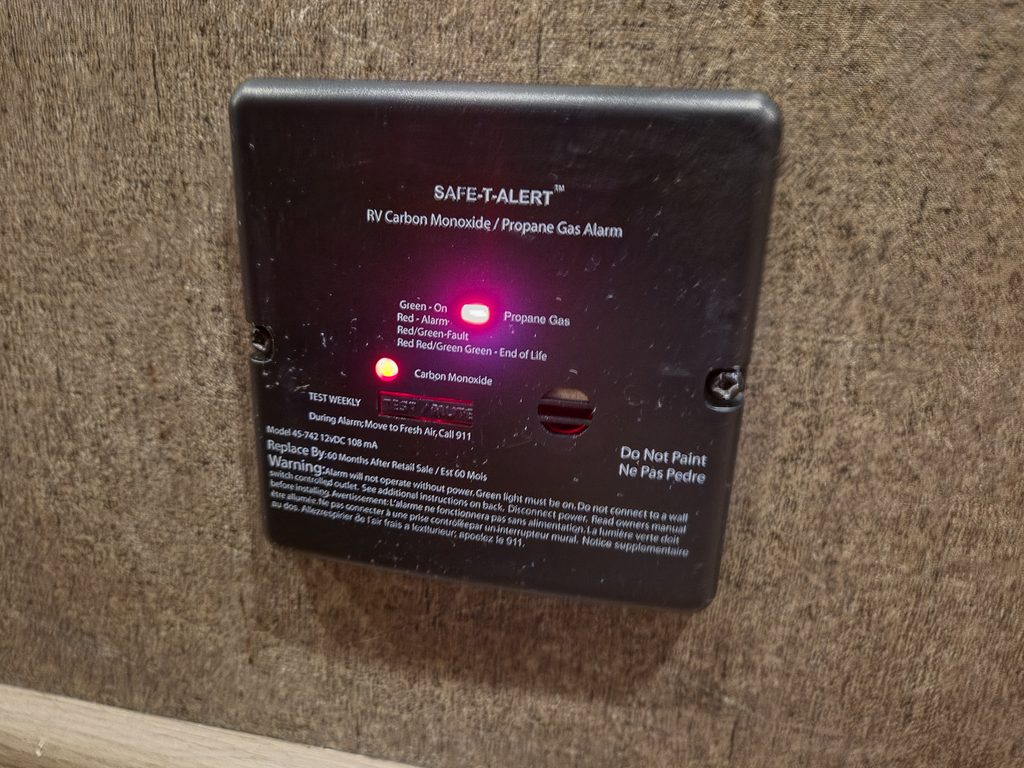
“Replace By: 60 Months After Retail Sale / Est 60 Mos.”
Five years.
And here we were in September 2026.
Right on time.
Apparently, this detector had reached the end of its expected service life.
Fortunately, it’s a pretty easy DIY project. This time we documented the entire process, so I’ll show you how we replaced ours, what we looked for when choosing the replacement, and one important thing you need to know when the new detector first powers up.
Our situation pointed us toward an aging detector, but don’t assume every beeping propane or carbon monoxide detector has simply reached the end of its life. A propane leak can occur even when appliances aren’t operating, and carbon monoxide can come from other combustion sources.
Follow the alarm patterns and safety instructions for your particular detector.
- How Long Does an RV Propane and Carbon Monoxide Detector Last?
- RV Propane and CO Detectors Come in Different Sizes and Styles
- Our New RV Propane and Carbon Monoxide Detector
- Make Sure the Replacement Covers the Existing Hole
- Why Are RV Propane Detectors Mounted Near the Floor?
- What We Used to Replace Our RV Detector
- How to Replace an RV Propane and Carbon Monoxide Detector
- Why Did Our New RV Propane Detector Show Numbers During Startup?
- Can You Have a Propane Leak When the Appliances Are Off?
- What About Carbon Monoxide?
- What Does a Beeping RV Propane Detector Mean?
- Should You Replace an Old RV Propane Detector Before It Starts Beeping?
- Our Detector Replacement Started a Bigger Safety Check
- Is Replacing an RV Propane and CO Detector a DIY Project?
- RV Propane & Carbon Monoxide Detector FAQ
- Detector Number Three Is Installed
- When Was the Last Time You Checked Yours?
This post contains affiliate links. As a participant in Amazon Associates and various affiliate programs, we are compensated when qualifying purchases are made through our referral links at no additional cost to you. Full Disclosure
How Long Does an RV Propane and Carbon Monoxide Detector Last?
RV propane and carbon monoxide detectors don’t last forever. The sensors inside them have a limited service life, even if the detector otherwise appears to be working normally.
For our old SAFE-T-ALERT detector, the expected service life was printed right on the front:
“Replace By: 60 Months After Retail Sale / Est 60 Mos.”
Our new detector has a similar five-year replacement interval:
“Replace: 60 months after initial power on.”
That doesn’t mean every RV detector lasts exactly five years. Replacement intervals can vary by manufacturer and model, so check the label or owner’s manual for your specific detector.
Check the Date on Your RV Detector
If you don’t know how old yours is, now is a good time to check.
The date isn’t always visible while the detector is mounted. On ours, we had to remove it from the wall to find the AUG 26 2021 date stamped on the back.
That confirmed what we already suspected: ours was due for replacement.
RV Propane and CO Detectors Come in Different Sizes and Styles
Before ordering the same detector we bought, take a look at what’s already installed in your RV.
RV propane and carbon monoxide detectors aren’t all the same size or shape. Depending on your RV, you may have a rectangular, square, or other style of detector, and the size of the wall opening can vary considerably.
That’s especially important with hardwired detectors that are recessed into the wall.
Our goal wasn’t simply to find a propane and carbon monoxide detector we liked. We needed one that would work with our RV’s 12-volt system and cover the existing opening in the wall.
That’s why the DP-E01 worked well for us.
But it may not be the best physical fit for your RV.
Before ordering a replacement, remove your existing detector and check:
- The detector’s outside dimensions
- The size of the wall opening behind it
- The required operating voltage
- Whether you need propane only or a combination propane/CO detector
- The manufacturer’s mounting and location requirements
If your existing detector is a different shape or size than ours, look for a replacement designed to fit that application rather than assuming one style fits every RV.
Our New RV Propane and Carbon Monoxide Detector
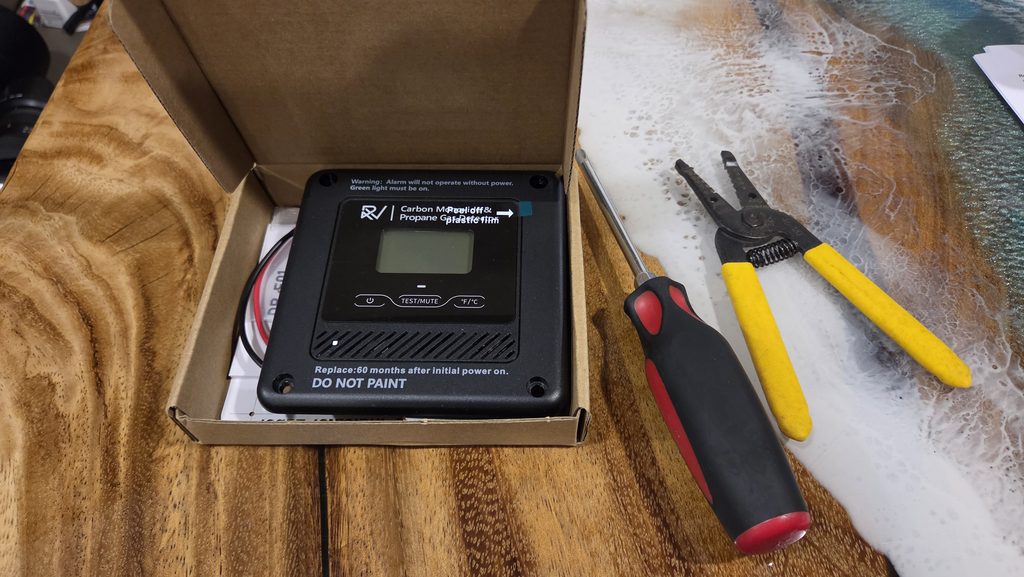
We replaced the old detector with a DP-E01 combination carbon monoxide and propane gas alarm for RVs.
We wanted another combination unit so one detector could continue monitoring for both:
- Propane gas
- Carbon monoxide
The DP-E01 operates on 12–24 volts DC, so it could be hardwired into our motorhome’s existing 12-volt electrical system.
It also gives us something the old detector didn’t have—a digital display.
The screen displays the CO reading along with temperature and humidity, and there’s a green indicator showing that the detector has power.
Make Sure the Replacement Covers the Existing Hole
There was another important consideration when we picked our replacement that had nothing to do with electronics.
It needed to be about the same size as the old detector.
Our detector isn’t simply screwed onto a finished wall. There’s an opening behind it for the wiring and recessed portion of the detector.
If we’d bought a substantially smaller detector, we could have ended up with part of that hole showing around the edges.
Then a simple detector replacement would have turned into a wall repair project.
No thanks.
So we specifically looked for a replacement that was roughly the same size and shape as the detector we were removing.
Fortunately, the new DP-E01 covered the existing opening nicely.
Measure Before Ordering
If you’re replacing an existing RV propane and carbon monoxide detector, measure both the old detector and the wall opening behind it before ordering your replacement.
Not Every RV Uses the Same Size Detector
RV propane and carbon monoxide detectors come in several different shapes, sizes, and mounting styles. Before ordering, measure your existing detector and the opening behind it and verify the voltage, wiring, and mounting requirements.
4-in-1 RV Gas Detector
This is the detector shown throughout this article and the one we installed in our motorhome. It fit our existing wall opening nicely and provides propane and carbon monoxide detection along with a digital display.
Other Styles to Consider
R503 Flush-Mount 2-in-1 Detector
A flush-mount option for RVs with a recessed detector installation. The listing identifies it as a replacement option for the older #31011-style RV gas detector.
View R503 Flush-Mount Detector on Amazon →2-in-1 Hardwired 12V RV Gas Detector
Another hardwired 12-volt combination detector with a different face and mounting design. This may be a better fit for RVs with a different existing wall opening.
View 2-in-1 Hardwired Detector on Amazon →Safe-T-Alert 25-742 Flush Mount with Trim Ring
The trim-ring design is worth considering if your replacement detector is smaller than the opening left by the old one. The larger trim ring can help cover the existing wall opening for a cleaner installation.
View Safe-T-Alert 25-742 on Amazon →RV Safe RVCOLP-2 Surface-Mount Detector
A surface-mount combination CO and propane detector for installations where a recessed or flush-mount detector isn’t the right fit.
View RV Safe RVCOLP-2 on Amazon →Before You Order: Don’t choose a replacement based on appearance alone. Verify the detector’s dimensions, operating voltage, wiring requirements, mounting requirements, and the size of the opening in your RV. The detector we installed may not be the right physical fit for every RV.
Why Are RV Propane Detectors Mounted Near the Floor?
If you’ve ever wondered why your RV propane detector is only a few inches above the floor, there’s a reason.
Propane is heavier than air.
If propane escapes into an RV, it tends to settle toward lower areas.
That’s why propane detectors are normally installed low on the wall.
Our replacement went back into the same location as the detector it replaced.
Don’t randomly relocate a propane detector simply because another location looks better. Follow the placement requirements the detector manufacturer provides.
What We Used to Replace Our RV Detector
This wasn’t a project requiring a bunch of specialized RV tools.
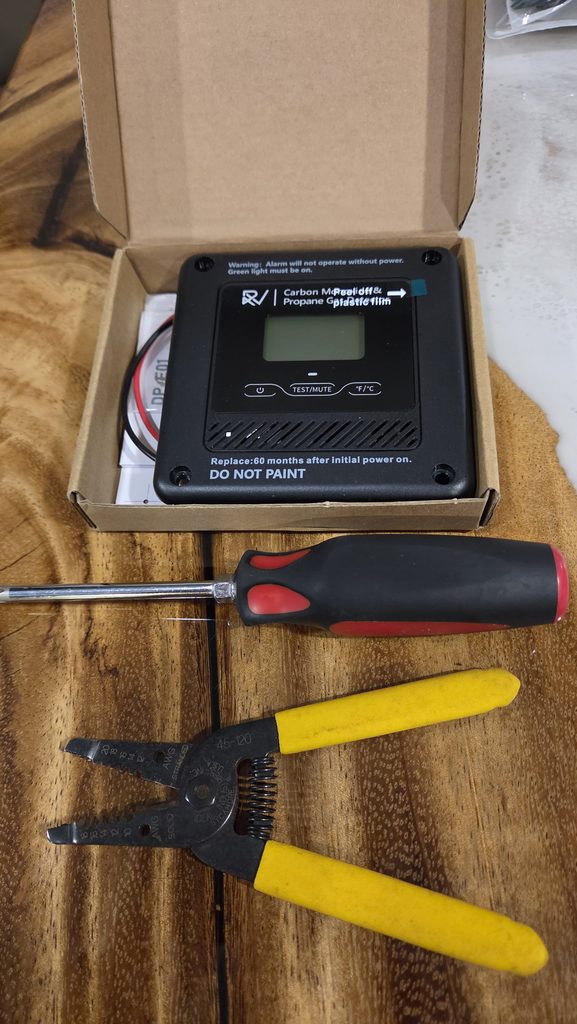
For our installation, we used:
- New DP-E01 RV propane and carbon monoxide detector
- Screwdriver
- Wire stripper
- Lever-style electrical connectors
That’s about it.
If you’re comfortable with basic 12-volt electrical work, this is a pretty straightforward project.
How to Replace an RV Propane and Carbon Monoxide Detector
The exact installation will vary depending on your RV and the detector you purchase.
Always follow the installation instructions for your specific detector.
Here’s how ours went.
Step 1: Turn Off the 12-Volt Power
Before touching any of the wiring, disconnect power to the detector.
Our detector is powered by the motorhome’s 12-volt DC electrical system.
That’s important because unplugging your RV from the campground pedestal doesn’t necessarily mean the detector is no longer powered.
Your house batteries can continue supplying 12-volt power even when you’re disconnected from shore power.
Depending on your RV, you may be able to remove the appropriate fuse, use the battery disconnect, or otherwise isolate the circuit.
Whatever method you use, verify that the detector circuit isn’t energized before disconnecting the wiring.
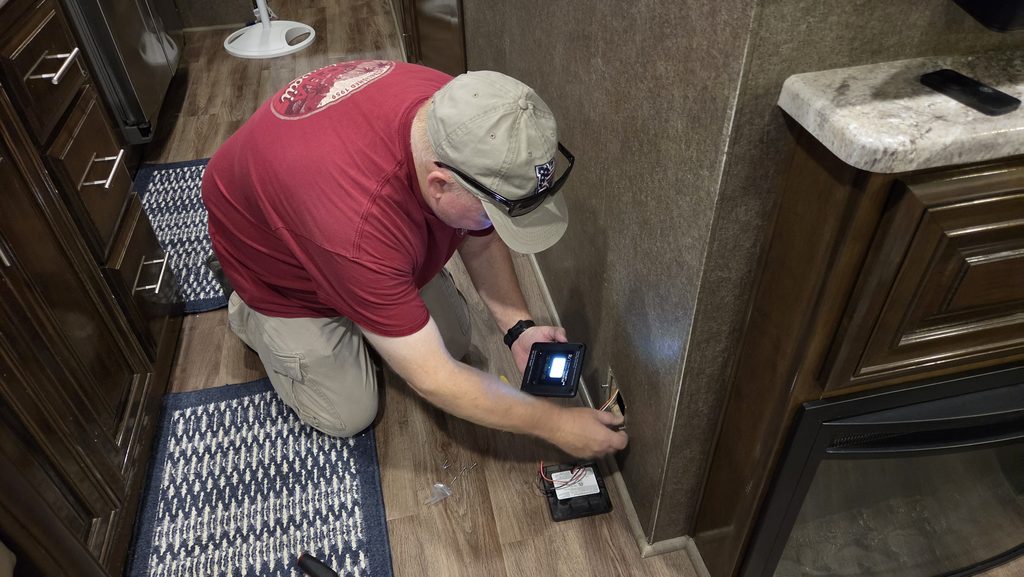
Step 2: Remove the Old RV Propane Detector
Our old detector was secured to the wall with screws.
After removing them, I carefully pulled the detector away from the wall.
Don’t yank it out because the wiring is still connected behind it.
Pull it out just far enough to get access to the wires.
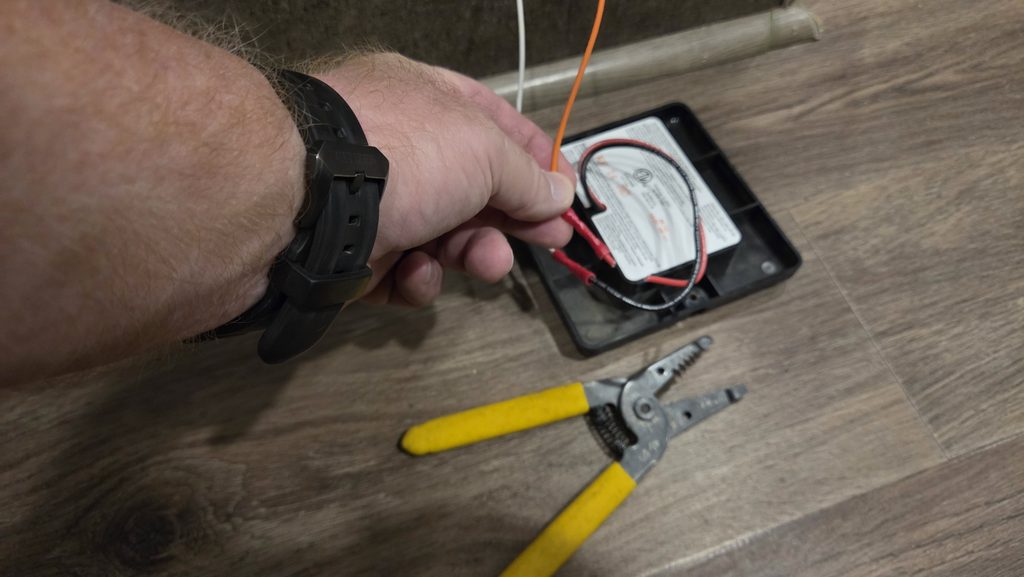
Take a Picture Before Disconnecting Anything
This is something we’ve learned from doing a lot of little projects around our motorhome.
Before disconnecting wiring, take a picture with your phone.
Even if you think you’ll remember exactly where everything went, that picture gives you something to reference later.
It takes five seconds and can potentially save you a lot of aggravation.
Step 3: Connect the New Detector
With the power off, we disconnected the old detector and prepared the existing RV wiring for the replacement.
Our new detector uses positive and negative DC power leads.
We connected those to the appropriate wires in our motorhome according to the detector’s instructions.
Don’t Trust Wire Color Alone
Don’t look at our pictures and assume the same RV wire colors will mean the same thing in your rig.
RV wiring can vary.
Determine which wire is positive and which is negative in your RV, and follow the wiring instructions supplied with your detector.
Polarity matters.
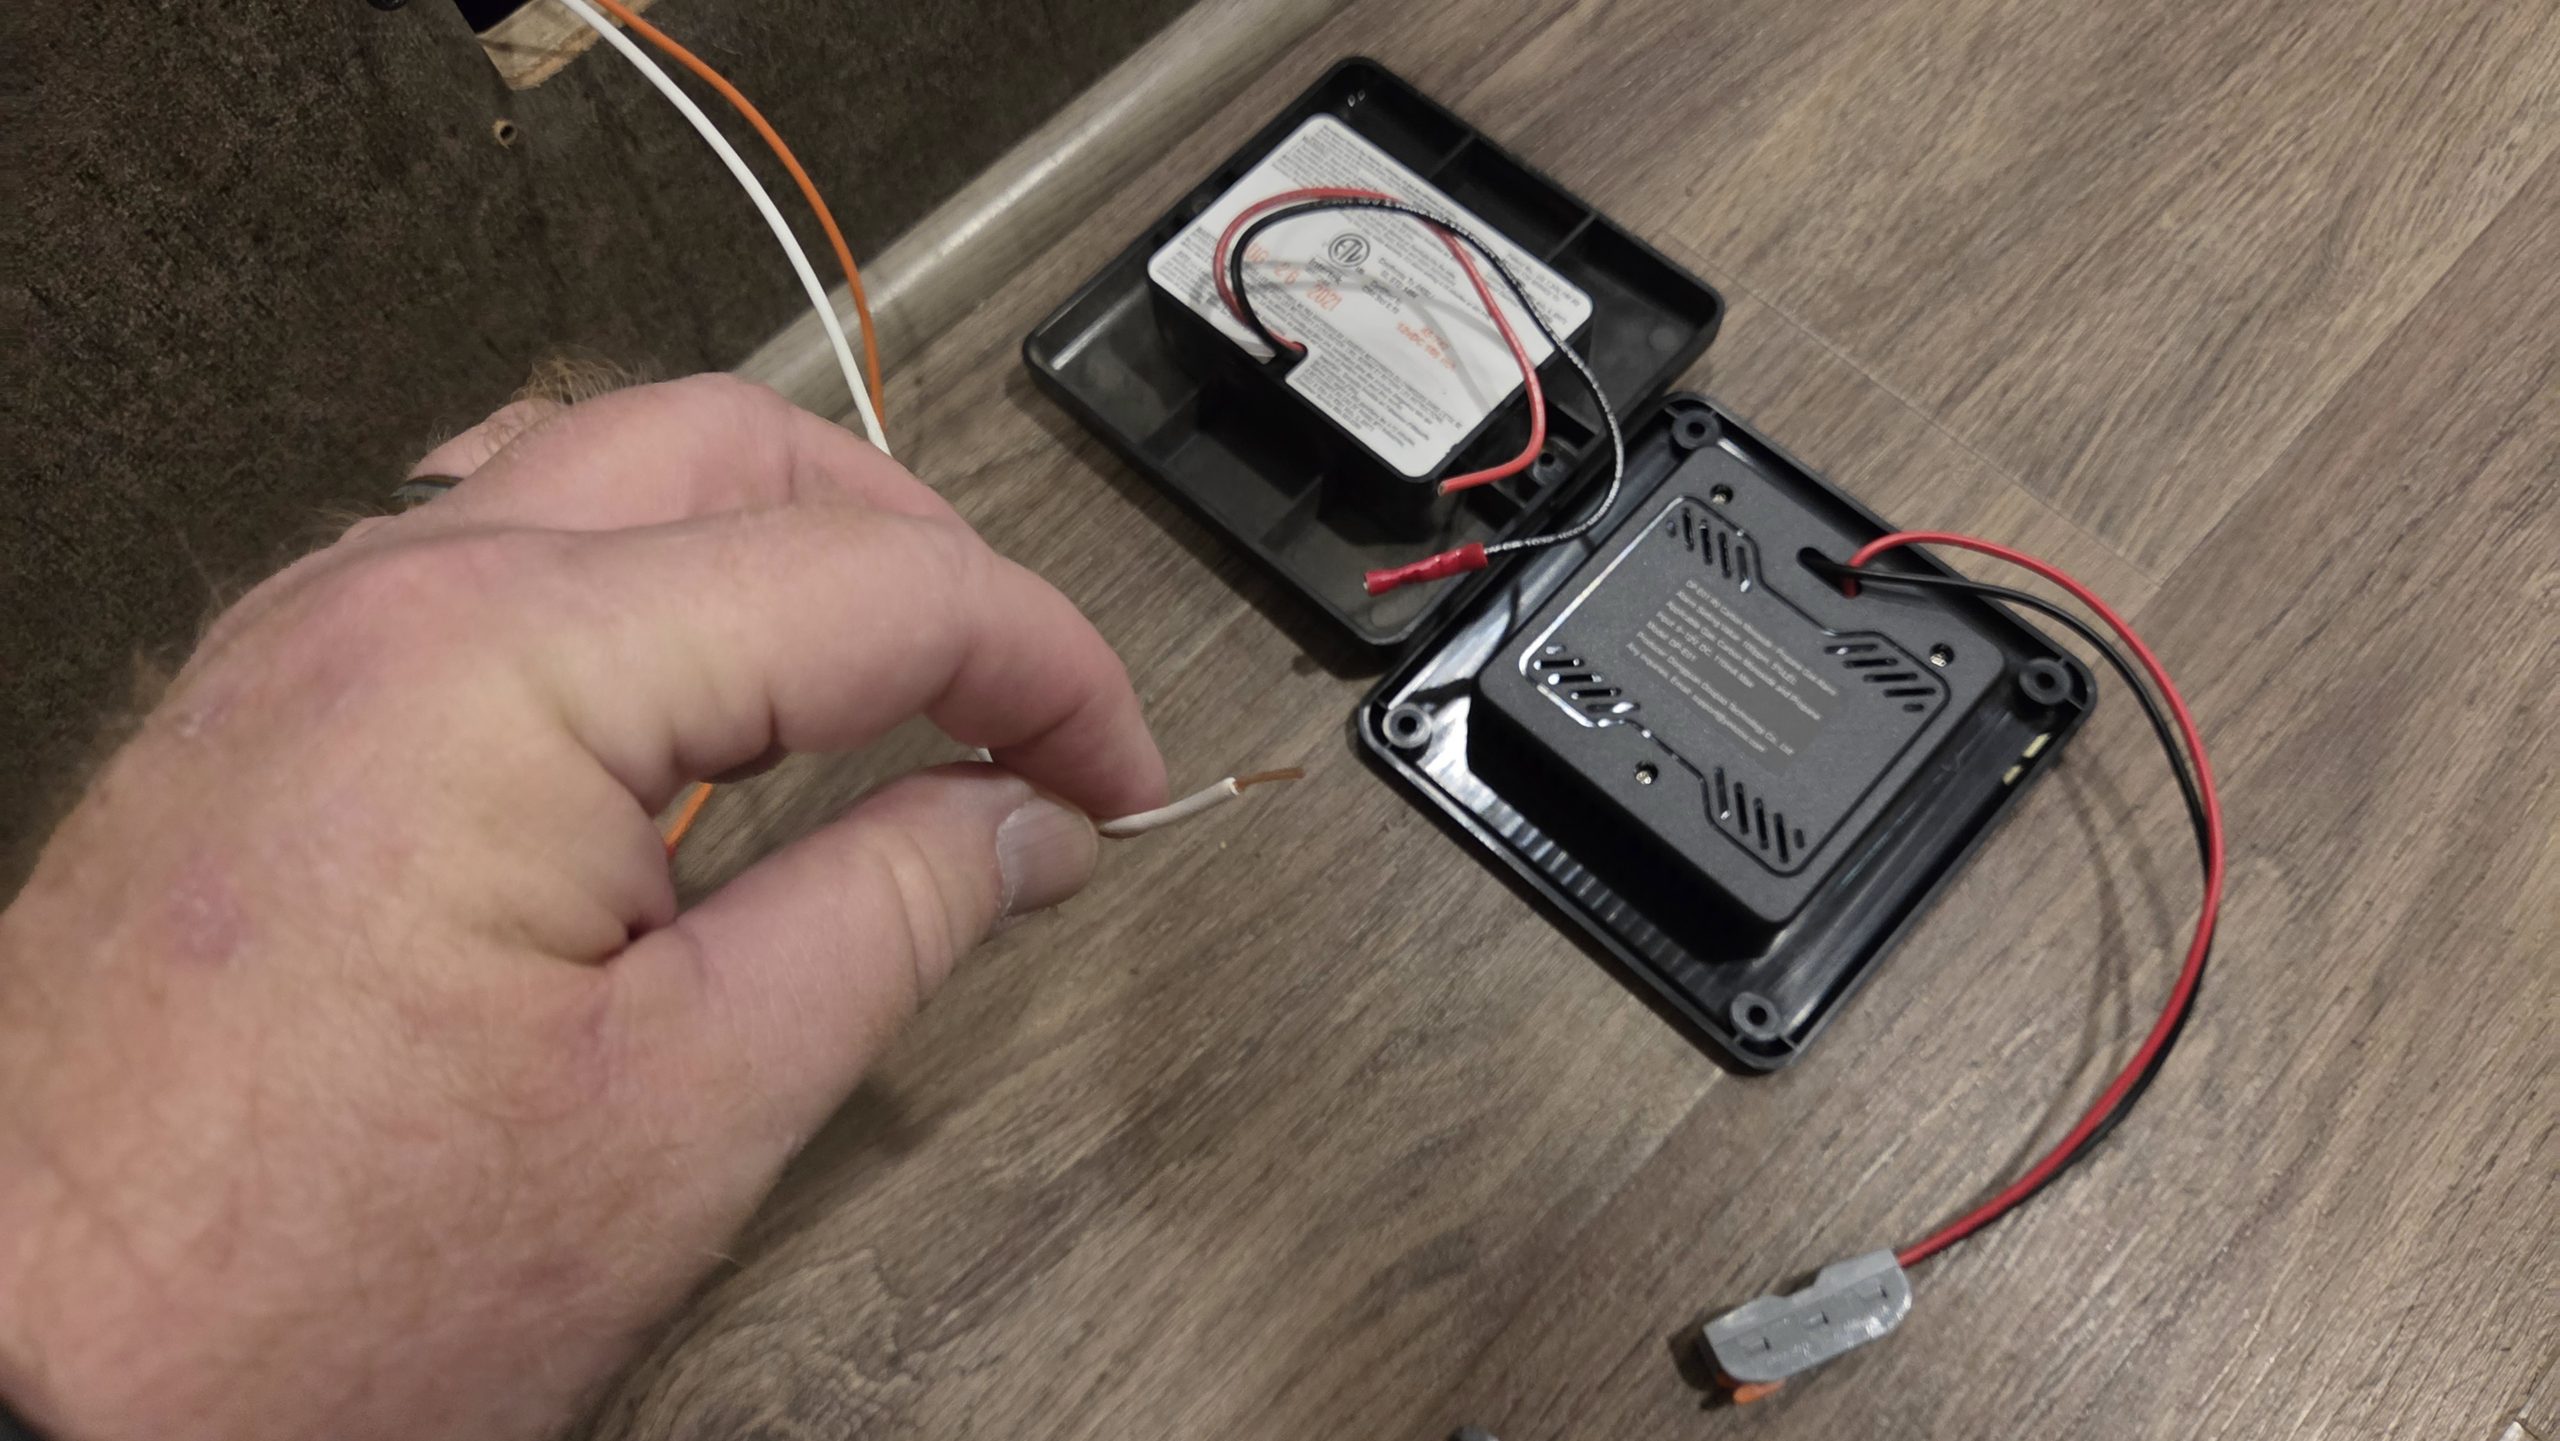
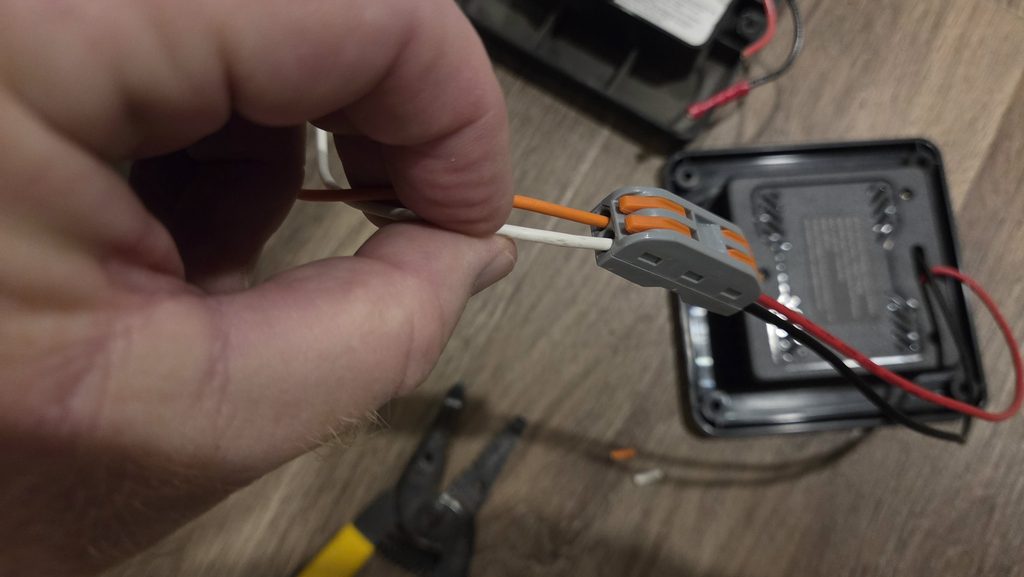
Why We Used Lever Connectors
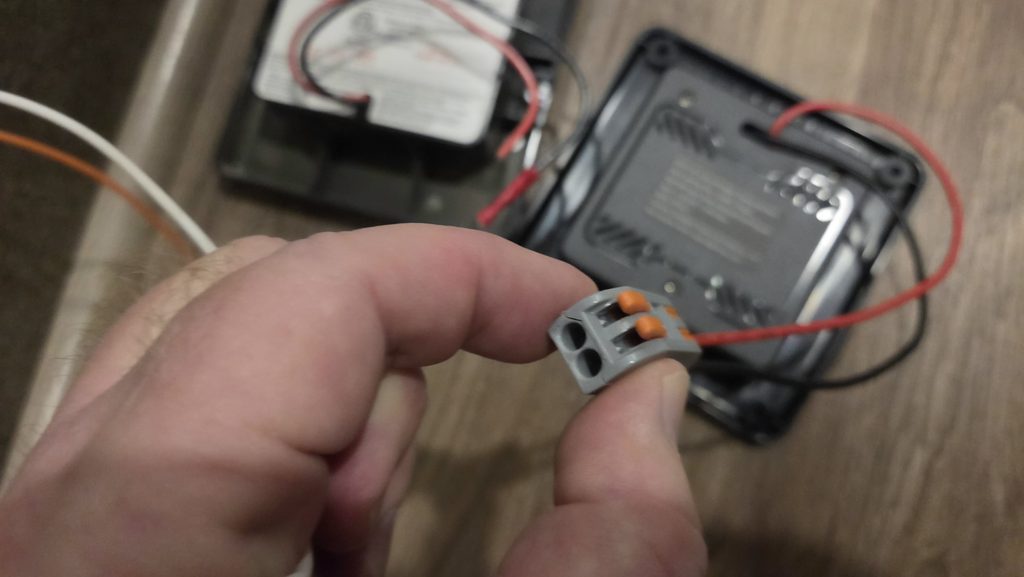
The new detector came with lever-style electrical connectors, which made connecting it to the existing RV wiring quick and easy.
Instead of using wire nuts or crimp connectors, you simply strip the appropriate amount of insulation from the wire, lift the lever, insert the wire, and close the lever to secure it.
They’re also a nice choice for something like a propane and carbon monoxide detector because we already know we’ll eventually have to replace it again.
When that time comes, we shouldn’t have to cut the motorhome’s wiring or shorten it any further. We can turn off the power, open the connectors, remove the detector wires, and connect the next one.
Hopefully detector number four will be just as easy!
Turn off the power, open the connectors, remove the old detector wires, and connect the next one.
Step 4: Mount the New Detector
After making the electrical connections, we carefully tucked the wires and connectors back into the wall.
The new detector covered the existing opening nicely, so all that was left was to position it and secure it with the mounting screws.
It ended up looking like it belonged there—which was exactly what we wanted.
Step 5: Restore Power and Let the Detector Warm Up
Once everything was connected, we restored 12-volt power.
The display immediately came to life.
And that’s when things got interesting.
Why Did Our New RV Propane Detector Show Numbers During Startup?
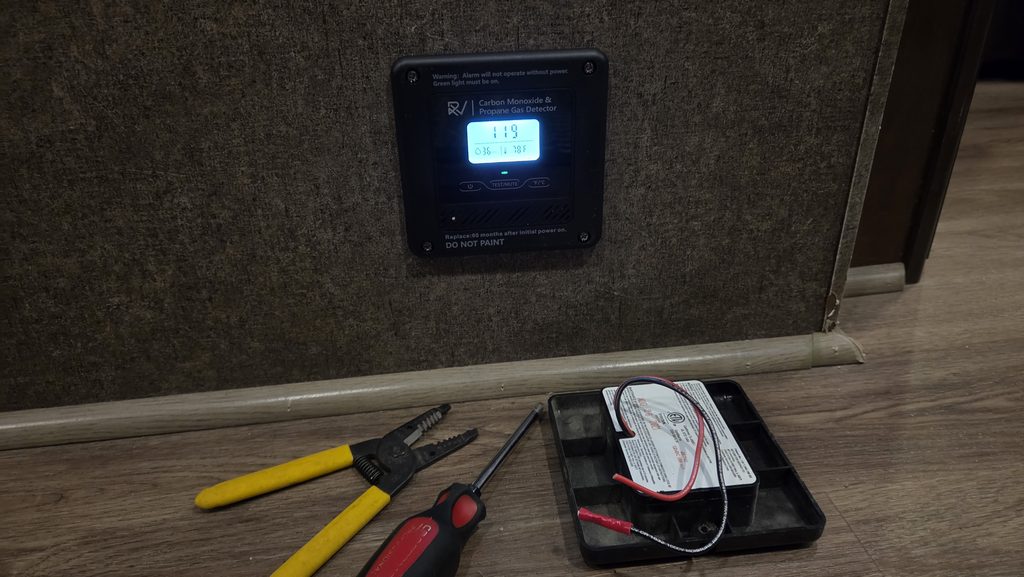
When we first powered up the new detector, the display didn’t immediately show zero.
Instead, the numbers started changing.
We saw readings including:
145… 119… 83… 47…
Seeing numbers like that appear on a brand-new carbon monoxide and propane detector certainly gets your attention.
But according to the owner’s manual, the detector requires a 150-second warm-up period before normal use.
That’s about 2½ minutes.
So we waited.
After the warm-up period, the display settled at:
0
Much better.
If you’re installing this detector—or another model with a startup period—read the instructions before interpreting what appears on the display immediately after power-up.
And if the alarm actually sounds, continues showing a concerning reading after startup, or otherwise indicates a propane or carbon monoxide problem, don’t dismiss it as part of the warm-up process. Follow the manufacturer’s instructions.
Step 6: Test the New Detector
After the warm-up process finished, we used the TEST/MUTE button to verify the alarm was functioning.
Don’t skip this part.
A screen lighting up tells you the detector has power.
It doesn’t replace actually testing the alarm.
Once we verified everything was working properly, the installation was finished.
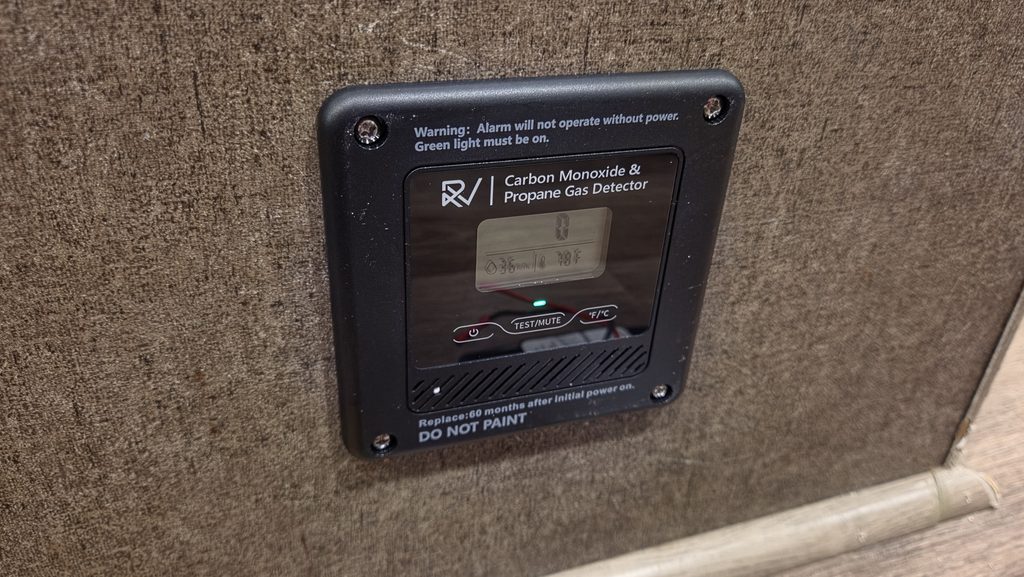
In addition to the gas detection, the new display shows temperature and humidity, and the green status light gives us an easy visual confirmation that the detector has power.
Can You Have a Propane Leak When the Appliances Are Off?
Yes.
This is worth mentioning because of what happened to us.
Neither of our propane appliances was running when our detector started beeping.
Our motorhome only has two things that use propane:
Our on-demand water heater and our furnace.
Both were off.
That was one of the reasons we suspected the detector itself, particularly since we’d already experienced one detector failure and this detector was approximately five years old.
But an appliance being turned off doesn’t necessarily mean the entire propane system is depressurized.
A propane leak could potentially occur elsewhere in the system.
So “nothing propane-powered is running” isn’t enough by itself to dismiss a propane alarm.
What About Carbon Monoxide?
Carbon monoxide is especially dangerous because you can’t see it, smell it, or taste it.
Even though our furnace and water heater weren’t running when our detector started beeping, that doesn’t mean an RV can’t have another source of carbon monoxide. Engines, generators, and other fuel-burning equipment can all produce CO.
That’s one reason a working carbon monoxide detector is such an important piece of RV safety equipment.
The National Park Service has a helpful RV Fire Safety 101 guide that covers carbon monoxide and propane detectors along with several other important RV fire-safety checks.
What Does a Beeping RV Propane Detector Mean?
A beeping detector doesn’t necessarily mean the same thing every time.
Depending on your particular model, different alarm patterns may indicate:
- Propane detection
- Carbon monoxide detection
- Low voltage or power problems
- Detector malfunction
- End of service life
That’s why I wouldn’t simply pull the fuse because a detector is annoying you.
Figure out what it’s trying to tell you.
The owner’s manual for your specific detector should explain its beep patterns, indicator lights, and fault codes.
And if the detector has reached the end of its rated service life, replace it.
Should You Replace an Old RV Propane Detector Before It Starts Beeping?
I would. Or at least have a replacement on hand as that five-year mark approaches.
After replacing ours twice, these aren’t components I want to push beyond their recommended service life.
Our first factory detector didn’t even make it five years.
The second one basically made it exactly as long as it was supposed to.
And our new detector tells us right on the front:
“Replace: 60 months after initial power on.”
So that’s what we’ll do.
Our Detector Replacement Started a Bigger Safety Check
Replacing our propane and carbon monoxide detector got us thinking about the other safety equipment in our motorhome.
Then, just a few days later, someone in our campground lost their RV to a fire. Thankfully, everyone got out safely, but seeing what remained of the RV definitely got our attention.
Our motorhome still had the original smoke detector that came with it, and although we’d always changed the battery at the recommended intervals, the detector itself was more than seven years old.
We decided it was time to replace it.
And instead of simply replacing the one smoke detector our motorhome came with, we added a second smoke detector in our bedroom.
Read Next: RV Smoke Detector Replacement: What We Learned About RV-Approved Alarms
Is Replacing an RV Propane and CO Detector a DIY Project?
For us, absolutely.
If you’re comfortable with basic 12-volt electrical work, this is a pretty manageable RV project.
The basic process was:
Turn off the power → remove the old detector → identify the wiring → connect the replacement → restore power → allow it to warm up → test it → mount it.
No major modifications were required.
If you’re not comfortable working with your RV’s electrical system, there’s nothing wrong with having an RV technician do the installation.
This is safety equipment.
Getting it right matters more than being able to say you installed it yourself.
RV Propane & Carbon Monoxide Detector FAQ
Can I replace my RV propane detector with a different brand?
You don’t necessarily have to replace an RV propane or carbon monoxide detector with the exact same brand, but the replacement needs to be appropriate for RV use and compatible with your RV’s electrical system. Pay attention to the required voltage, wiring, mounting style and dimensions. If your existing detector is recessed into the wall like ours was, also make sure the new detector will cover the existing opening.
Can I use a household carbon monoxide detector in my RV?
We prefer using detectors specifically designed and listed for RV applications. RVs have different conditions than a typical house, including vibration, temperature changes, propane appliances and a 12-volt electrical system. Always check the detector manufacturer’s specifications to make sure the alarm is approved for the application where you plan to use it.
Does an RV propane and CO detector work when you’re not plugged into shore power?
A hardwired 12-volt RV detector can normally receive power from the RV’s house battery system even when the RV isn’t connected to shore power. That’s also why simply unplugging the RV from the campground pedestal may not remove power from the detector when you’re replacing it. Your RV’s electrical system may differ, so verify that power has actually been disconnected before working on the wiring.
Can a low RV battery cause a propane or CO detector to beep?
Depending on the detector, low or abnormal 12-volt supply voltage can trigger a fault or warning indication. Before assuming a beeping detector has simply failed, check the alarm pattern in the owner’s manual and verify that the detector is receiving the voltage specified by the manufacturer. Never assume an alarm is only a low-voltage warning until you’ve ruled out an actual propane or carbon monoxide hazard.
Should I write the installation date on a new RV detector?
That’s a simple idea that can make future maintenance much easier. If the detector doesn’t automatically record its activation date, writing the installation date somewhere appropriate on the back of the unit or keeping it in your RV maintenance records gives you an easy way to know how old it is. Always follow the manufacturer’s replacement interval rather than relying only on how the detector looks or whether it has started beeping.
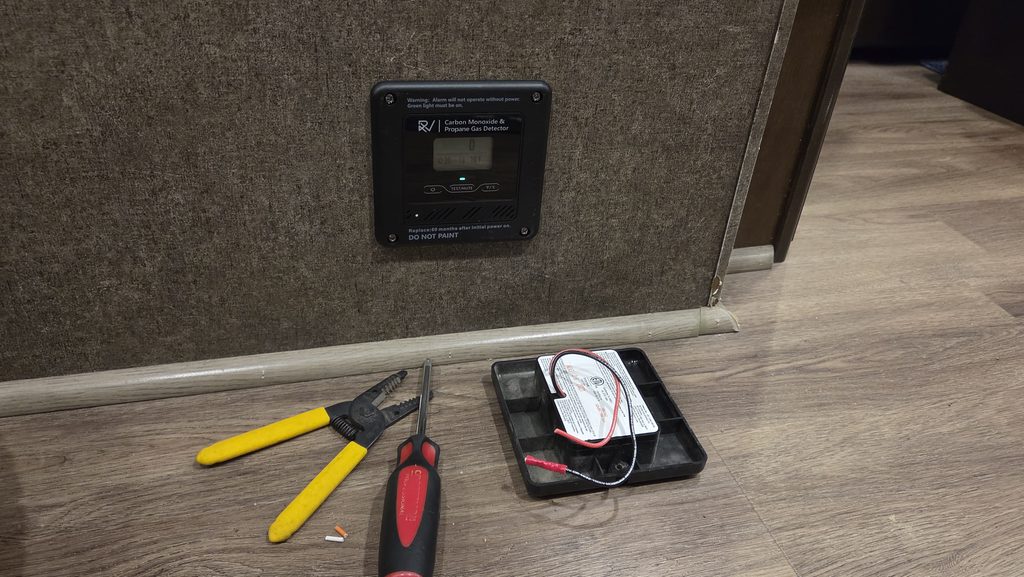
Detector Number Three Is Installed
And just like that, detector number three is installed.
The new detector fits the existing opening, the wiring is tucked away, the green power light is illuminated, and after completing its startup process, the display settled at:
0
Exactly what we wanted to see.
Hopefully, we won’t have to think about it again for another five years.
And if you want to know the secret to avoiding that dreaded detector beeping in the middle of the night?
Apparently it’s still:
Work the overnight shift! LOL
When Was the Last Time You Checked Yours?
If you own an RV, here’s a quick maintenance job you can do today:
Go look at your propane and carbon monoxide detector.
How old is it?
If you don’t know, check the label or remove it and look for a date on the back.
If you’re approaching the manufacturer’s replacement interval, you might want to replace it before it decides to remind you.
Because apparently, these things have an internal clock that knows exactly when you’re trying to sleep.