
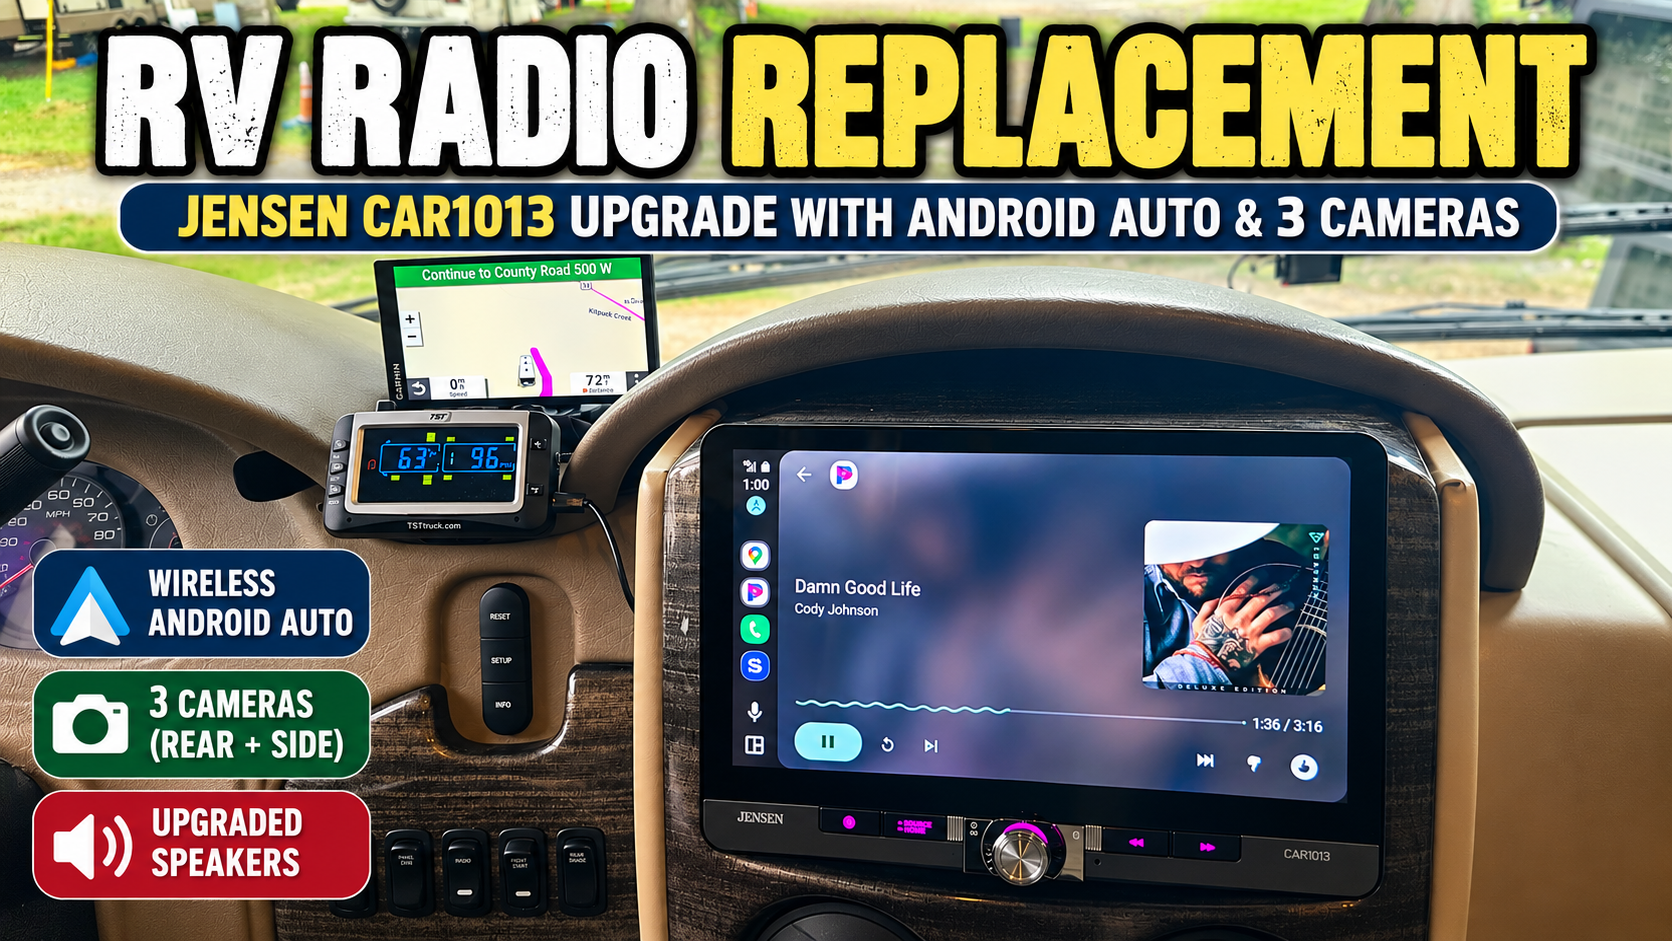
How we replaced our frustrating Axxera radio, upgraded our speakers, added wireless Android Auto, and kept all three of our motorhome cameras working
Our RV radio replacement was an upgrade we’d been thinking about for quite a while. When we bought our 2019 Thor Challenger 37YT, one of the things I was never particularly happy with was the factory-installed Axxera radio.
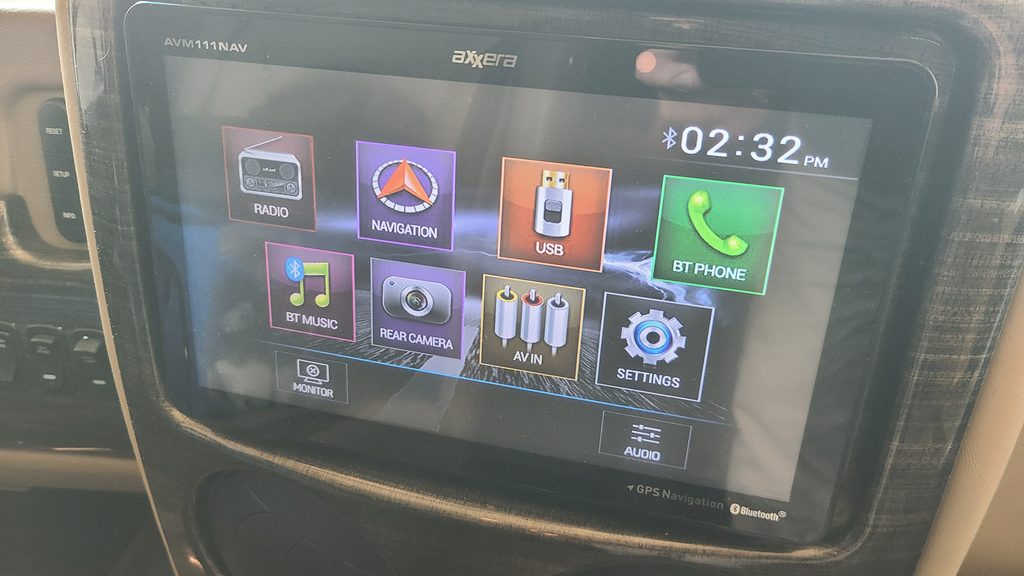
It had a large 10.1-inch screen, built-in navigation, Bluetooth, and connections for our motorhome’s rear and side cameras. On paper, it had everything we needed.
But our problems with it started on our very first big trip.
We were approaching a campground near Washington, D.C., when the navigation suddenly froze. We were only a few miles from our destination, but we were also dealing with rush-hour traffic on a busy interstate.
Not exactly where you want your navigation to freeze while driving a 38-foot motorhome!
I ended up having to pull over along the interstate and reset the radio/navigation system to get it working again.
Shortly afterward, we purchased a dedicated Garmin RV GPS and stopped relying on the Axxera for navigation.
We continued using the radio for music, Bluetooth, and our cameras. But years later, when the driver’s-side speaker started cutting out, the rear-camera picture began disappearing, and the entire radio started restarting when we hit bumps, I’d finally had enough.
It was time for an upgrade.
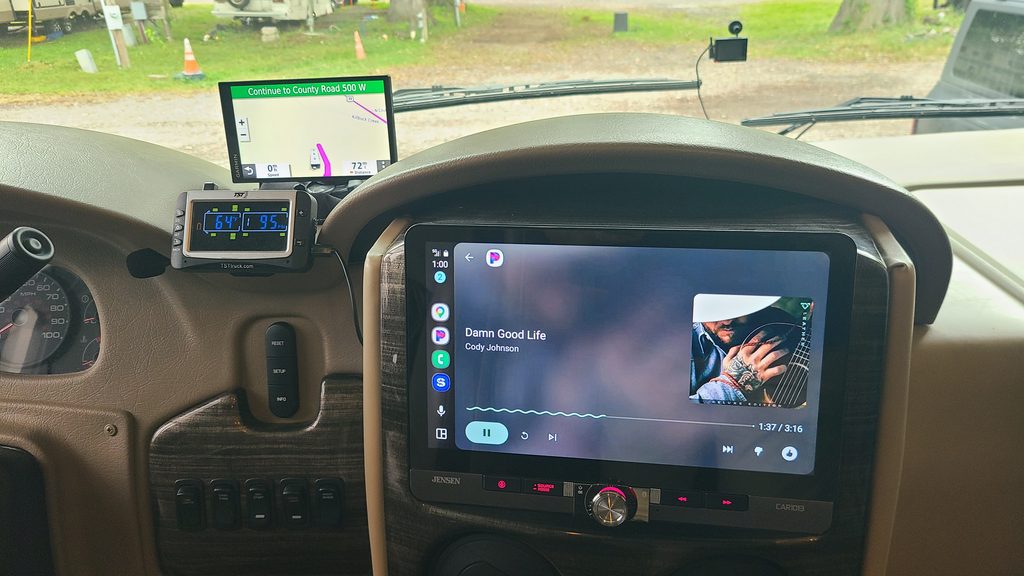
We chose the Jensen CAR1013, a 10.1-inch multimedia receiver with wireless Android Auto and Apple CarPlay.
Of course, replacing a radio in a motorhome isn’t quite as simple as swapping one in a regular car. We figured out our motorhome’s factory wiring, built an adapter, and retained our three-camera system.
Here’s how it all came together.
- Why We Replaced Our Factory RV Radio
- Why We Chose the Jensen CAR1013
- Upgrading Our Motorhome Speakers
- Building Our Own Plug-In Wiring Adapter
- Keeping Our Three-Camera System Working
- The Best Part: Continuous Rear-Camera Viewing Still Works
- Setting Up Wireless Android Auto
- Adjusting the Jensen’s Audio Settings
- One Interesting Discovery: Our Radio Runs on the House Batteries
- Don’t Forget to Secure the Wiring
- Was Our RV Radio Replacement Worth It?
- Frequently Asked Questions About Replacing an RV Radio
- Planning Your Own RV Radio Upgrade?
This post contains affiliate links. As a participant in Amazon Associates and various affiliate programs, we are compensated when qualifying purchases are made through our referral links at no additional cost to you. Full Disclosure
Why We Replaced Our Factory RV Radio
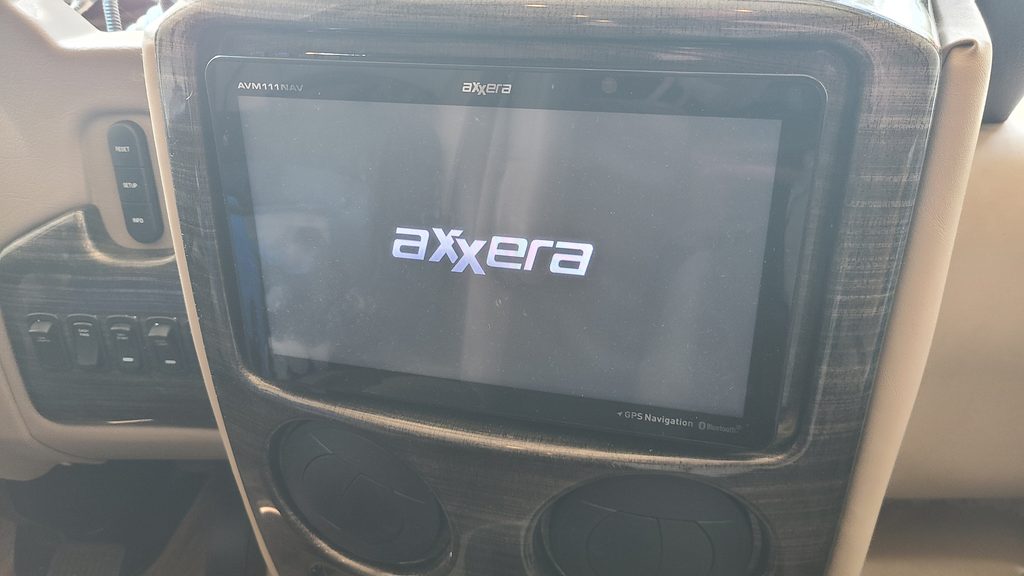
Our Challenger originally came with an Axxera AVM111NAVLH.
Although it had plenty of features, our experience with it wasn’t particularly good.
Our First Problem: Navigation Froze Near Washington, D.C.
On our first big trip in the motorhome, we were heading toward a campground near Washington, D.C., when the Axxera’s built-in navigation suddenly froze.
We were only a few miles from the campground, but we were also in rush-hour traffic on a busy interstate.
I had to pull over along the interstate and reset the radio/navigation system before we could continue.
That experience convinced us we needed a different navigation solution.
Shortly afterward, we bought a Garmin RV-specific GPS.
Besides giving us a separate navigation system, the Garmin provided RV-specific routing that could account for our motorhome’s dimensions and help us avoid roads that weren’t suitable for a large RV.
We continued using the Axxera for everything else, but navigation was now the Garmin’s job.
Then the Radio Started Acting Up
Eventually, we began experiencing a completely different set of problems.
First, the driver’s-side speaker would intermittently stop working.
Then the rear-camera picture started disappearing and unexpectedly returning to the radio screen.
Finally, the entire radio would sometimes shut down and restart when we hit a bump.
That last issue was particularly frustrating.
We like to keep our rear camera displayed while driving, especially when we’re flat towing our Ford Bronco. Being able to glance at the screen and see what’s happening behind the motorhome gives us an extra level of awareness.
Having the camera unexpectedly disappear wasn’t something I wanted to keep dealing with.
After the earlier navigation incident and now these glitches, I was ready to replace the Axxera.
But the Radio Wasn’t Necessarily the Problem
Before installing the new Jensen, I pulled the dash apart to investigate.
That’s when I discovered that the main wiring connector on the back of the Axxera had worked partially loose.
Suddenly, the intermittent problems made a lot more sense.
I firmly reseated the connector and took the motorhome on a roughly 200-mile test drive.
Not one glitch.
The speaker stayed on, the rear camera worked, and the radio didn’t restart.
That strongly suggested the loose connector was responsible for the recent problems.
We don’t know what caused the original navigation freeze, and there’s no reason to assume the loose connector was responsible for that earlier incident.
But even though reseating the connector resolved the later glitches, I still wanted to replace the radio.
We’d already moved to a dedicated Garmin for navigation, and I wanted a more modern multimedia receiver with wireless Android Auto.
So we moved forward with the Jensen.
Why We Chose the Jensen CAR1013
After looking at several replacement radios, we settled on the Jensen CAR1013 10.1-inch multimedia receiver.
It offered several features we wanted:
- A large 10.1-inch touchscreen.
- Wireless Android Auto and Apple CarPlay.
- Bluetooth hands-free calling.
- Front and rear camera inputs.
- Physical volume control.
- Adjustable audio settings and a 10-band equalizer.
We found the Jensen on Amazon for approximately $307.49.
This is the radio we installed in our 2019 Thor Challenger 37YT. It gives us a large 10.1-inch touchscreen, wireless Android Auto and Apple CarPlay, Bluetooth, camera inputs, and a physical volume knob.
Check the Jensen CAR1013 on Amazon →
One important difference between the Jensen and our original Axxera is navigation.
The Jensen doesn’t replace our Garmin RV GPS. Instead, it allows us to display compatible phone navigation apps, such as Google Maps, through Android Auto.
We still use the Garmin for RV-specific routing.
That gives us two useful systems: the Garmin for navigating the motorhome and the Jensen for entertainment, phone integration, and cameras.
What About the Screen Size?
Both radios have a 10.1-inch screen, so we weren’t giving up display size.
The Jensen also has an adjustable floating screen, which allowed us to position it in the Challenger’s dash.
And having a physical volume knob was a feature I appreciated.
Upgrading Our Motorhome Speakers
Since we were already replacing the radio, we decided to upgrade the speakers, too.
Our motorhome has four speakers connected to the dash radio: two up front and two mounted over the couch.
We chose Kenwood speakers for both locations.
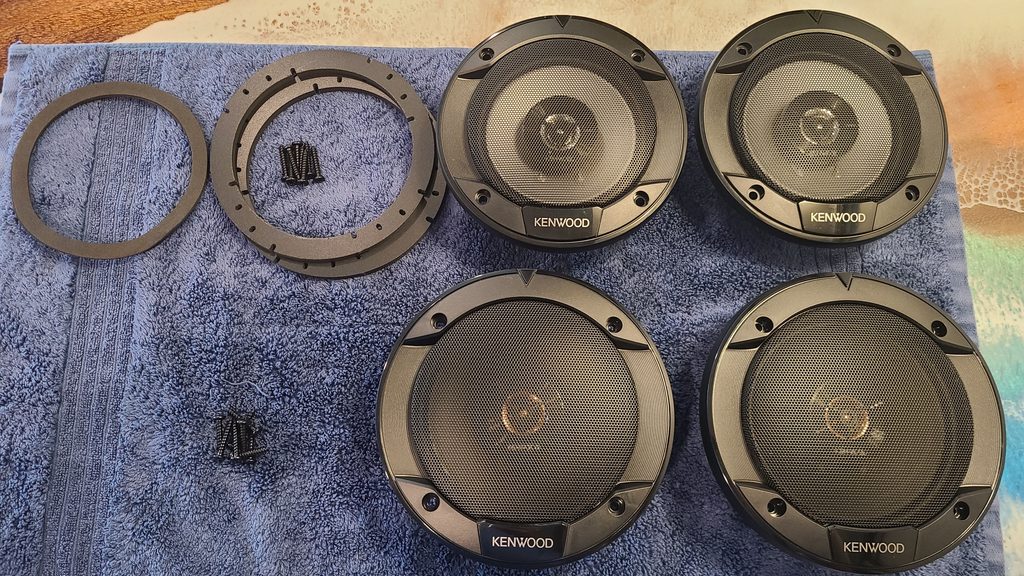
Up front, we installed Kenwood KFC-1666R 6.5-inch 2-way speakers. Over the couch, we installed Kenwood KFC-1366S 5.25-inch 2-way speakers.
Kenwood KFC-1666R
Kenwood KFC-1366S
Mounting depth was an important consideration.
We had approximately 2.25 inches available for the front speakers and only about 1.75 inches for the speakers over the couch. For the installation, we also used uxcell 5.1-inch EVA foam speaker rings and 1/4-inch-thick 5.25-inch speaker spacers to get everything mounted the way we wanted.
Used to provide the additional clearance we needed for the 5.25-inch speakers.
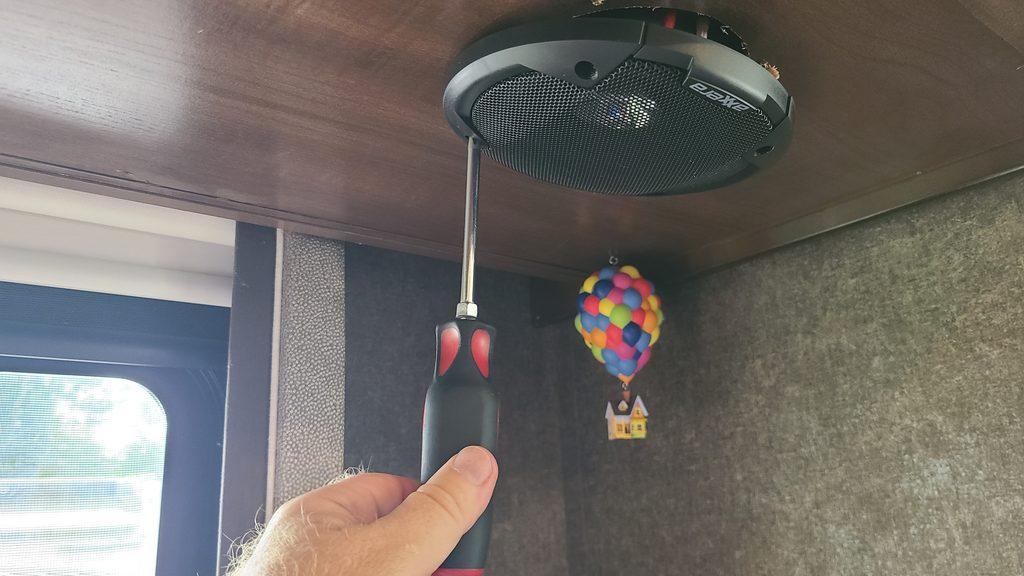
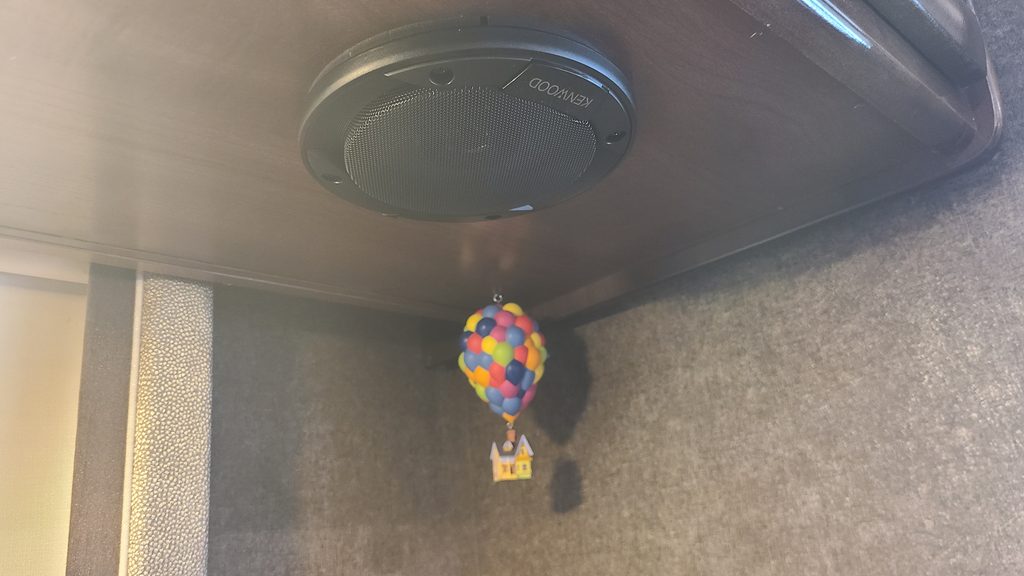
The Jensen powers all four speakers directly, so we didn’t add an external amplifier. Once the radio was installed, I used the Jensen’s Balance/Fader controls to test each speaker individually. Front left, front right, rear left, and rear right all worked correctly.
That was a satisfying moment after building the wiring adapter ourselves!
Building Our Own Plug-In Wiring Adapter
This was probably the most hands-on part of the project.
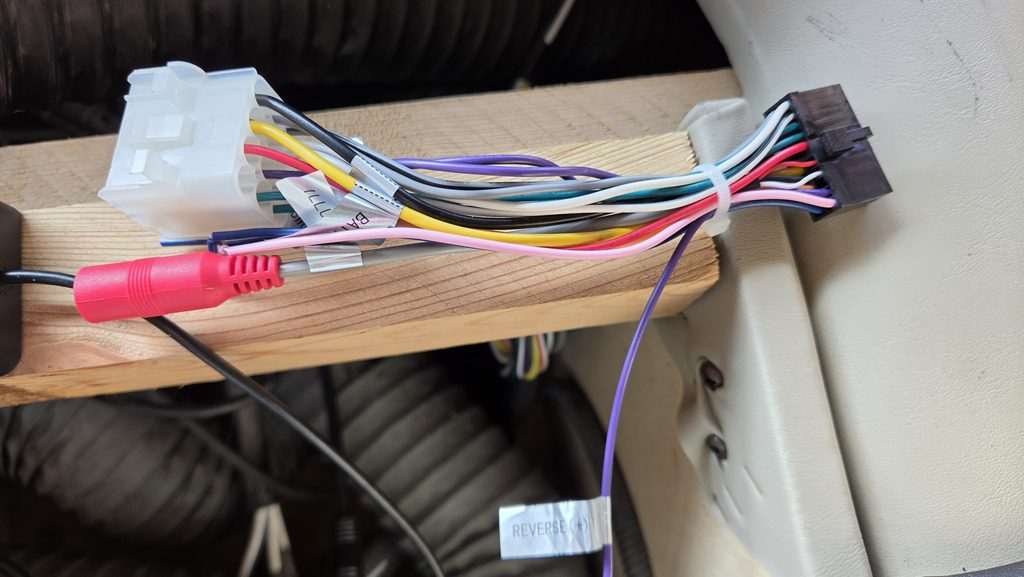
I wanted to install the Jensen without cutting apart our motorhome’s original wiring harness.
That way, if we ever decide to remove the Jensen or install another radio, the original motorhome wiring will still be intact.
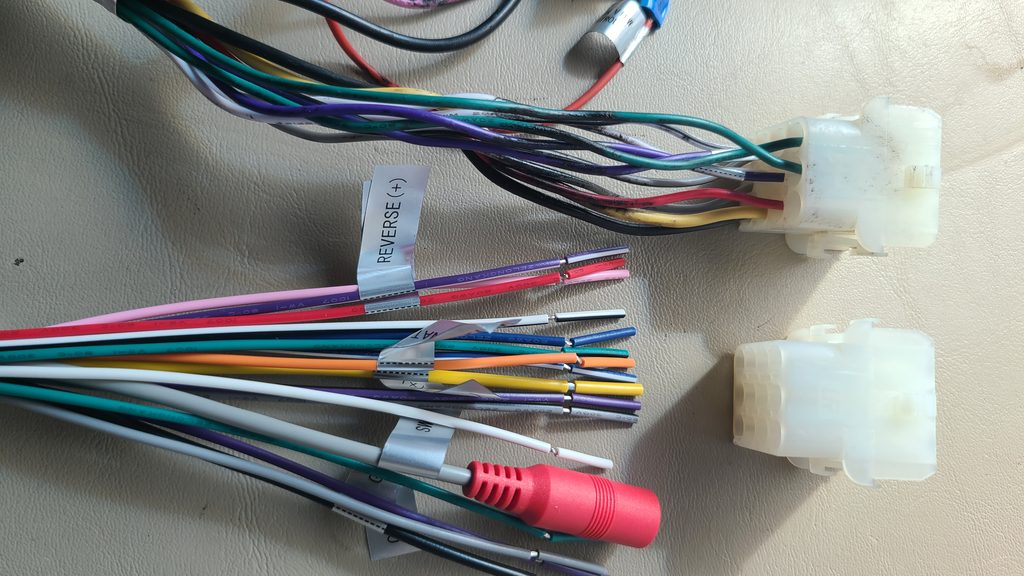
After examining the connectors behind the Axxera, we identified the main connector family as TE Connectivity’s Universal MATE-N-LOK.
The Thor-side connector has female sockets, while the Axxera-side connector has male pins.
We needed to duplicate the male-pin side.
The Connector and Tools We Used
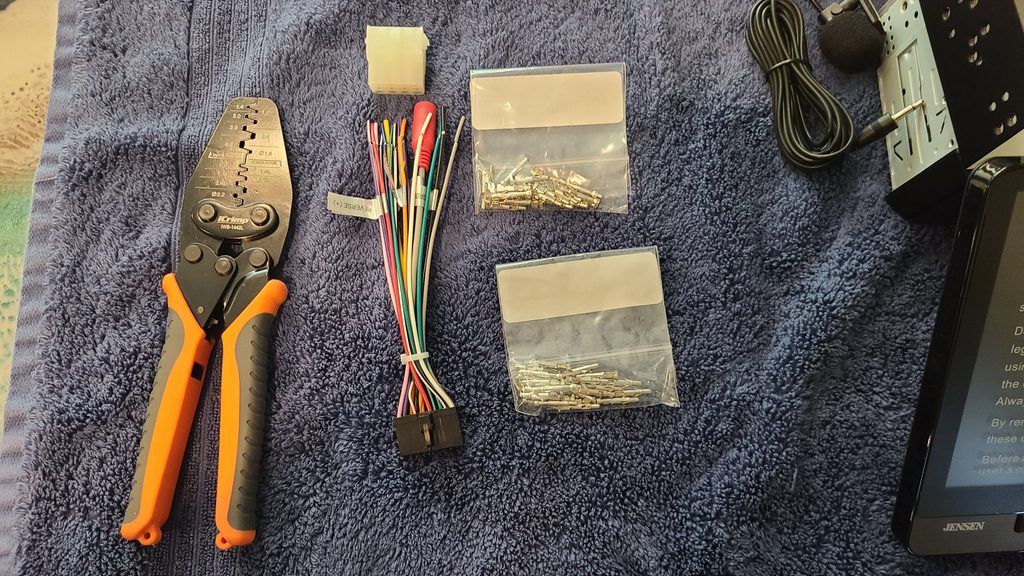
Our adapter used the following components:
The Universal MATE-N-LOK housing we used to mate with the original Thor wiring harness.
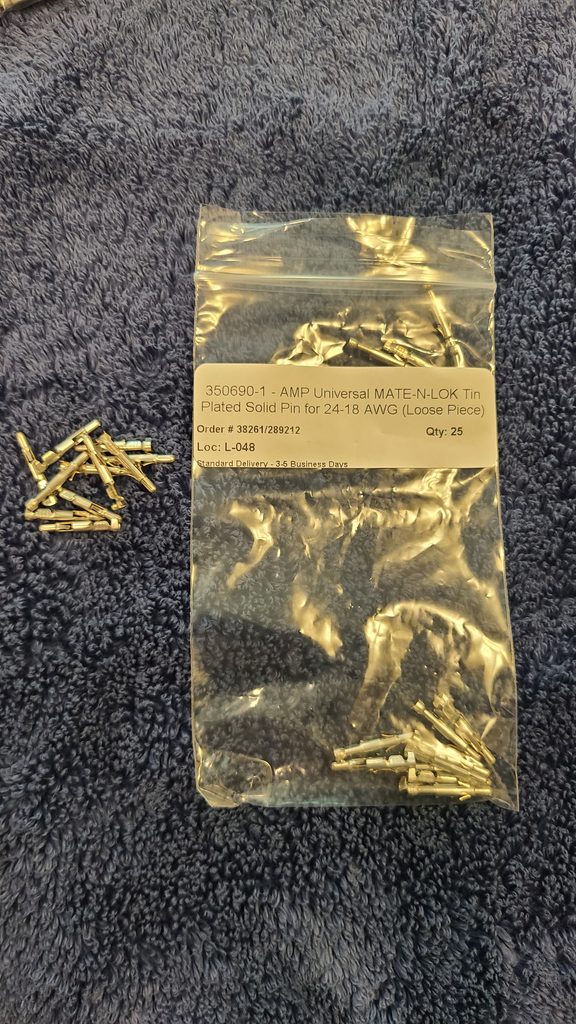
24–18 AWG male contacts used for the appropriate smaller-gauge wiring.
The housing has 12 positions arranged in a 3-by-4 configuration. We used the smaller 350690-1 contacts for the appropriate smaller-gauge wiring and the larger 350547-1 contacts for the heavier power wiring.
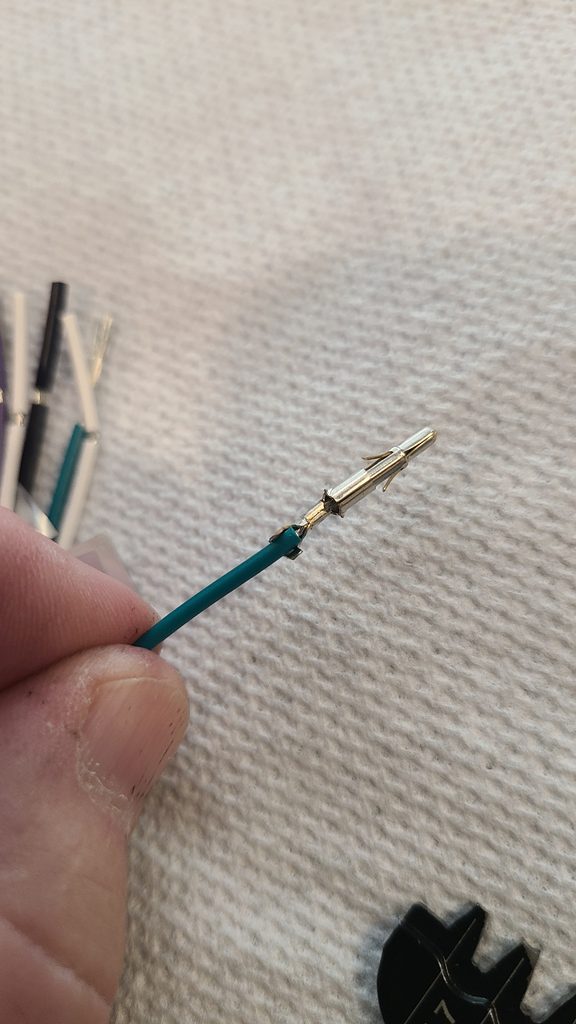
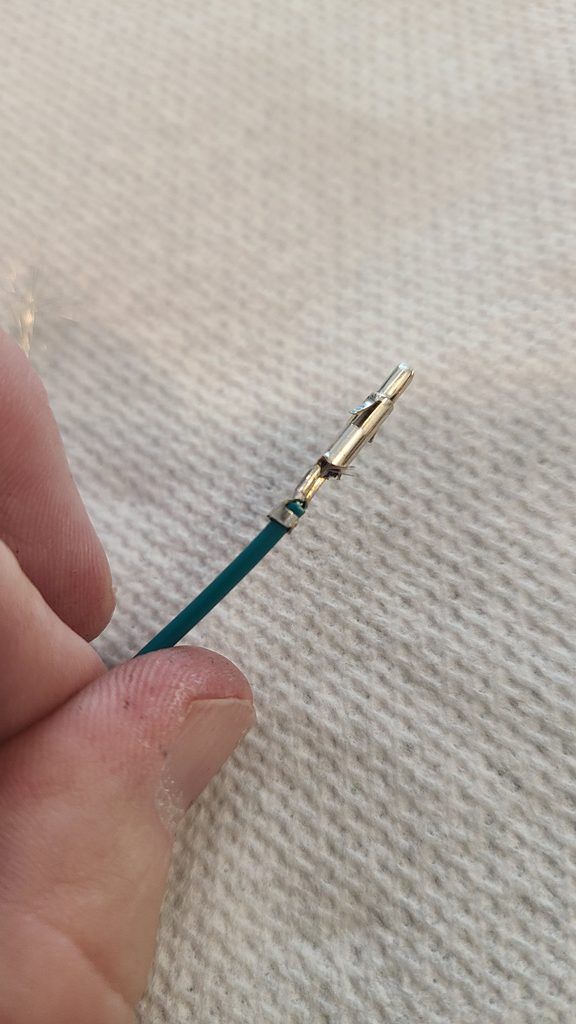
Before assembling the adapter, I practiced crimping a few terminals to make sure I was getting secure crimps before working on the actual harness.
Matching the Wiring
The adapter carries the Jensen’s main power, ground, and four speaker channels.
Here are the standard Jensen wire colors:
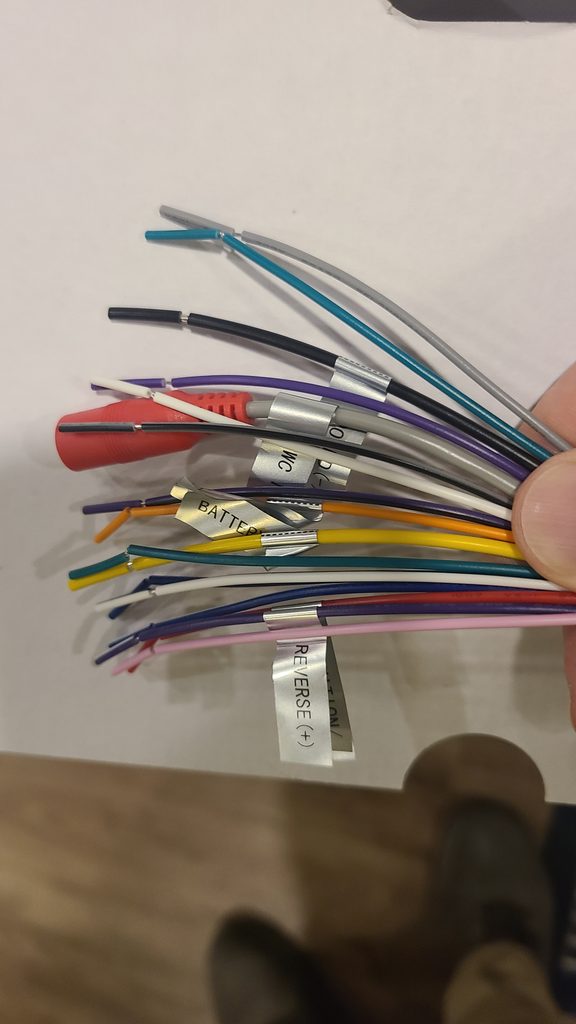
After assembling the adapter, I checked the contacts and made sure each one was properly seated.
Then we connected the new harness to our motorhome wiring and plugged it into the Jensen.
The radio powered right up!
Keeping Our Three-Camera System Working
This was the part of the installation I was most concerned about.
Our Challenger has three exterior cameras:
- A rear camera.
- A left-side camera.
- A right-side camera.
The side cameras are integrated into the motorhome’s mirrors.
We wanted the Jensen to retain the original automatic camera behavior.
When we activate the left turn signal, the screen should display the left-side camera. The right signal should display the right-side camera. And shifting into reverse should bring up the rear camera.
But there was another feature I wasn’t willing to give up.
I wanted to keep the rear camera displayed continuously while driving.
That’s especially useful when we’re towing the Bronco.
Finding Thor’s Camera Switcher
While tracing the wiring behind the dash, we found a separate camera switcher labeled CSW3014T.
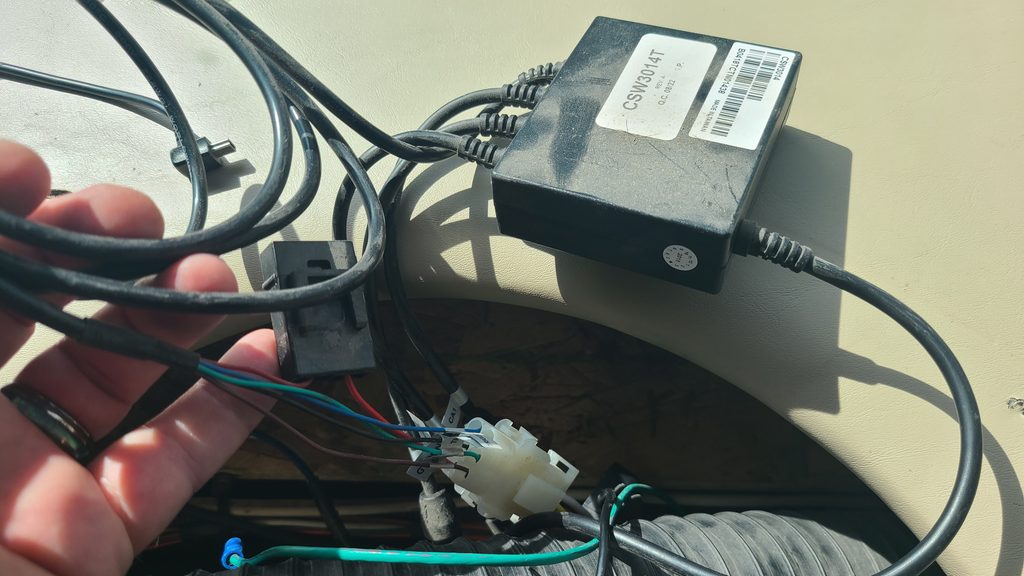
This module handles the selection between the three cameras.
Rather than sending three separate video feeds to the radio, the switcher sends the selected camera feed through a single video output.
That was good news.
It meant we didn’t need to replace the existing camera system or find a radio with three independent camera inputs.
We needed to connect the switcher’s video output and monitor-trigger signal to the Jensen.
Connecting the Camera Video
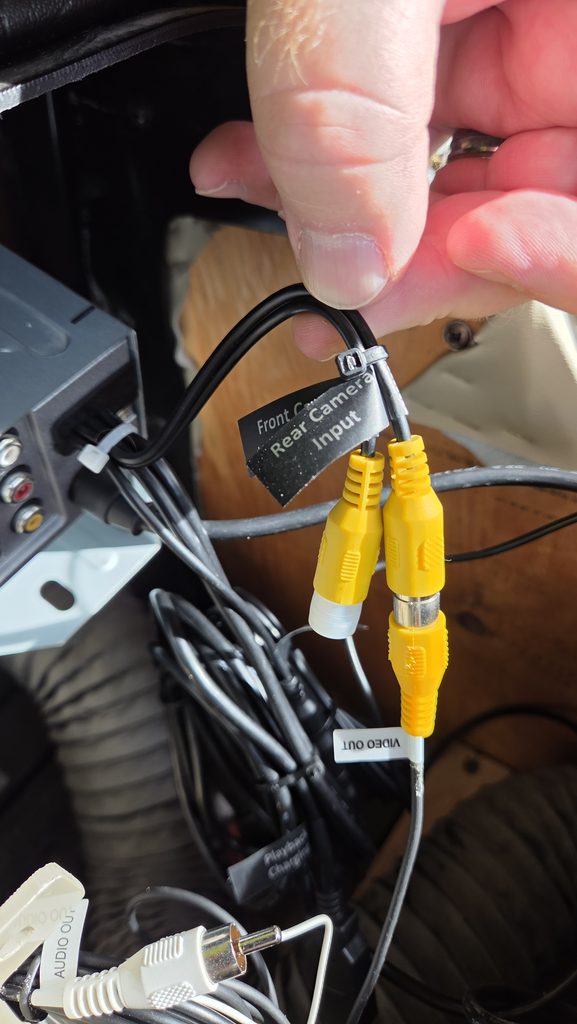
After tracing the wiring, we identified the yellow RCA carrying the video output from the CSW3014T.
We connected that RCA to the Jensen’s Rear Camera Input.
The existing white RCA was not needed for the Jensen’s camera input, so we left it disconnected.
Before connecting the automatic trigger, I manually selected Camera on the Jensen.
There it was: our rear-camera picture.
That confirmed the video connection was working.
Figuring Out the Monitor-Trigger Wire
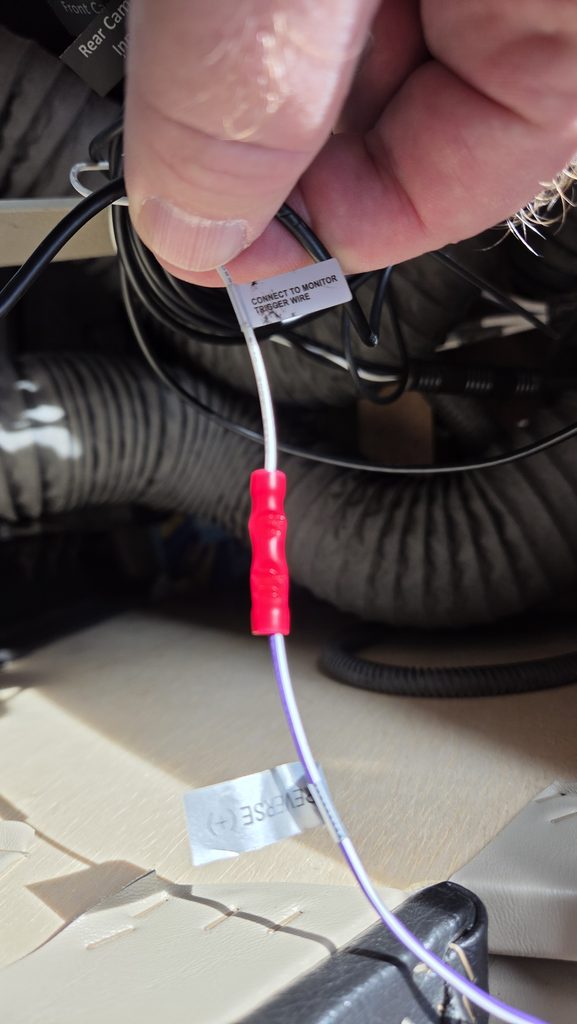
The camera switcher also has a white wire labeled:
CONNECT TO MONITOR TRIGGER WIRE
Rather than guessing what it did, we tested it with a multimeter.
Here’s what we measured:
We connected that wire to the Jensen’s purple/white REVERSE (+) input.
Then we tested it.
The Jensen automatically switched to the appropriate camera when we activated the turn signals or selected reverse.
It worked!
Important: This wiring arrangement worked with our particular Thor Challenger and CSW3014T switcher. Before attempting a similar installation, verify your own camera switcher’s video output, trigger polarity, voltage, and radio requirements. Don’t connect an unidentified wire based solely on its color.
The Best Part: Continuous Rear-Camera Viewing Still Works
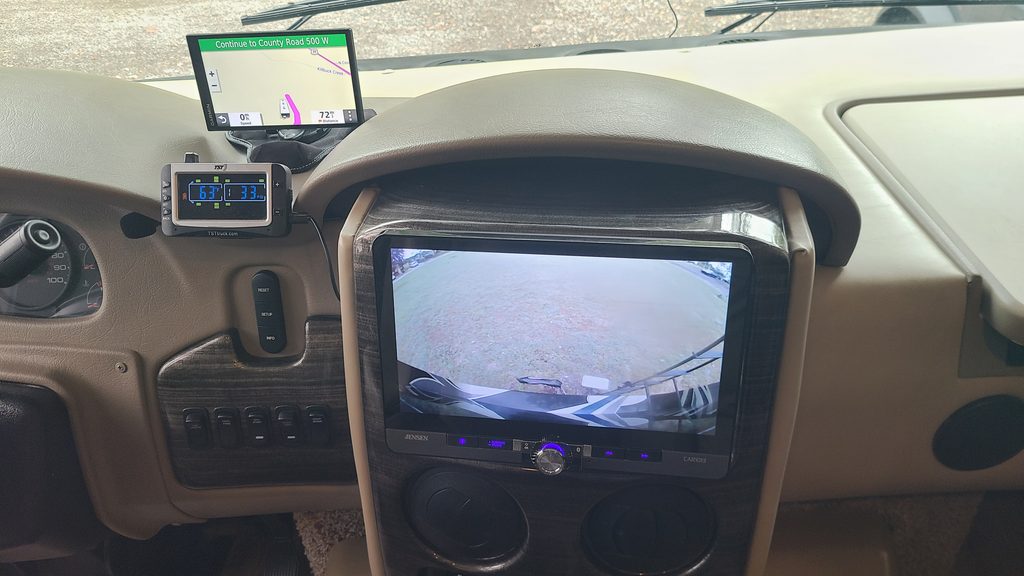
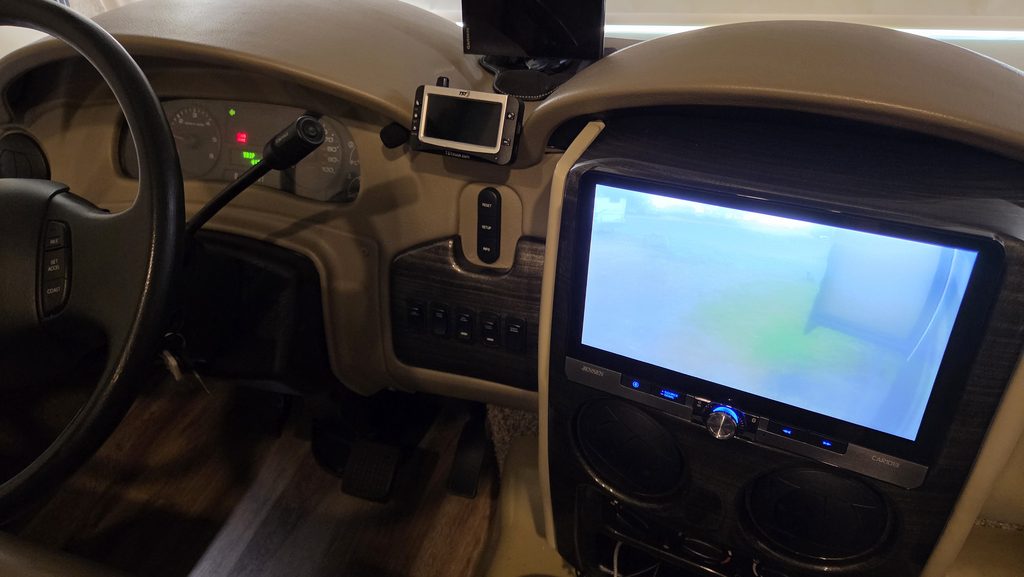
With the Jensen on its Camera screen, the rear camera stays displayed while we’re driving. When we activate either turn signal, the appropriate side camera temporarily takes over. Cancel the signal, and the Jensen returns to the rear-camera view.
We didn’t need a Y-splitter, additional relay, or replacement camera switcher.
Thor’s original CSW3014T handles the camera selection, while the Jensen displays whichever camera the switcher sends.
For us, that’s exactly what we wanted.
One Thing I Wish the Jensen Had
There is one small inconvenience.
The CAR1013 doesn’t have a dedicated physical button for immediately opening the rear camera.
To display it manually, we go to the Home screen and select Camera.
Once it’s displayed, however, we can leave it there, and the turn-signal cameras continue working.
I’d love a one-touch rear-camera button, but it’s not a dealbreaker.
Between the Jensen, our Garmin RV GPS, and our TST 507 tire pressure monitoring system, we have a lot more information available from the driver’s seat than we did when we first bought the motorhome.
Setting Up Wireless Android Auto
Once the wiring and cameras were working, we moved on to the fun stuff.
The Jensen connected to our phone and brought up wireless Android Auto.
Now we can use Google Maps, listen to music, make phone calls, and access compatible apps on the large touchscreen.
And because Android Auto is wireless, we don’t have to plug in the phone every time we drive.
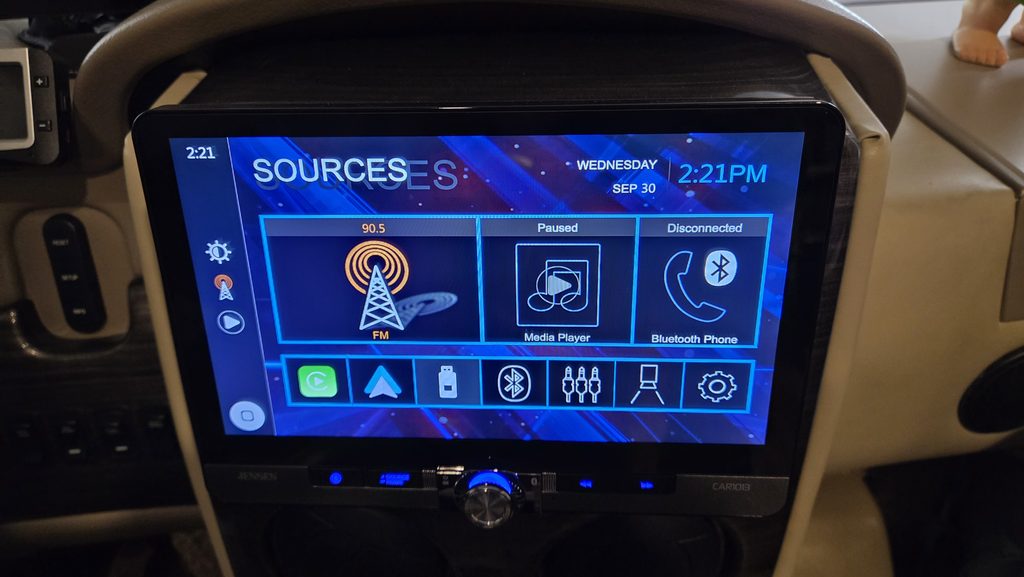
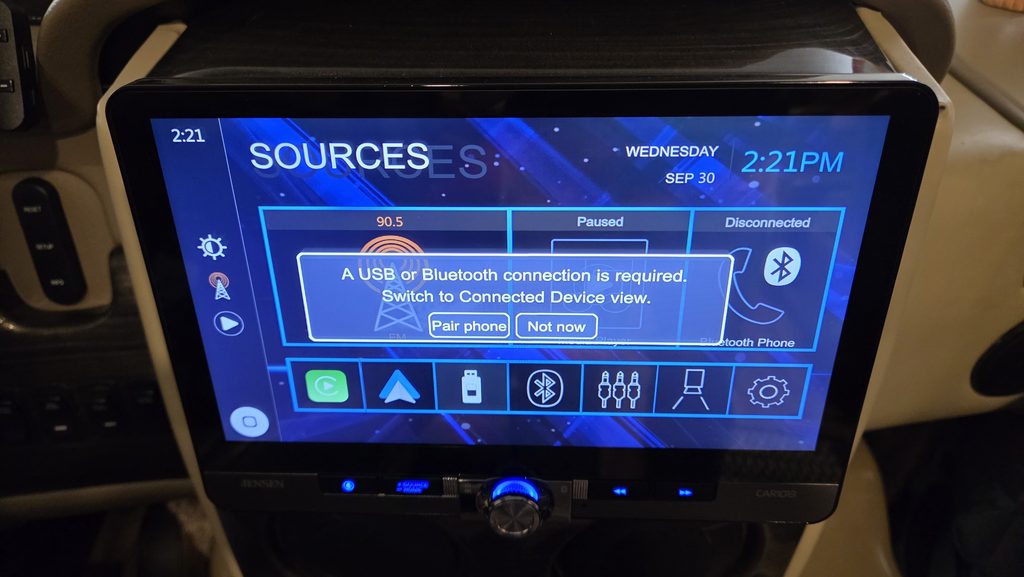
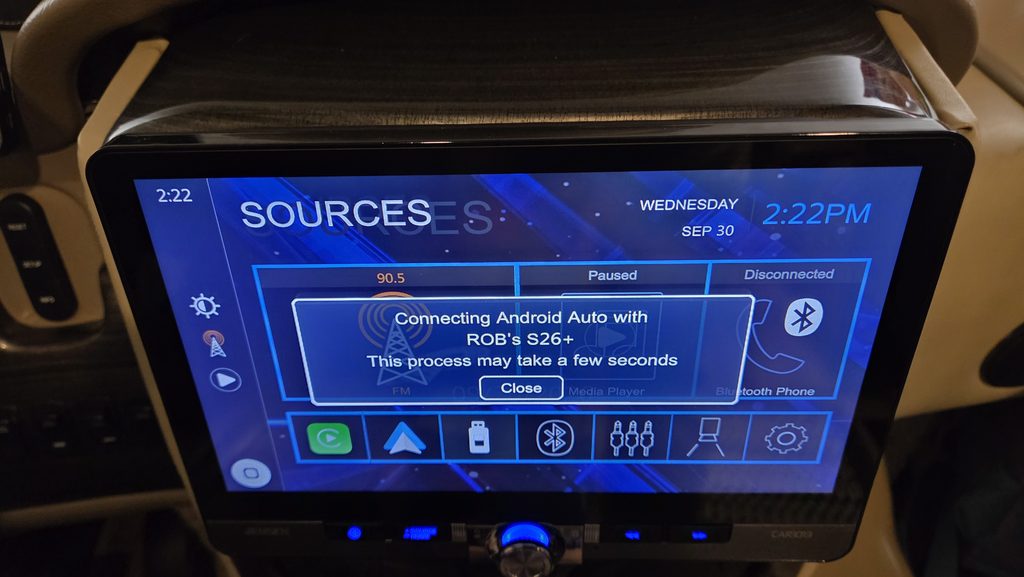
We still have our Garmin RV GPS for RV-specific navigation.
I like having both options available.
Installing the External Microphone
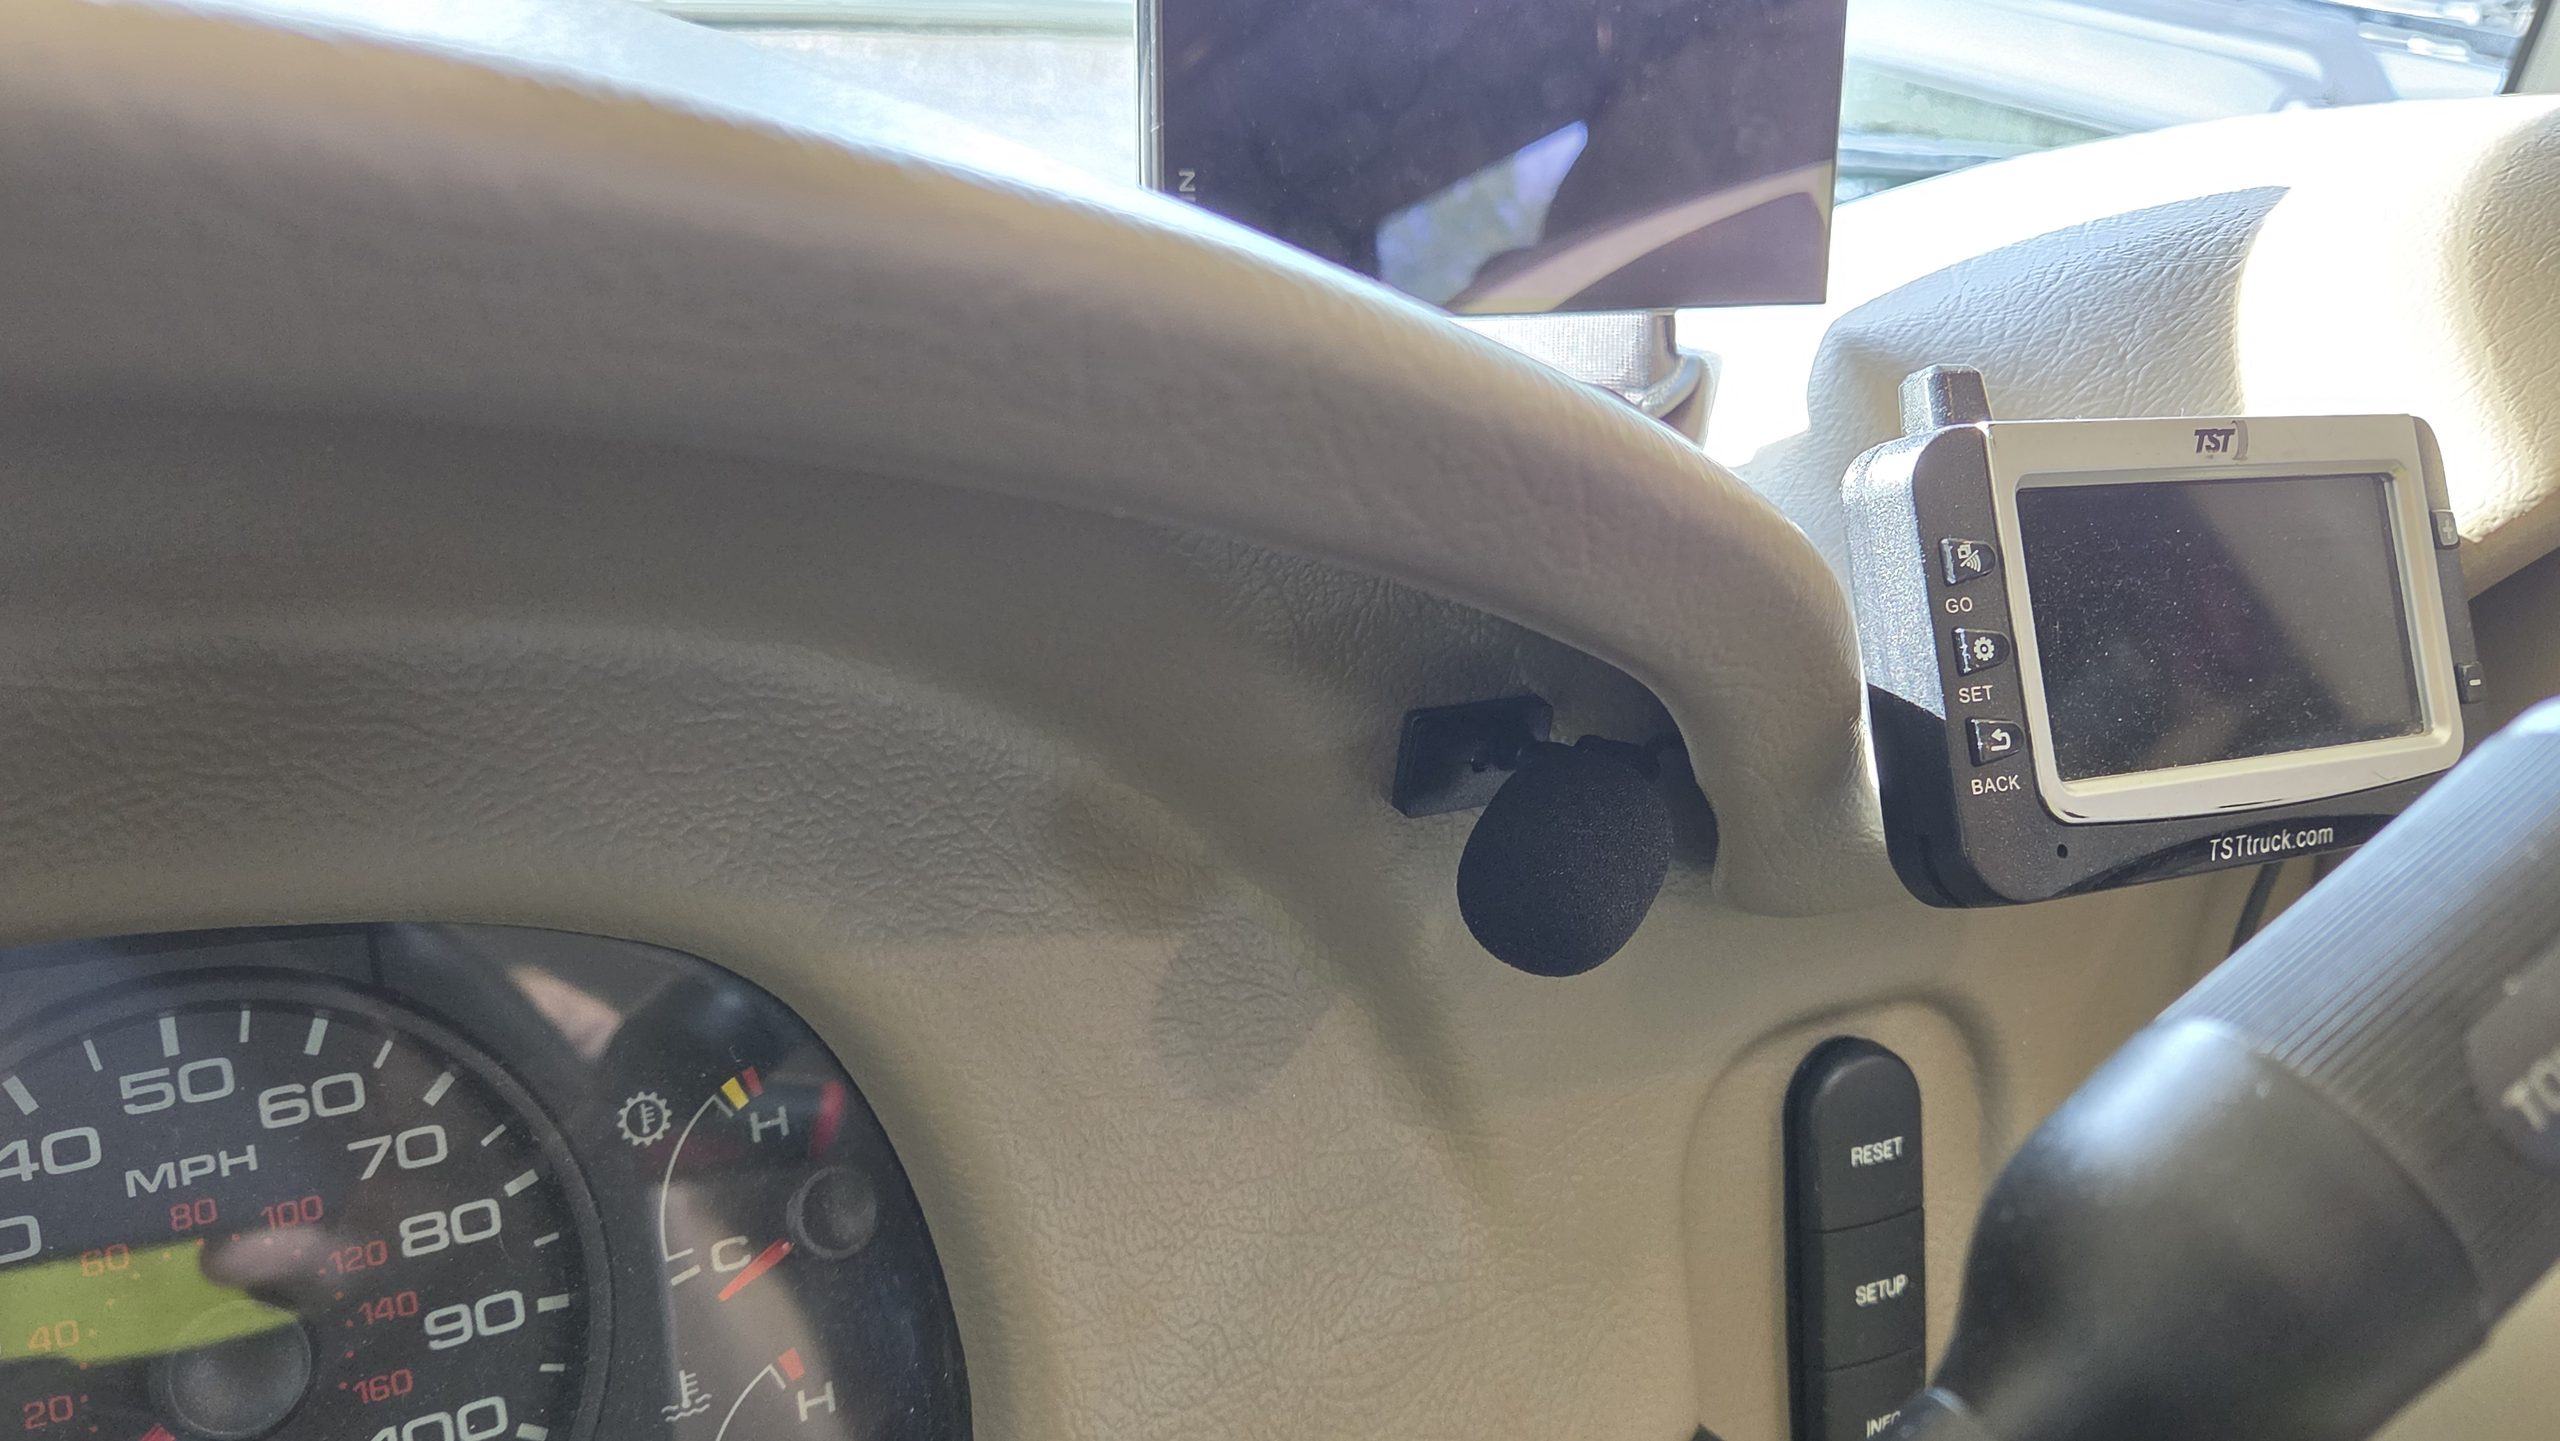
The CAR1013 includes an external microphone for hands-free calls and voice commands.
We routed the microphone toward the driver’s side of the dash.
The important things were keeping it close enough to pick up my voice, avoiding direct HVAC airflow, and keeping it away from anything that might rattle.
Motorhomes can be noisy, especially at highway speeds, so microphone placement matters.
What About the USB Ports?
The Jensen has two USB connections: one for Apple CarPlay/Android Auto and another for playback and charging.
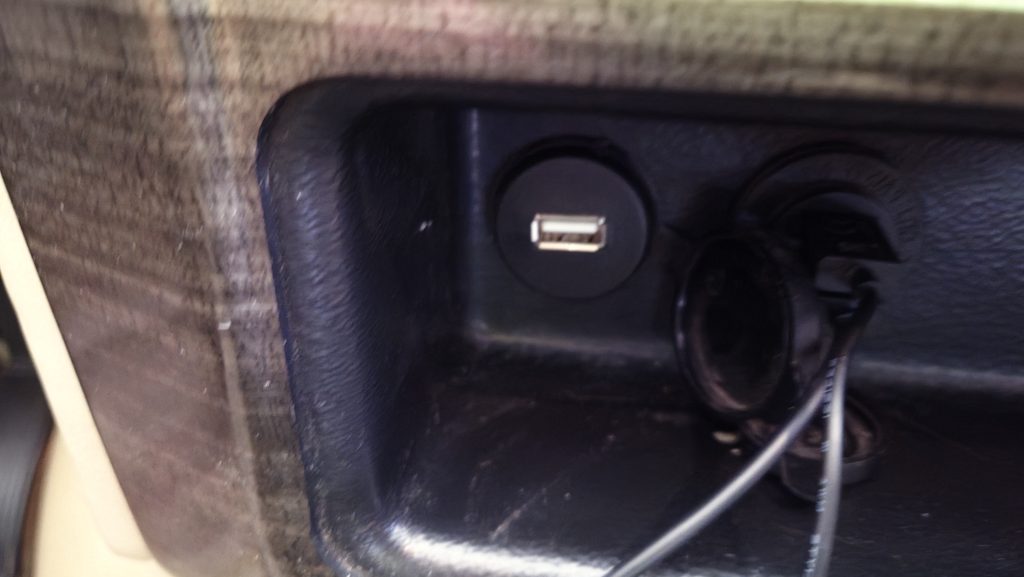
Our Challenger already had a USB port in the front dash cubby, so we wanted to retain an accessible connection.
We’re also looking at adding a dual USB charging outlet to make it easier to charge devices from the dash.
Adjusting the Jensen’s Audio Settings
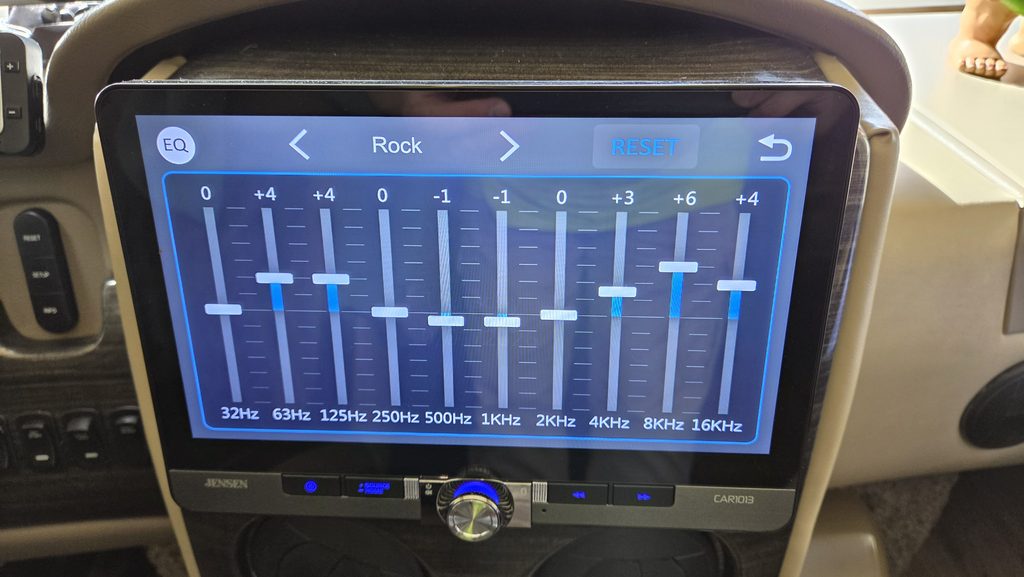
The CAR1013 includes a 10-band equalizer, Balance/Fader controls, loudness, and subwoofer settings.
Since we don’t have an external subwoofer, we turned the subwoofer setting off.
We also used the Balance/Fader controls to verify that all four Kenwood speakers were wired correctly.
Then we started experimenting with the EQ presets.
The factory Rock preset has noticeable boosts to the bass and treble.
It’s worth comparing the presets with familiar music before building a custom EQ curve.
For now, we’re using the presets and will adjust the EQ further as we spend more time listening to the system on the road.
One Interesting Discovery: Our Radio Runs on the House Batteries
While working through the wiring, I discovered something I hadn’t realized before.
Our motorhome’s radio receives power from the motorhome’s house battery system rather than the chassis battery.
That can be useful when we’re parked and want to listen to music without drawing from the battery used to start the engine.
The Jensen has separate constant-power and switched-power connections, so those circuits still need to be configured correctly.
We’re also looking into one minor detail.
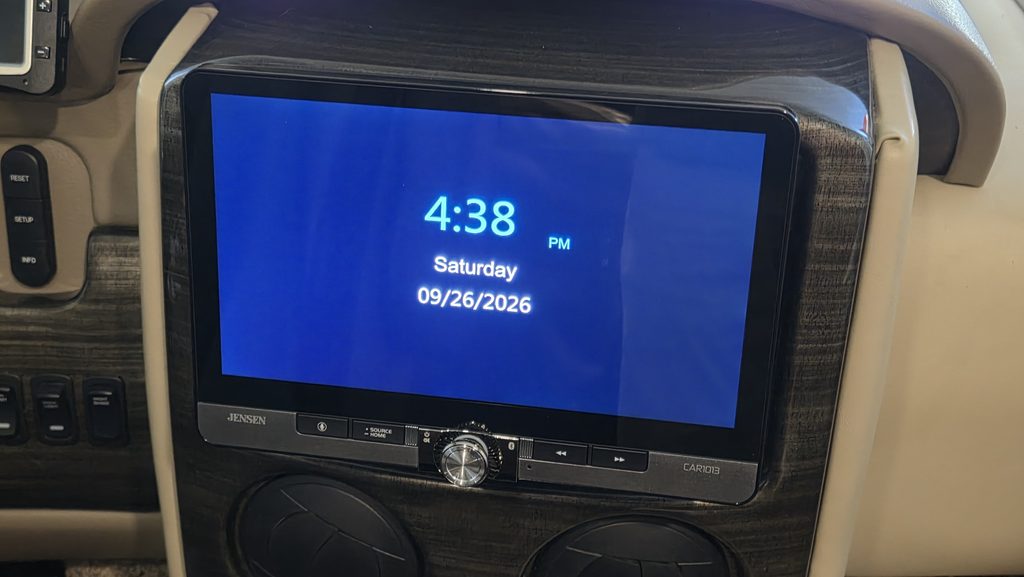
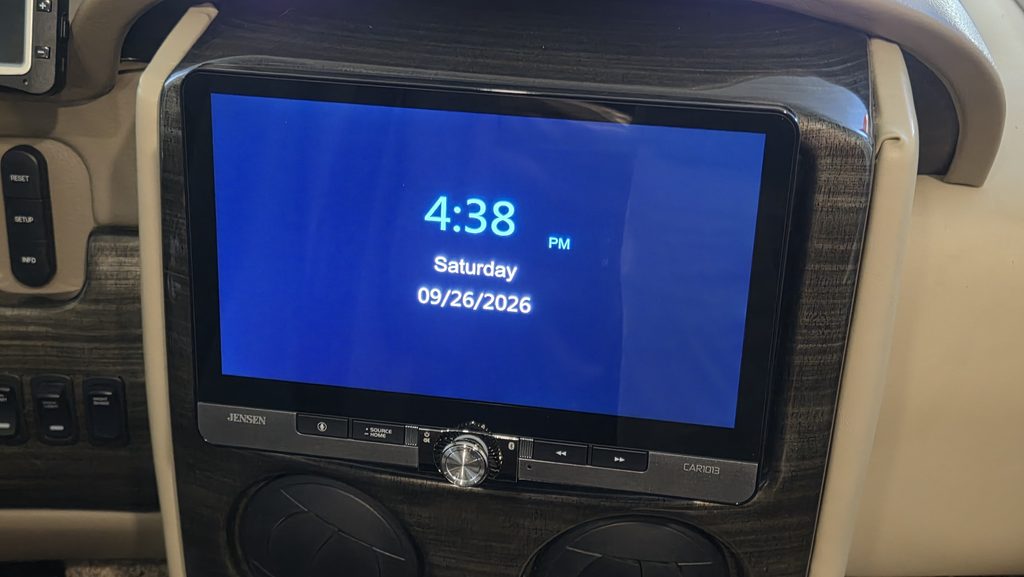
When the Jensen is turned off, it displays the time and date. I’d prefer the screen to go completely dark when we’re not using it.
One thing I wondered about after installing the Jensen was whether that big 10.1-inch screen would stay illuminated whenever the motorhome had power.
When we turn the Jensen off, the radio shuts down, and the screen changes to a simple display showing the time, day, and date.
At first, I thought that screen was going to remain on all the time.
It doesn’t.
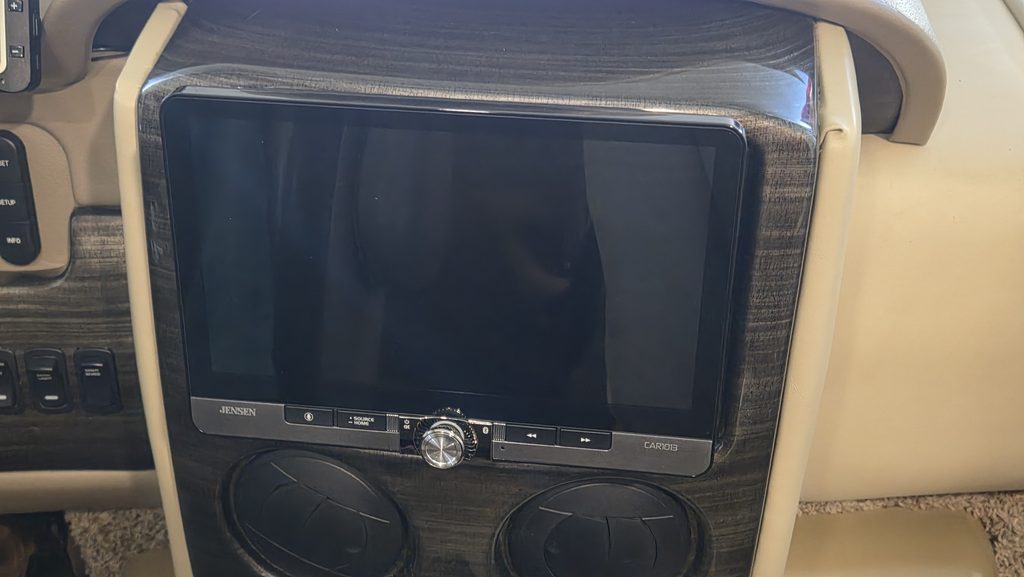
Touch the clock screen once, and the display goes completely dark.
That’s a nice feature in a motorhome, especially since our Jensen is powered by the house batteries. We don’t have to leave a bright clock glowing in the cockpit when we’re parked or at night.
Don’t Forget to Secure the Wiring
Remember that partially unplugged connector we found on the original Axxera?
We certainly didn’t want to repeat that problem.
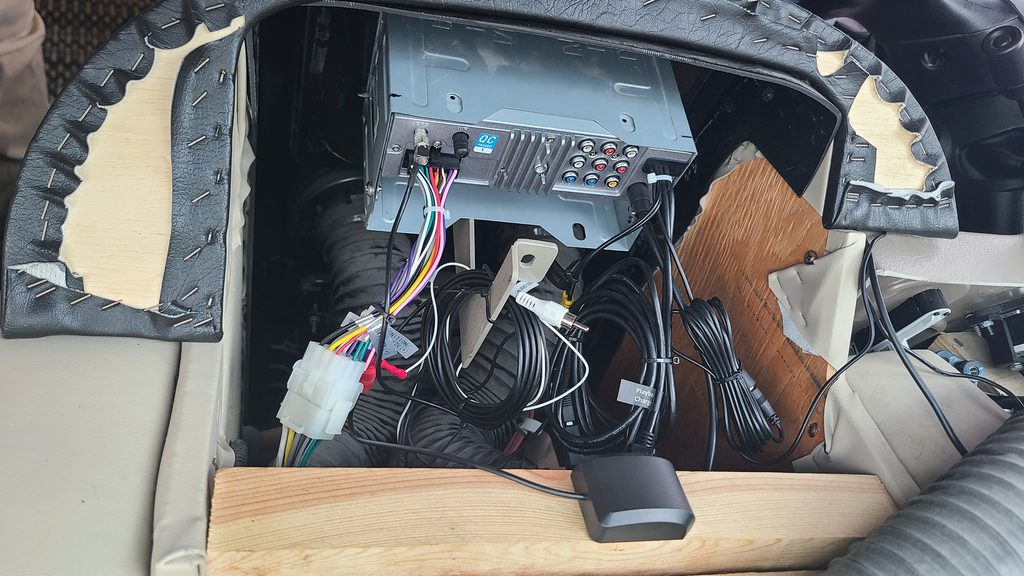
Before closing everything up, we made sure the Jensen’s wiring harness, camera RCA, USB cables, and other connections weren’t hanging by their connectors.
We also wanted enough slack to pull the radio out later without putting tension on the wiring.
The goal is to keep motorhome vibration from slowly pulling a connection loose again.
This is one of those little details that can save a lot of frustration down the road.
Was Our RV Radio Replacement Worth It?
For us, absolutely.
Our problems with the original Axxera started on our very first big trip, when its navigation froze near Washington, D.C., and I had to pull over along a busy interstate to reset it.
We purchased a dedicated Garmin RV GPS shortly afterward and stopped relying on the Axxera for navigation.
Years later, the intermittent speaker, camera, and power problems were the last straw.
Although reseating the partially unplugged connector and then driving roughly 200 miles without another glitch strongly suggested the loose connection was causing those later problems, replacing the radio still gave us the upgrade we’d been wanting.
We now have a Jensen CAR1013 with wireless Android Auto, upgraded Kenwood speakers, and our original Thor three-camera system working the way we want it.
And we still have our Garmin RV GPS for RV-specific navigation.
The Jensen handles our entertainment, phone integration, and cameras, while the Garmin handles RV routing.
That’s a combination we’re much happier with.
And now, when we’re heading down the highway with the Bronco behind us, we can keep an eye on it without giving up our turn-signal cameras.
That’s a pretty good upgrade in my book.
Frequently Asked Questions About Replacing an RV Radio
Can you replace a factory Axxera radio in a motorhome?
Can you keep the factory RV cameras when replacing the radio?
Can the Jensen CAR1013 display the rear camera while driving?
Does the Jensen CAR1013 have wireless Android Auto and Apple CarPlay?
Does Android Auto replace an RV GPS?
Do you need an amplifier when upgrading RV speakers?
Can you install a new RV radio without cutting the factory wiring?
Are RV radio wiring colors and connector pinouts universal?
Can you turn the Jensen CAR1013 screen completely off?
Planning Your Own RV Radio Upgrade?
If you’re thinking about replacing the factory radio in your motorhome, take some time to investigate the existing wiring and camera system before ordering parts.
Every motorhome installation is a little different, and understanding how the original equipment works can save you a lot of frustration.
We were able to retain our original motorhome wiring, keep all three factory cameras working, and add the modern features we’d been missing.
Have you upgraded the radio in your RV, or are you still using the factory-installed system? Let us know in the comments what radio you have and whether you’re happy with it!