
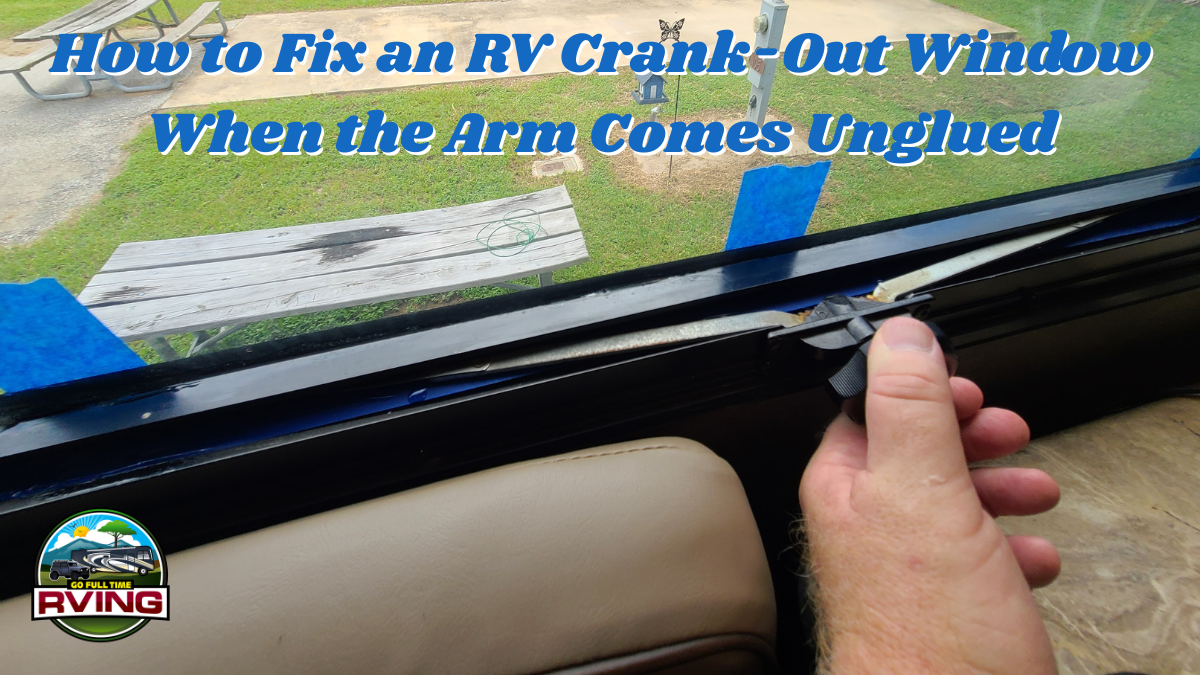
If your RV’s crank-out window opens fine but refuses to pull shut when you turn the handle, chances are the crank arm has come unglued from the window sash. The handle might turn and extend the arm, but when you try to close the window, it just floats back in — or worse, hangs open until gravity helps it slam shut.
It’s a common issue in older RV windows and even newer ones that get a lot of sun, road vibration, or moisture. The good news? It’s an easy DIY fix that only takes a few basic tools and a small tube of epoxy.
I’ve fixed this exact problem a couple of times now, and I always reach for Gorilla Clear 5-Minute Epoxy. It’s strong, fast-curing, and holds up well in RV conditions.
This post contains affiliate links. As a participant in Amazon Associates and various affiliate programs, we are compensated when qualifying purchases are made through our referral links at no additional cost to you. Full Disclosure
Why This Happens
Most RV crank-out windows are designed with a small metal arm (called the operator arm) that’s either glued or riveted to the glass or window sash frame. The crank handle controls this arm, which pushes the window open and pulls it shut.
Over time, the adhesive holding that arm in place breaks down — usually from heat, UV exposure, or travel vibrations. When the bond fails, the arm can still push the window open due to leverage, but it can’t pull it shut anymore. That’s when you’ll notice the window closing loosely or not sealing at all.
This post contains affiliate links. As a participant in Amazon Associates and various affiliate programs, we are compensated when qualifying purchases are made through our referral links at no additional cost to you. Full Disclosure
What You’ll Need
You don’t need a lot of tools or skills for this one. Just grab the following:
- Gorilla Clear 5-Minute Epoxy
- Isopropyl alcohol or denatured alcohol
- A plastic razor blade or scraper
- Clean rags or paper towels
- Painter’s tape
- Optional: fine-grit sandpaper or a small file
This whole job can usually be done in under 30 minutes (plus cure time), and you can knock it out with just basic hand tools.
Step-by-Step Instructions
Step 1: Remove Old Adhesive
Use a plastic razor blade to scrape away any remaining adhesive on both the metal crank arm and the window glass. Clean both surfaces thoroughly with isopropyl alcohol to remove residue, dust, or oils. This ensures you get a strong, clean bond.


Step 2: Lightly Scuff the Bracket
If the crank arm bracket has a smooth surface, lightly scuff it with fine-grit sandpaper or a small metal file. This roughens the surface and gives the epoxy something to grip.
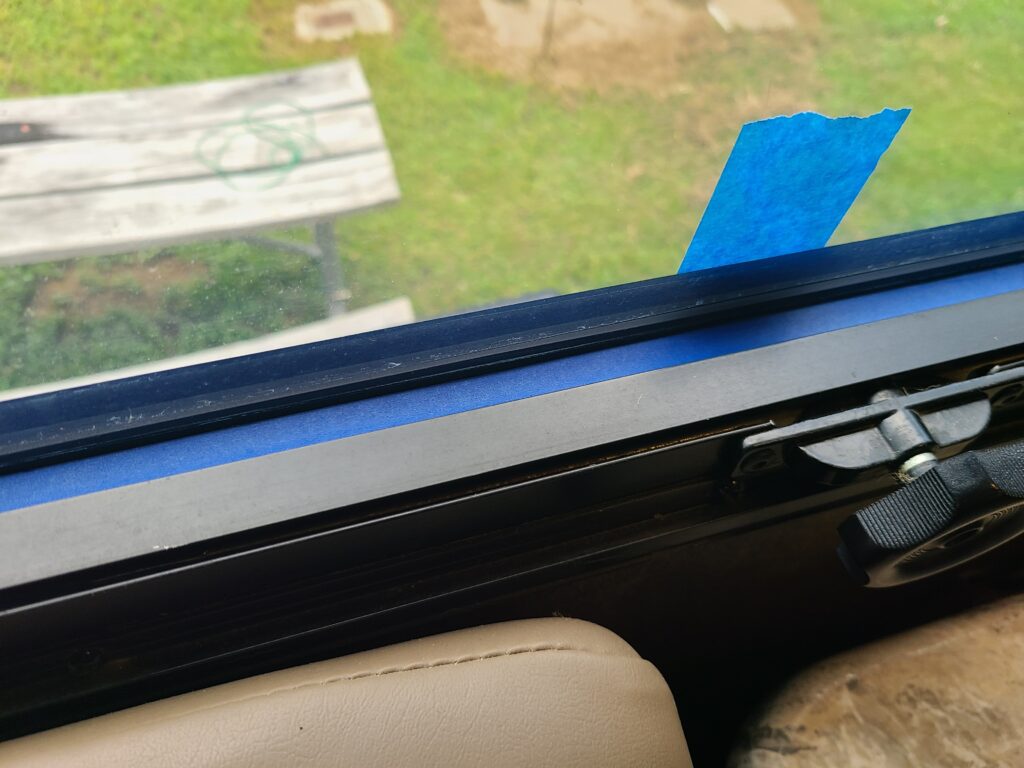
Step 3: Prep with Painter’s Tape
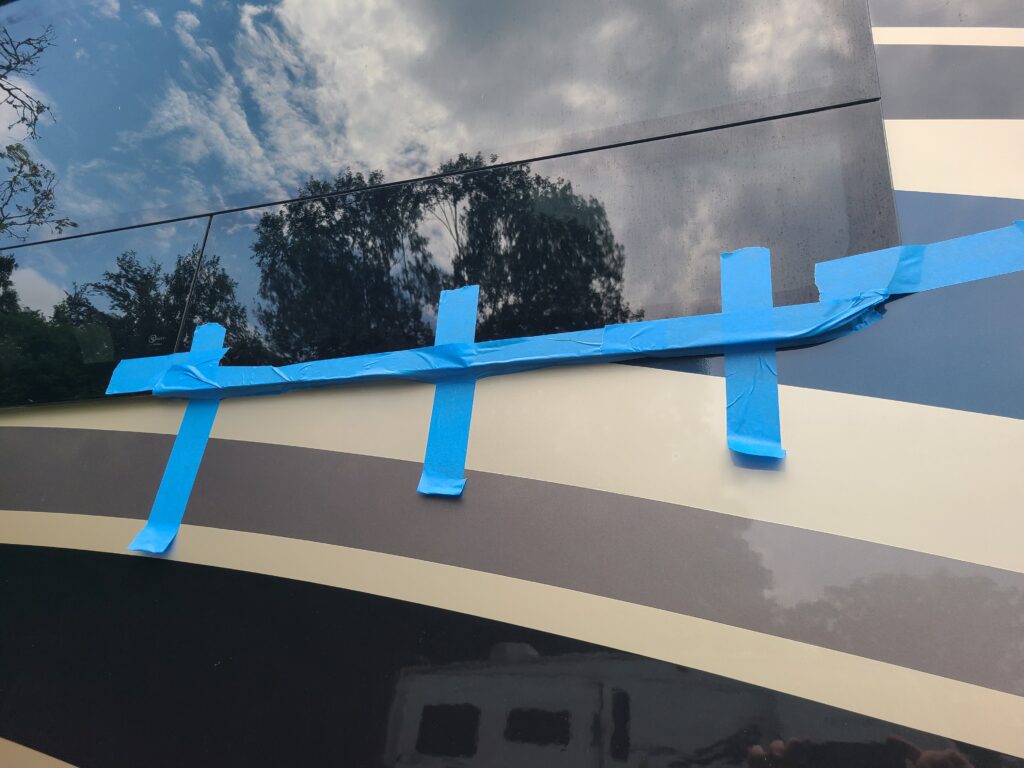
Before mixing the epoxy, tape the window shut from the outside to keep it aligned and stable while you work. Then apply painter’s tape below the window on the outside of the RV to catch any drips. Even a small run of uncured epoxy can flow down and make a mess of your paint or siding. This quick step can save you a big cleanup later.
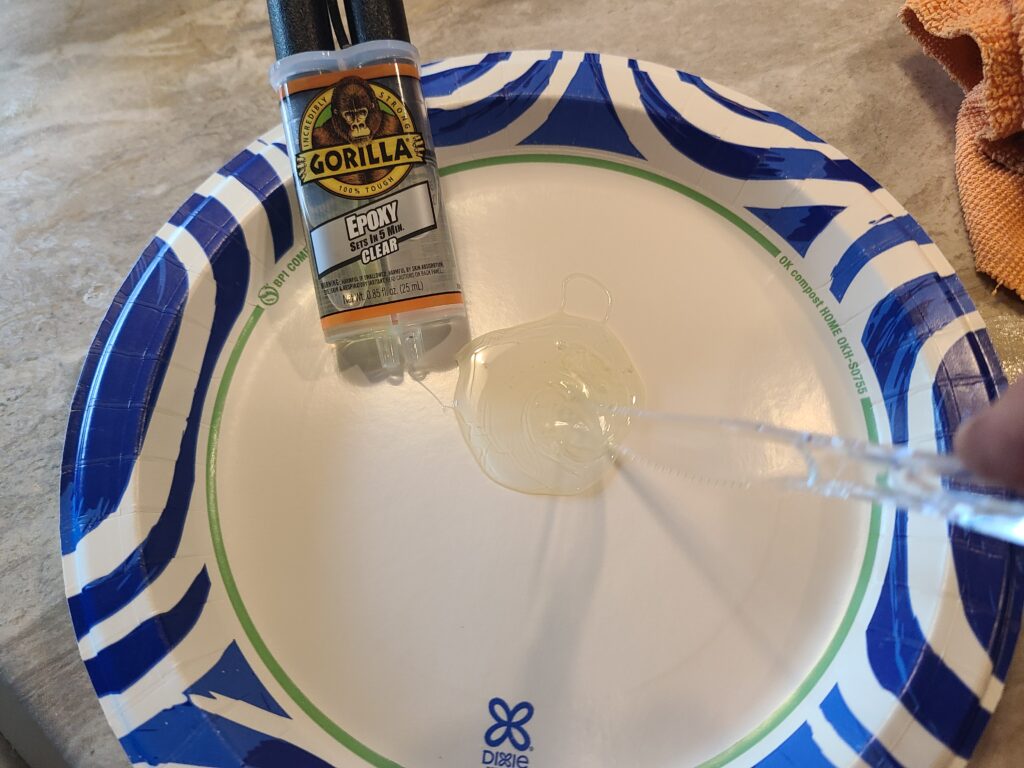
Step 4: Mix and Apply Gorilla Epoxy
Squeeze out a small amount of Gorilla Clear 5-Minute Epoxy onto a disposable surface and mix it well for 20–30 seconds. Apply a small dab to the bracket only — not the glass. You want just enough to form a solid bond without oozing everywhere.
Step 5: Press and Hold in Place
Carefully press the crank arm bracket back onto the glass in its original location. Crank the arm out until it comes firmly in contact with the window glass. You’ve got about five minutes of working time, so don’t wait too long before getting it secured.

Step 6: Let It Cure
Although Gorilla epoxy sets in five minutes, I recommend leaving everything undisturbed for at least an hour. For full strength, let it cure for 24 hours before using the crank again. After that, test the window — it should now open and close smoothly, with the crank arm firmly reattached.
Why I Use Gorilla Clear Epoxy
There are plenty of adhesives out there, but Gorilla Clear 5-Minute Epoxy is my go-to for this type of repair. It bonds well to both glass and metal, sets quickly, and dries clear — so the fix is clean and nearly invisible. It also holds up well in the temperature swings and road vibrations that are part of RV life. I keep a tube of it in our repair bin at all times. It’s one of those “just in case” items that pays for itself the first time you need it.
✅ Need some for your RV toolbox?
Grab Gorilla Clear 5-Minute Epoxy on Amazon.
Final Tips
Here are a few final tips to make this repair easier and more effective:
- Don’t overtighten the clamp or press too hard — you don’t want to crack the glass
- Make sure everything is clean and dry before you apply epoxy
- If you’re sensitive to epoxy, wear gloves and keep some paper towels handy for cleanup
- Consider storing an extra tube in your RV — it’s great for quick repairs beyond windows, too

Closing Thoughts
Fixing a crank-out window where the arm has come unglued is one of those little jobs that’s easy to put off… until it drives you crazy. Fortunately, with just a little effort and a small dose of Gorilla epoxy, you can make a solid, lasting repair that gets your window working like new again.
If you’ve dealt with this issue or found another method that works well, I’d love to hear about it. Drop a comment below or reach out — I’m always swapping tips and tricks with fellow travelers.
If you’re looking to build your own home-based business like we have with this webpage, check out Wealthy Affiliate.
Wealthy Affiliate is an all-in-one platform that you can build your whole affiliate marketing business on. It combines training, software, and website hosting into one. This makes the whole process of starting an online business from scratch much easier, especially if you’re new to building a website.